Menu&U
Web application for restaurateurs and their clients
Tasks
1. Develop a web application for restaurant administrators and waiters to organize the operation of establishments, including table settings, menus, dishes, interaction with orders, and planning
2. Develop a web application for restaurant customers, where after scanning a QR code on the restaurant table, the menu is visible, and orders can be placed and paid for
My role
UX/UI designer in the design team
Implemented by me
Settings / Analytics / Main with Calendar / Orders / Tables / Operator Login / Profile / Landing Page Prototype / Design Review / Adaptives
Implemented with the design team
Analysis of references / user flow / wireframes / illustrations
Date
July — September 2024
The main metrics we focused on when creating the web application for restaurant owners and employees.
Time to value
At the start, it is important for us to understand how quickly users will receive the first tangible benefit from the application (setting up the basic parameters of the restaurant) in order to measure the simplicity and clarity of the UX. We will track the time from registration to the first target action.
Target indicator: 10-15 min
Customer Satisfaction Score
The assessment of customer satisfaction with the service and the collection of feedback from users will be one of our priorities to make improvements in the user experience and influence the further development and dissemination of the product.
Target indicator: 4-4.5 out of 5
Support Ticket Volume
A high volume of requests to the support service with questions or issues may indicate difficulties in the user interface or a lack of documentation, which will signal us to conduct an analysis and make adjustments to the design if necessary.
Target indicator: <2 requests per 10 active users per day
The web application is in the final stages of development and service sales to clients. We expect results.
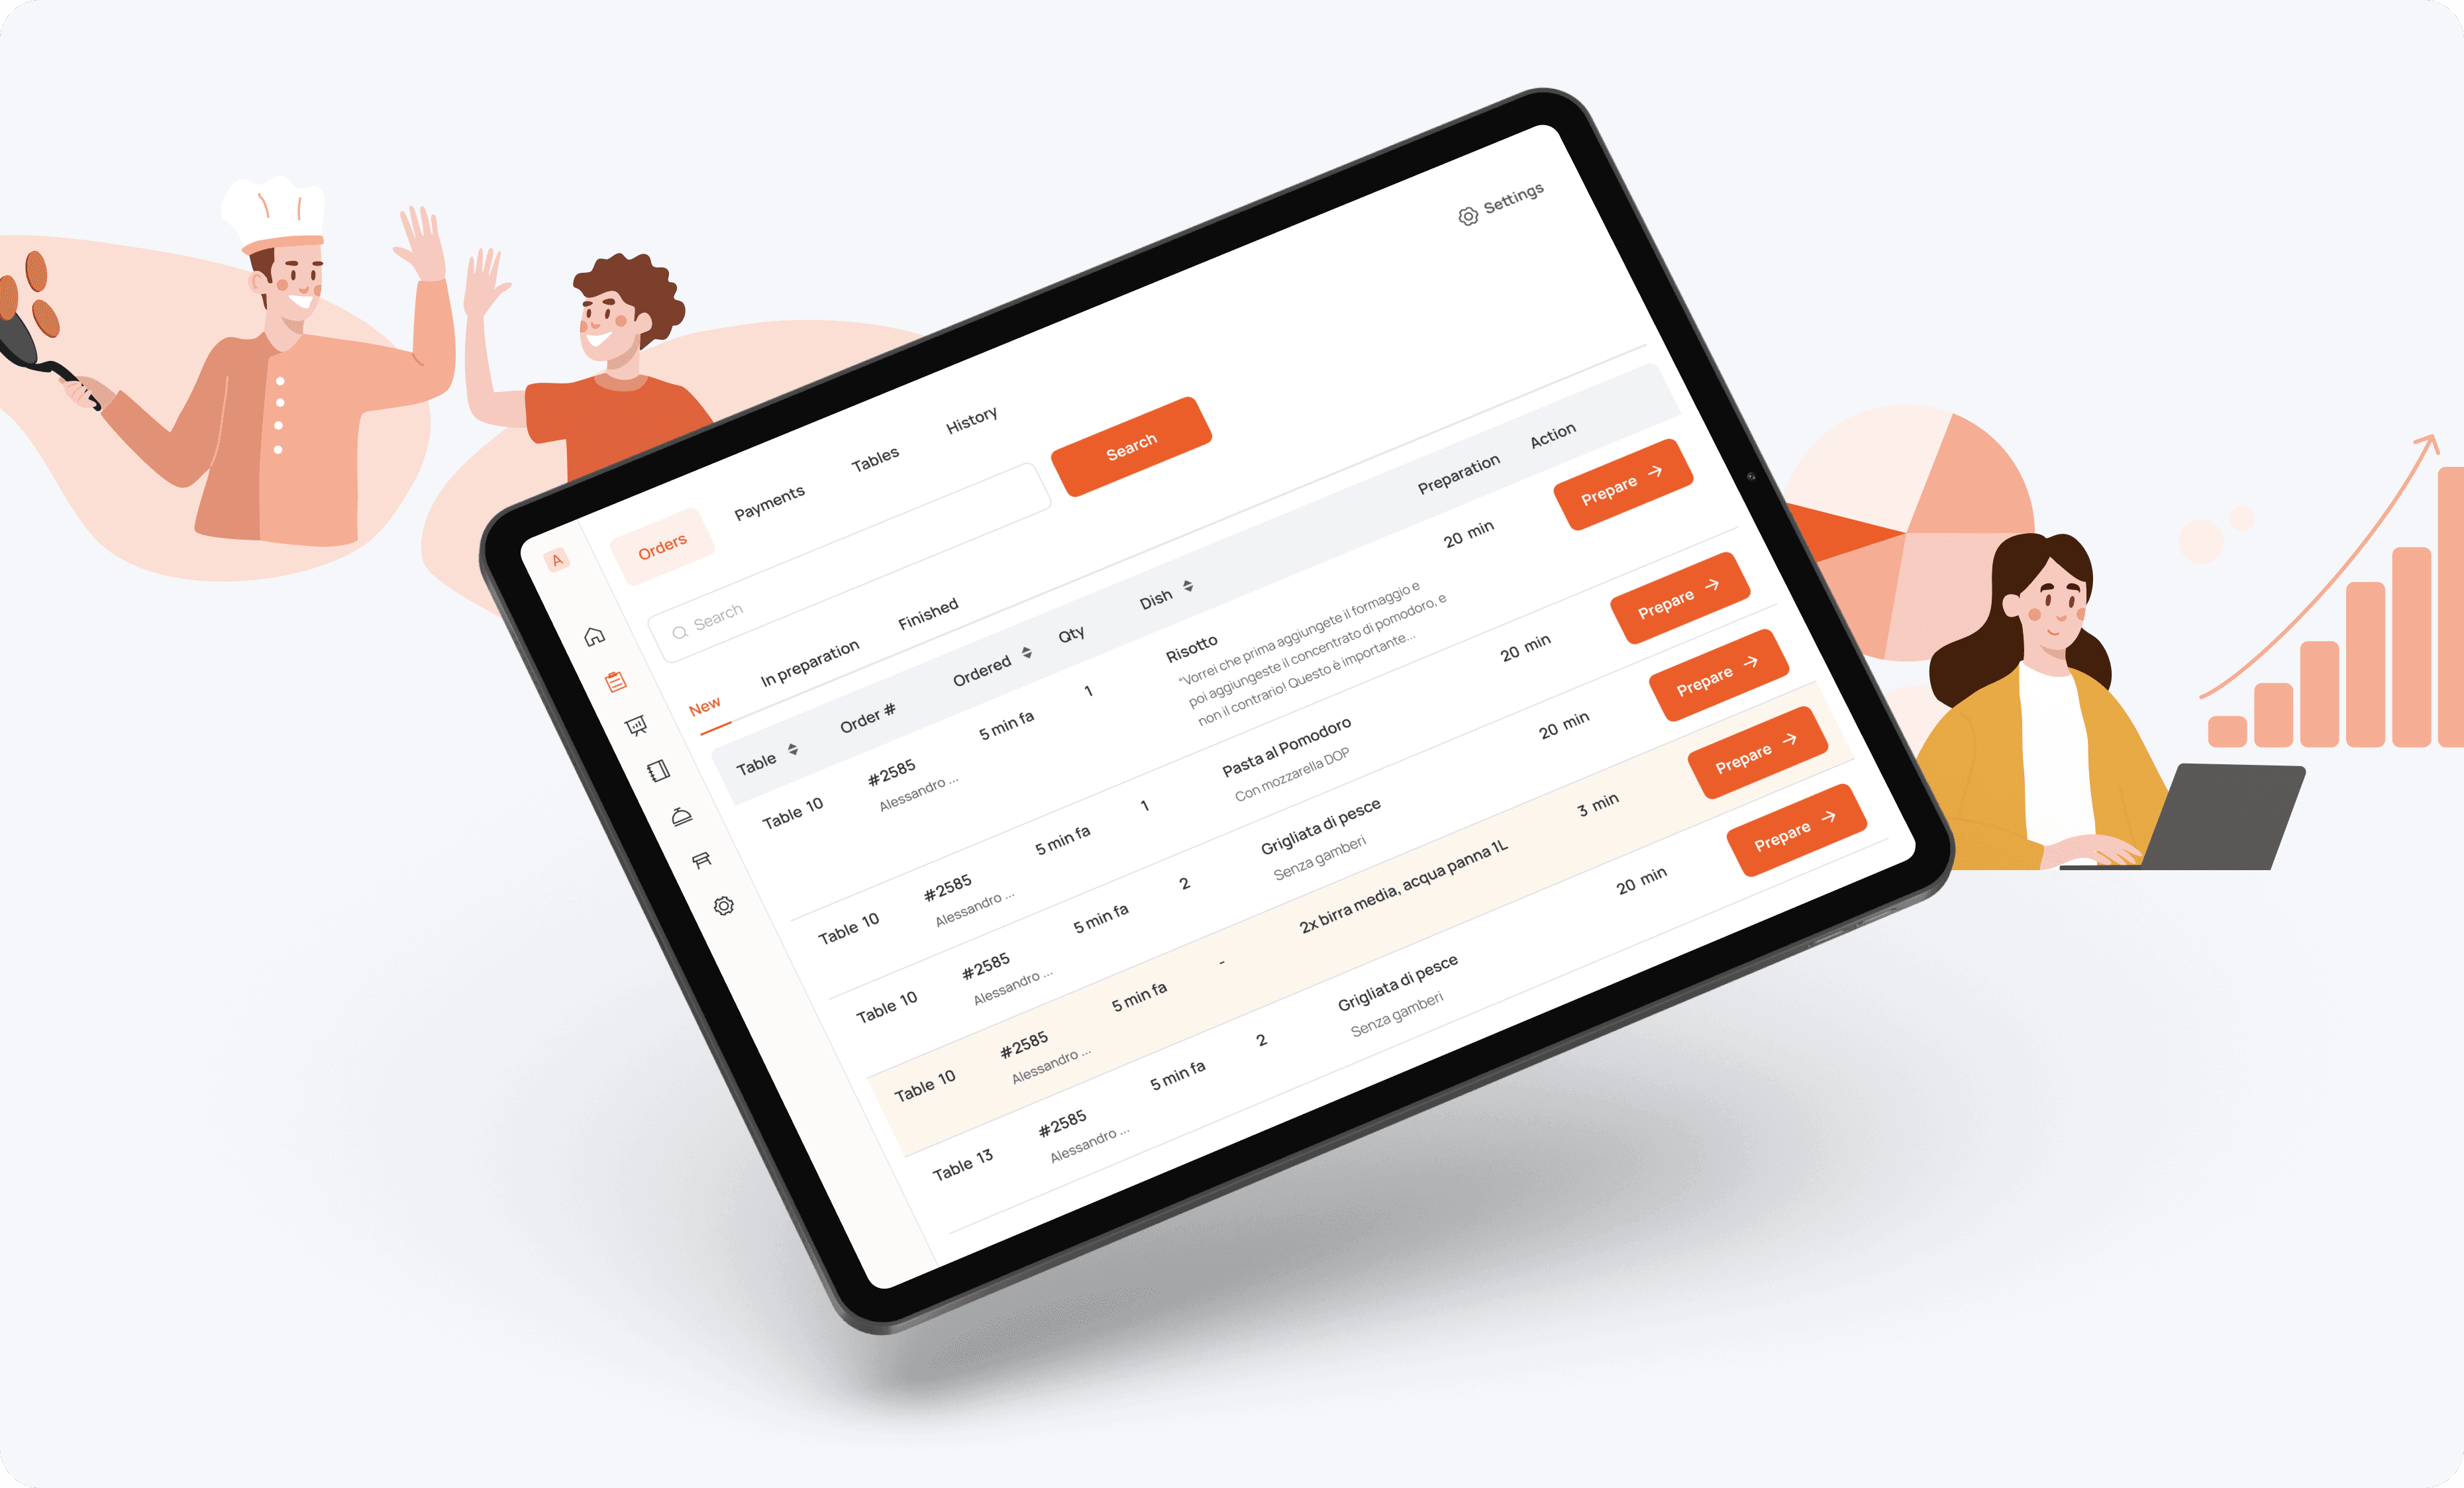
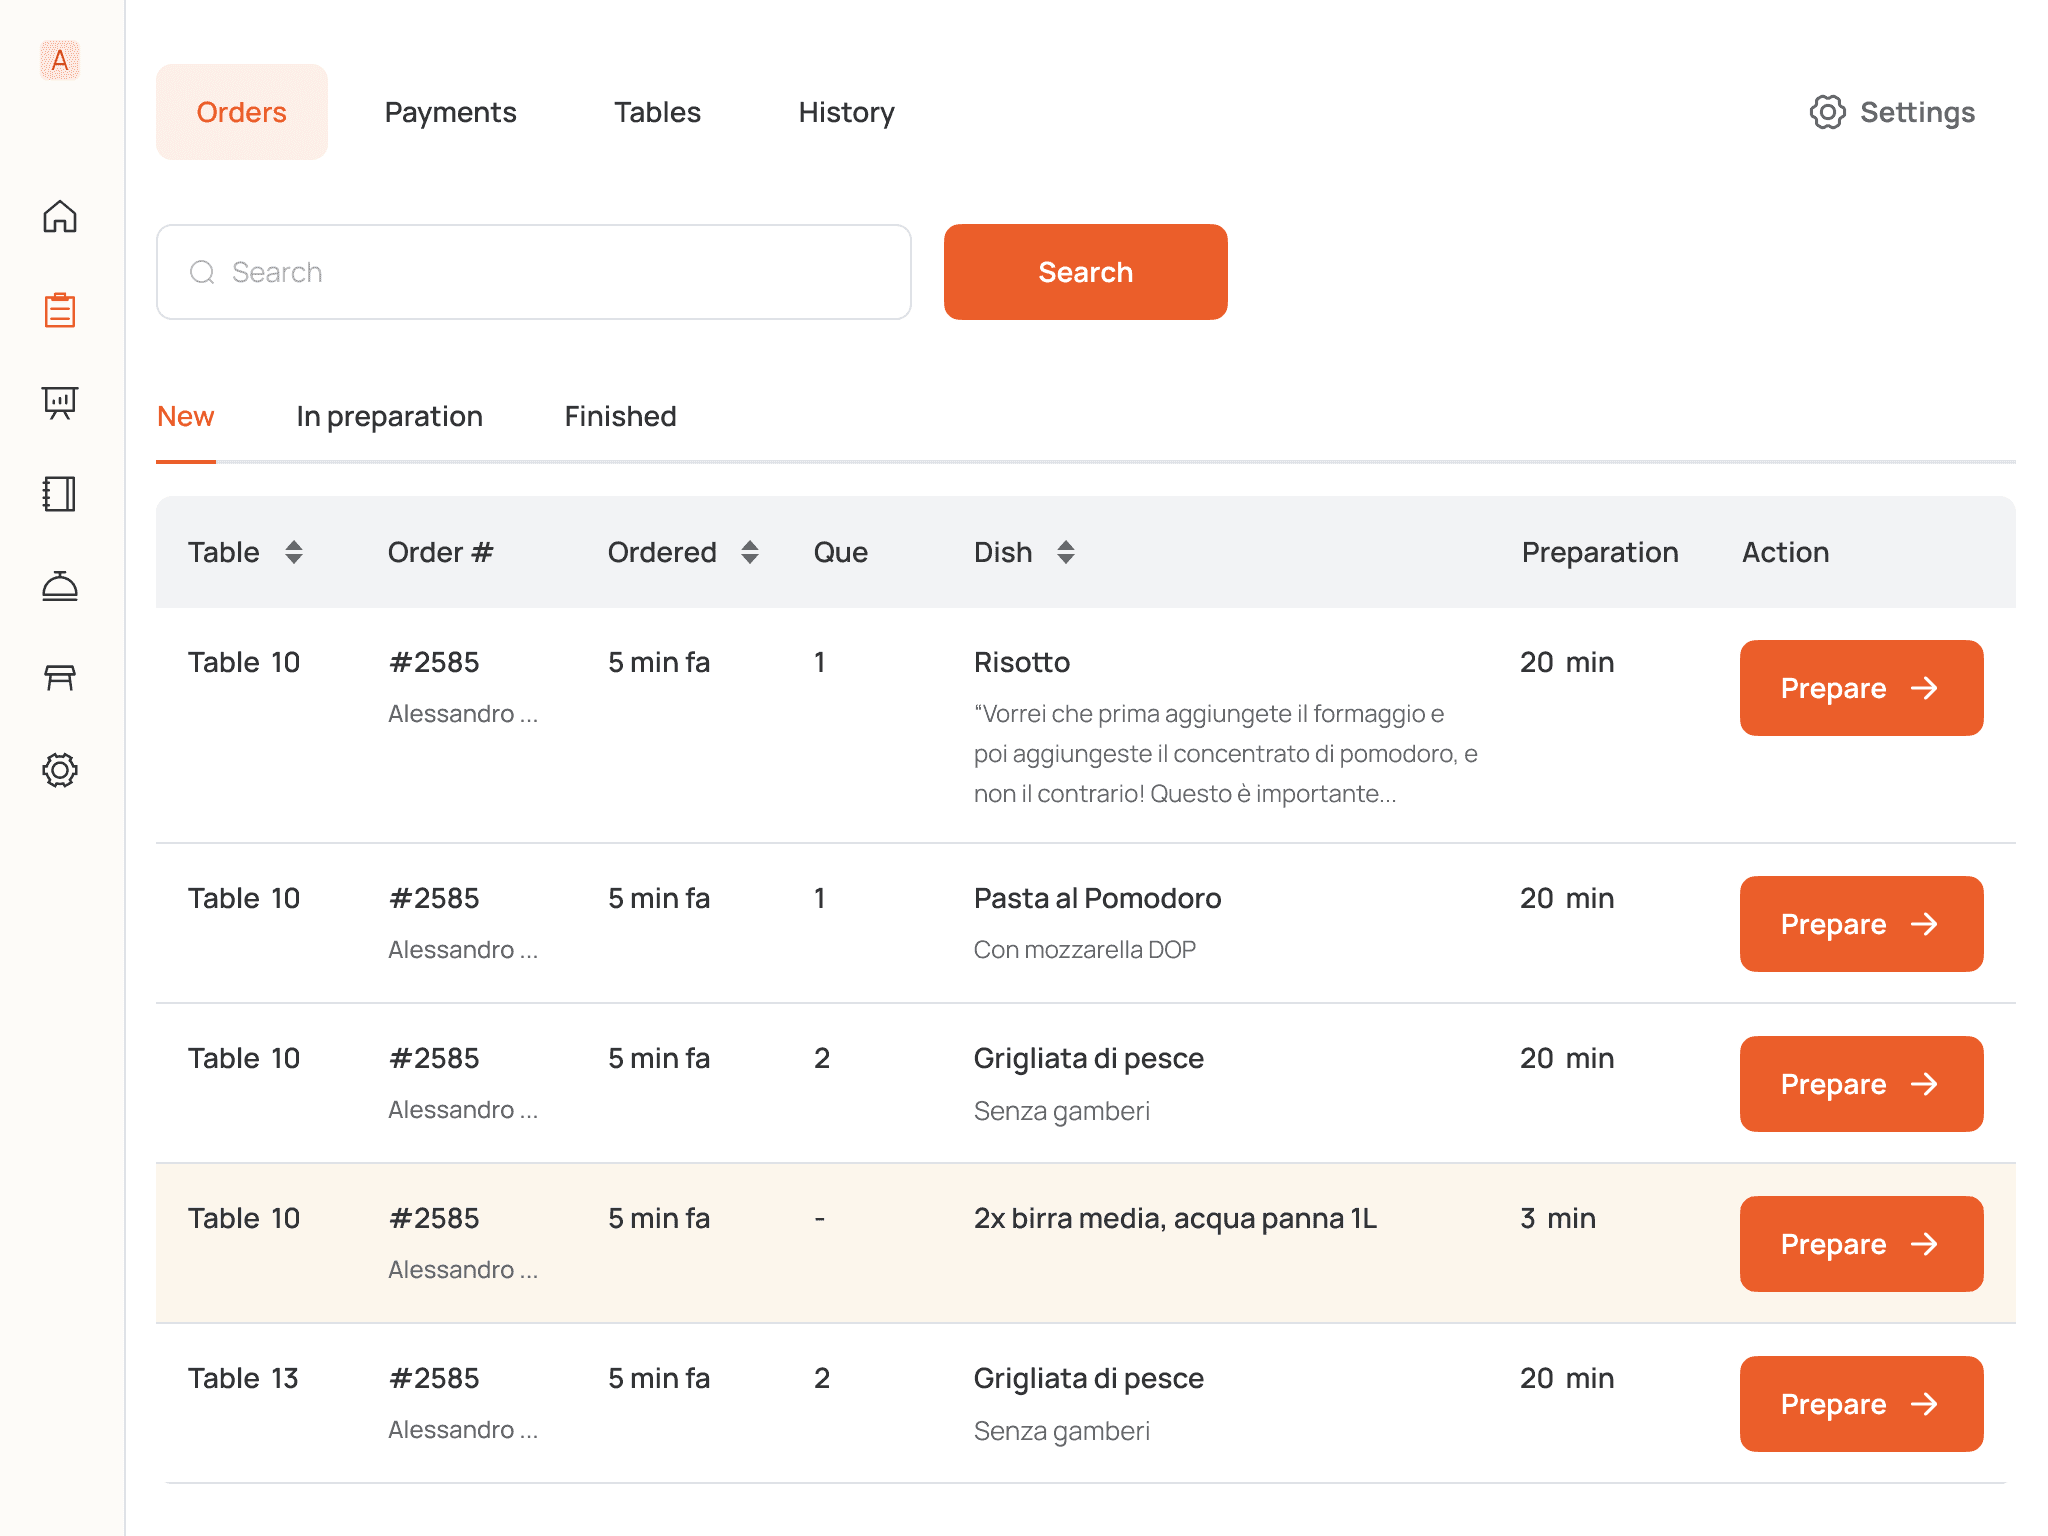
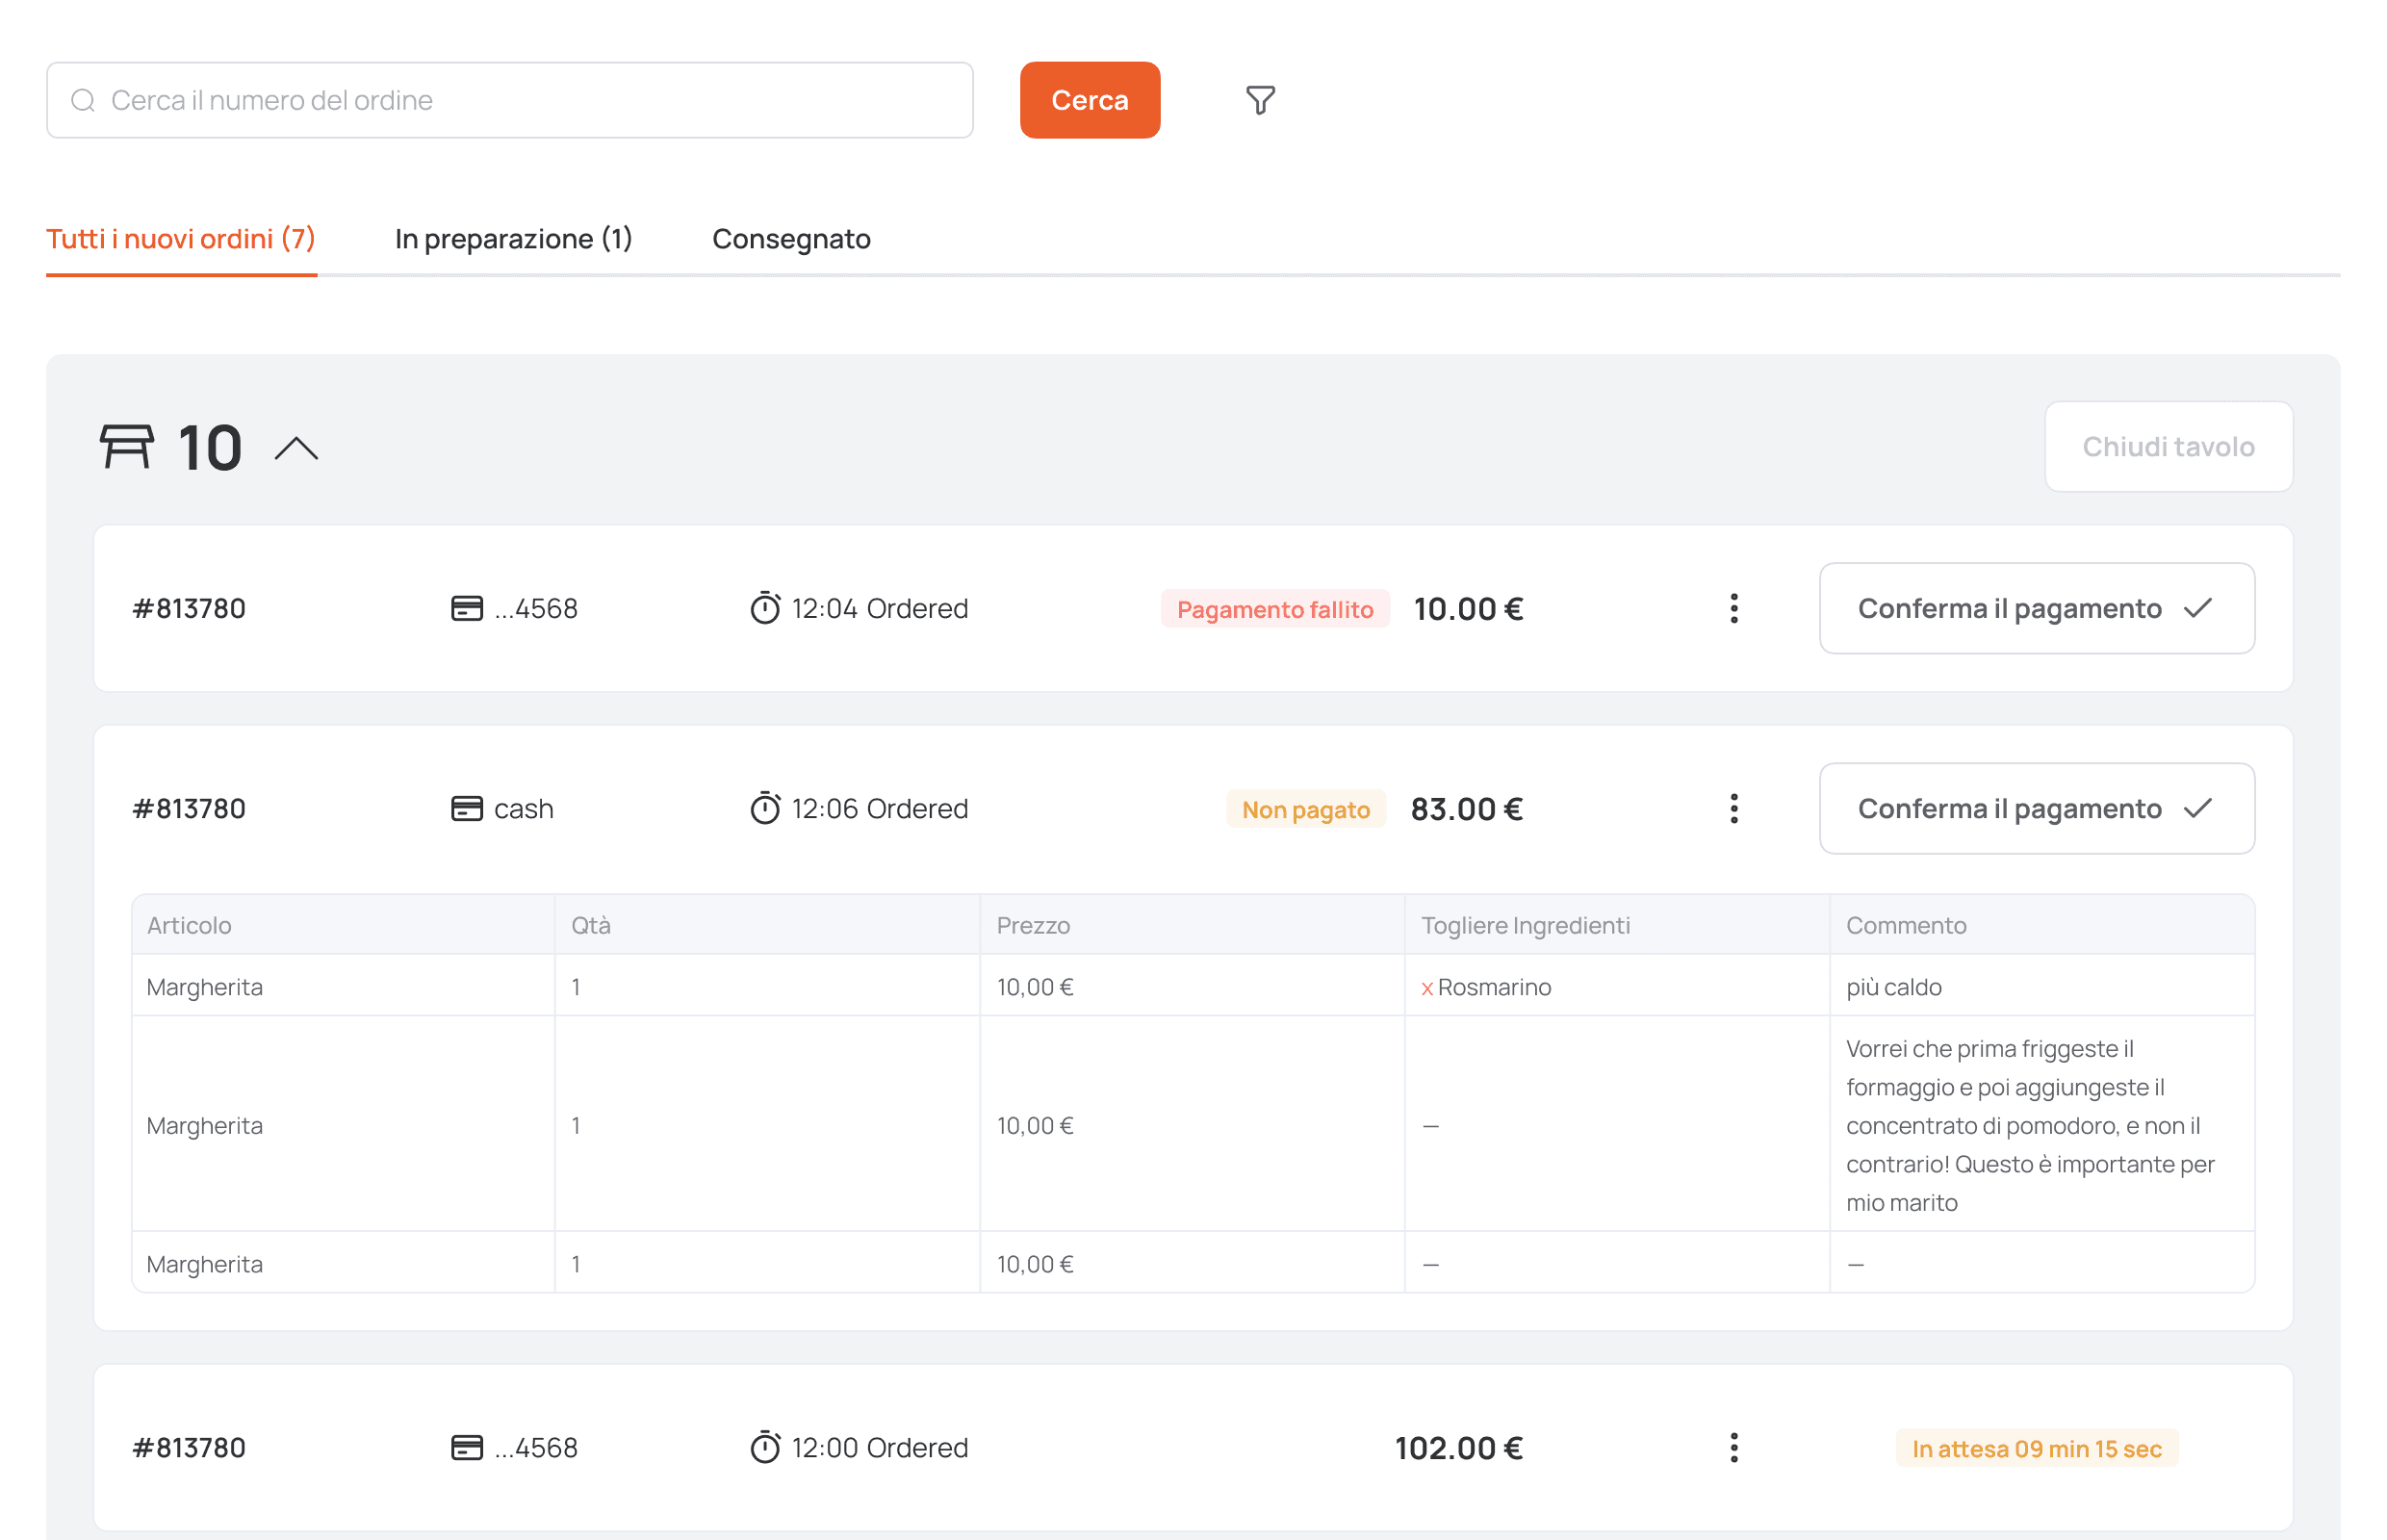
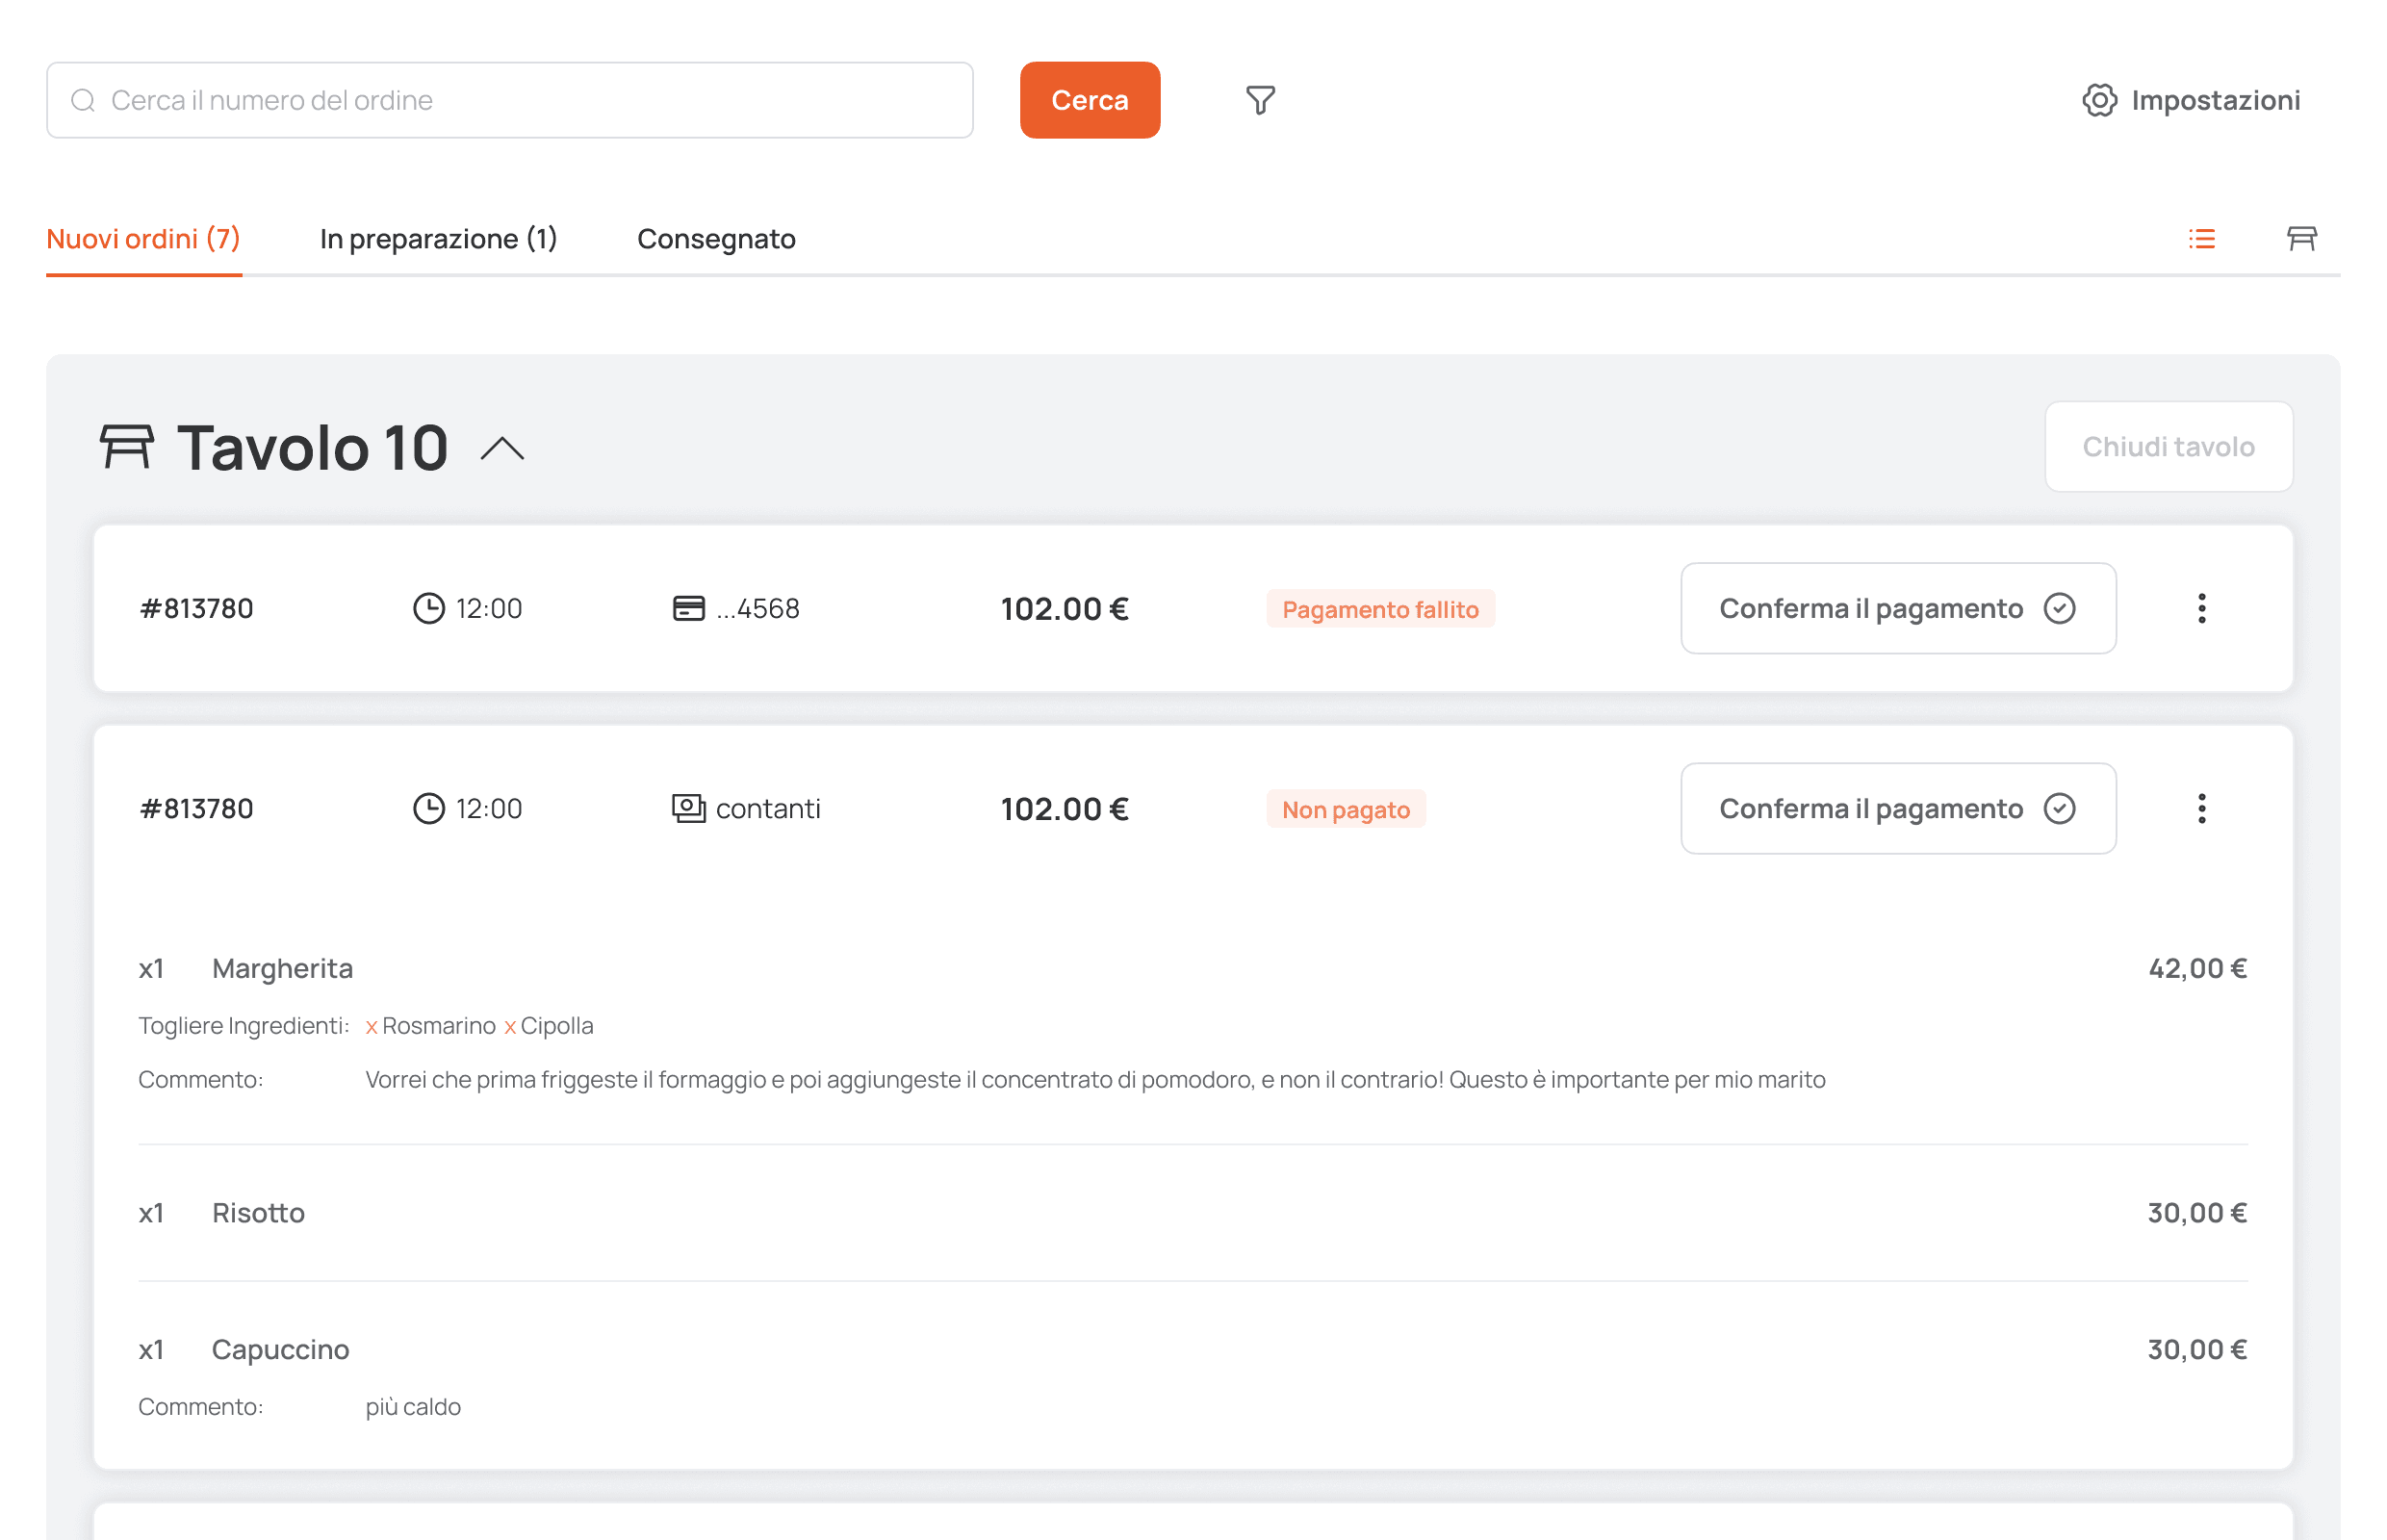
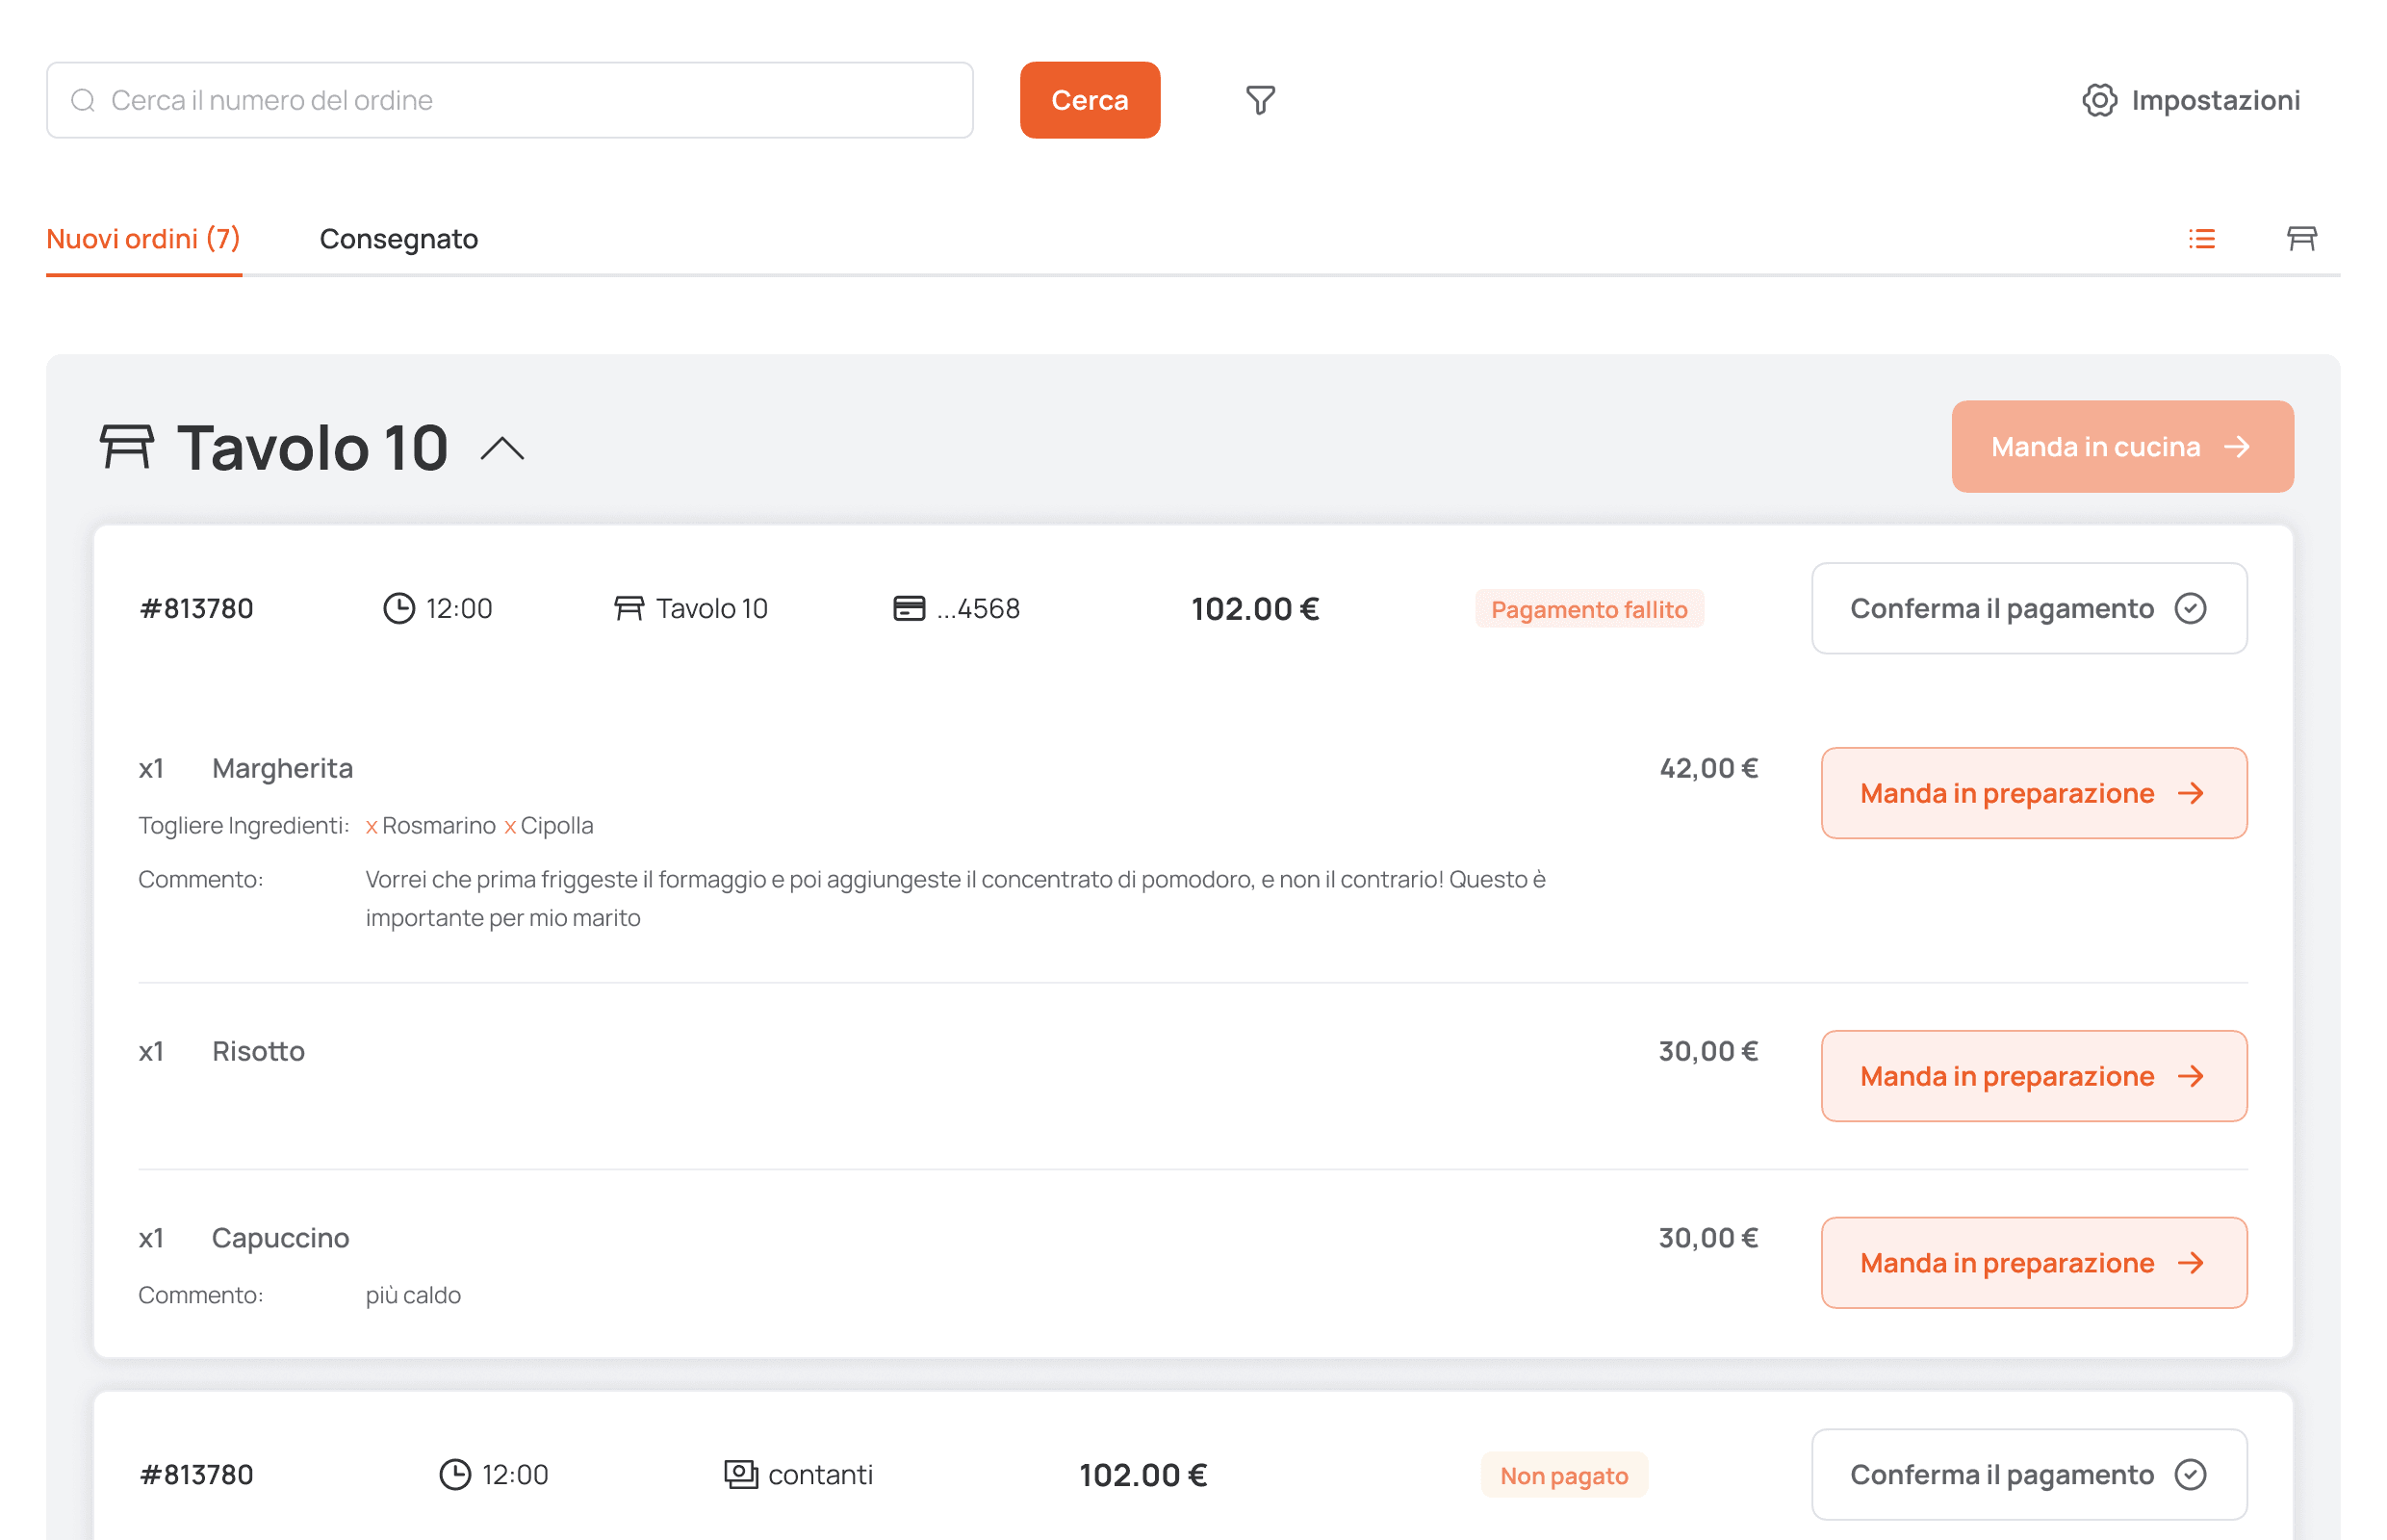
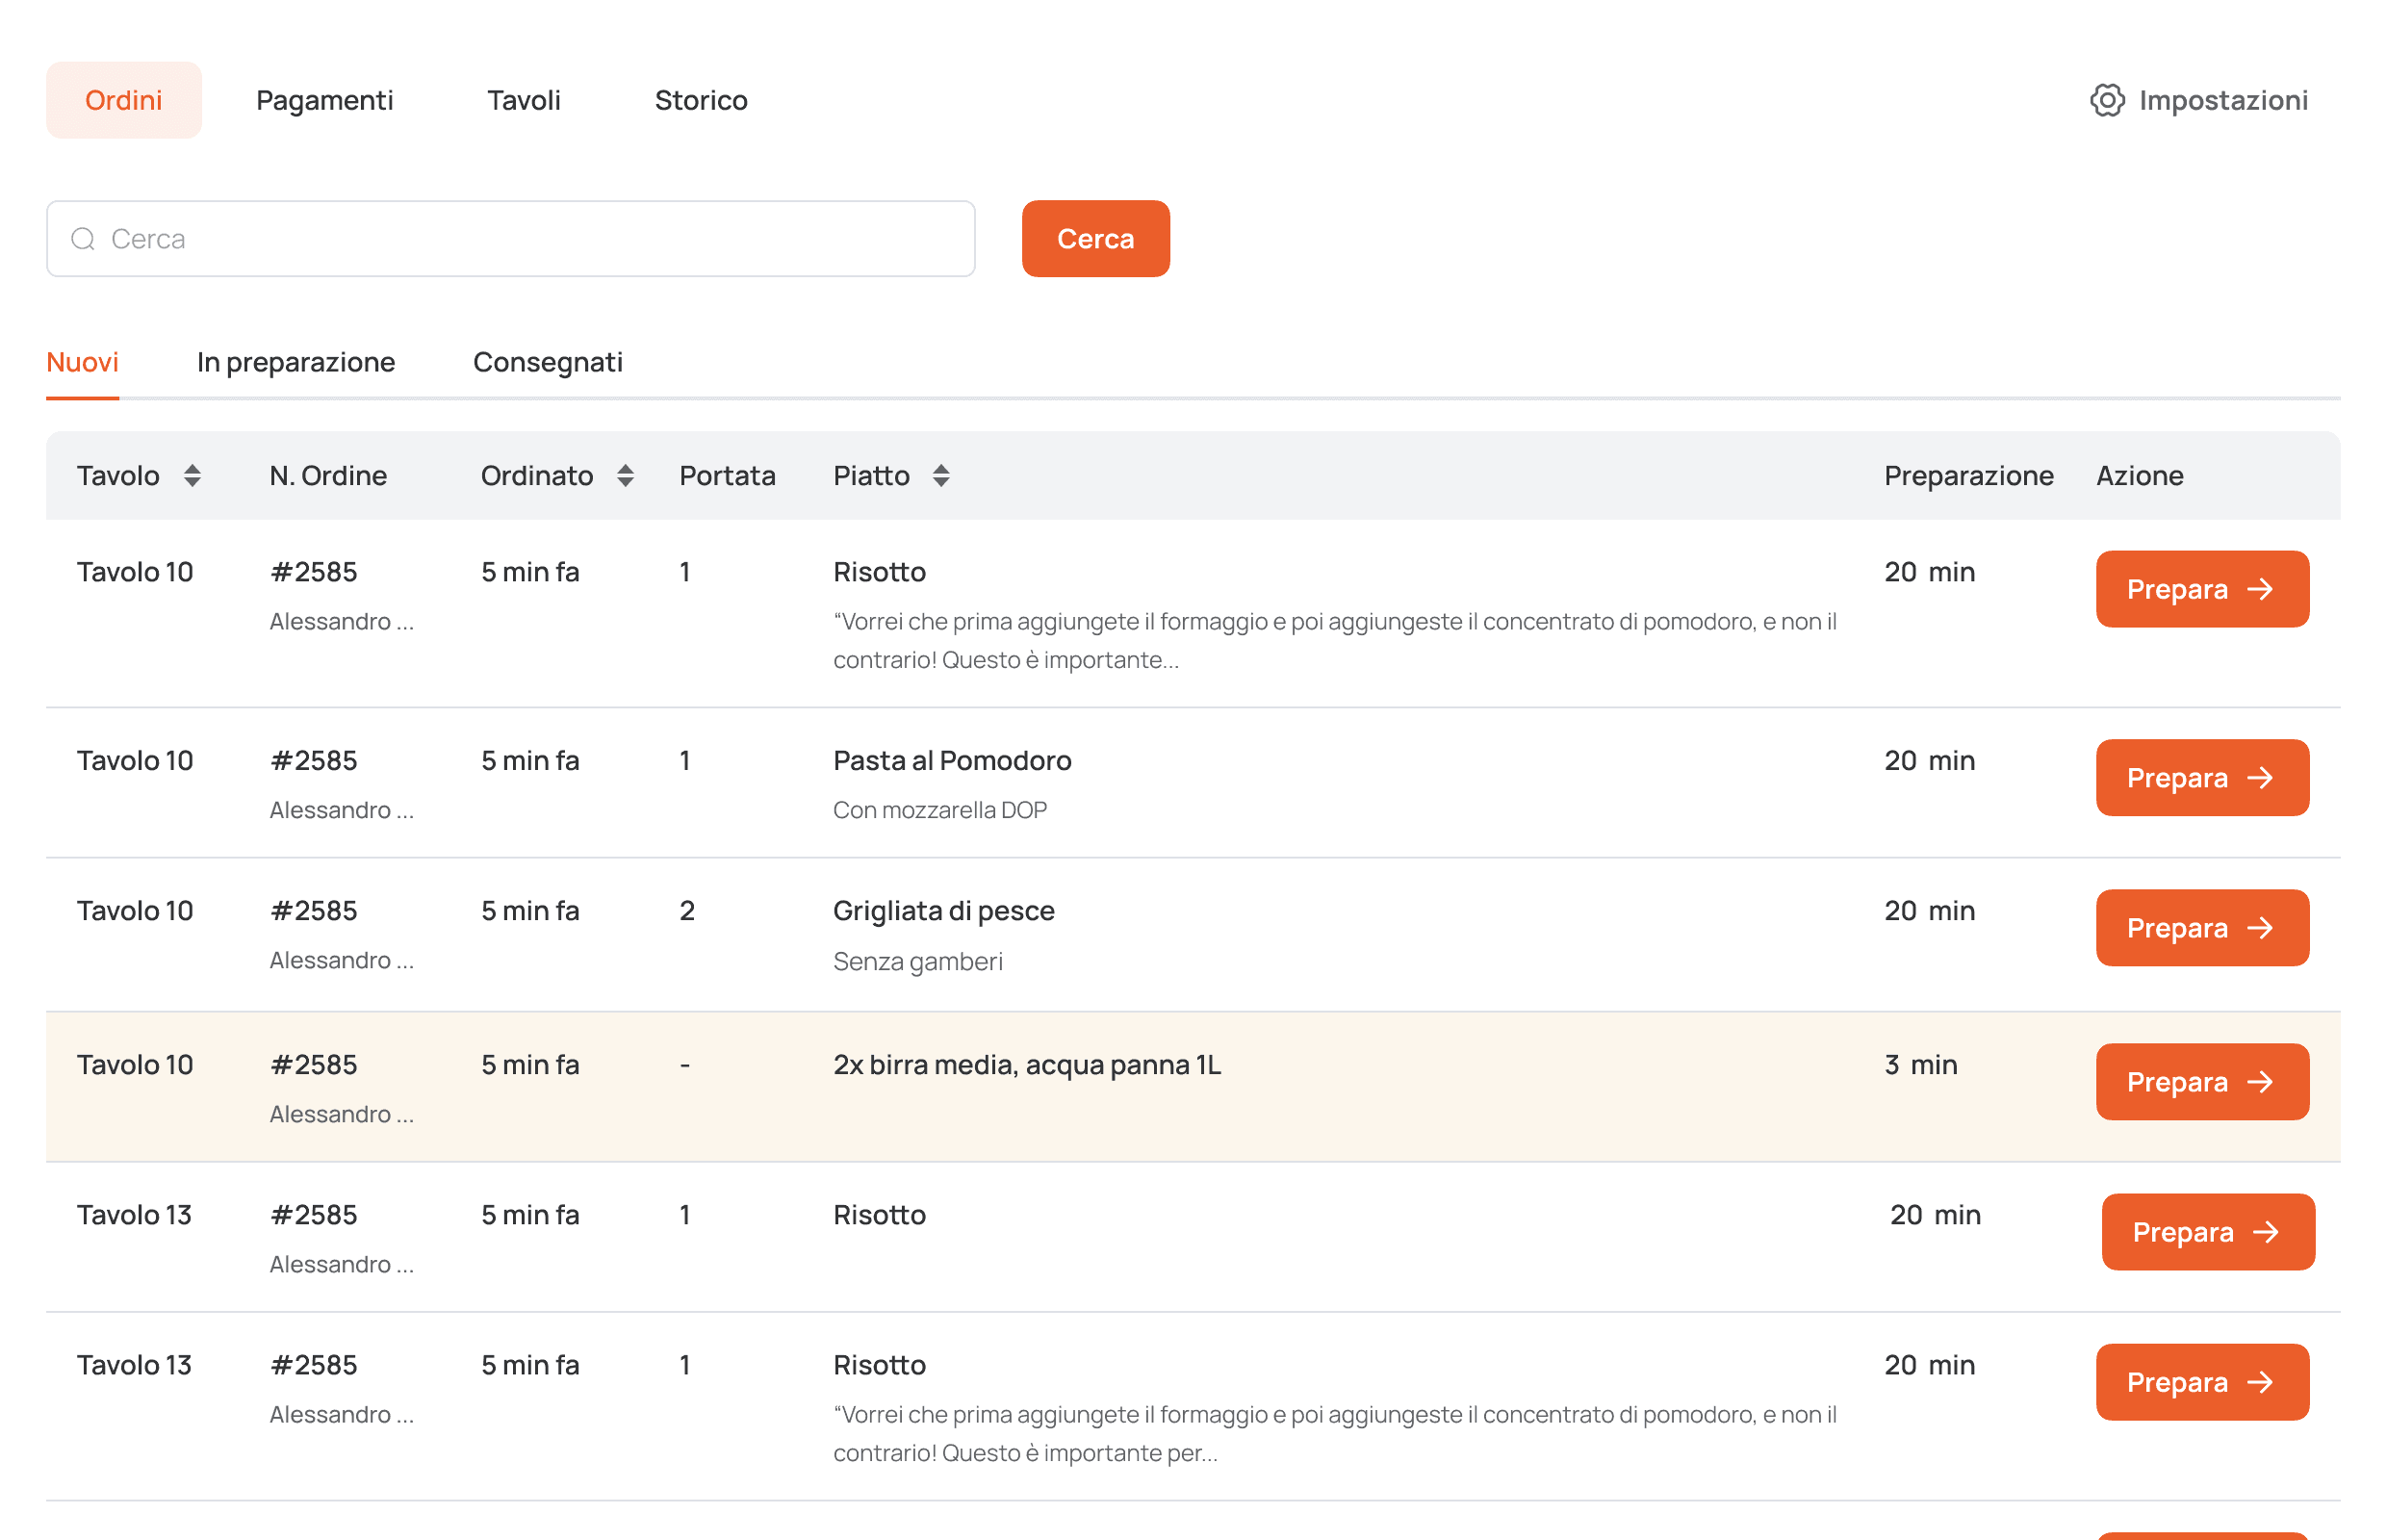
Orders
One of the most important sections where all the information connecting guests and the restaurant comes together: what was ordered, at which table, how long ago the order was made, how many people are at the table, whether the payment will be by card or cash, and how long the order is expected to take.
Here, the waiter also advances the dishes through the statuses — being prepared or completed — by pressing a button. Drinks are highlighted in a different color to send them to the bar immediately and serve them to guests more quickly.
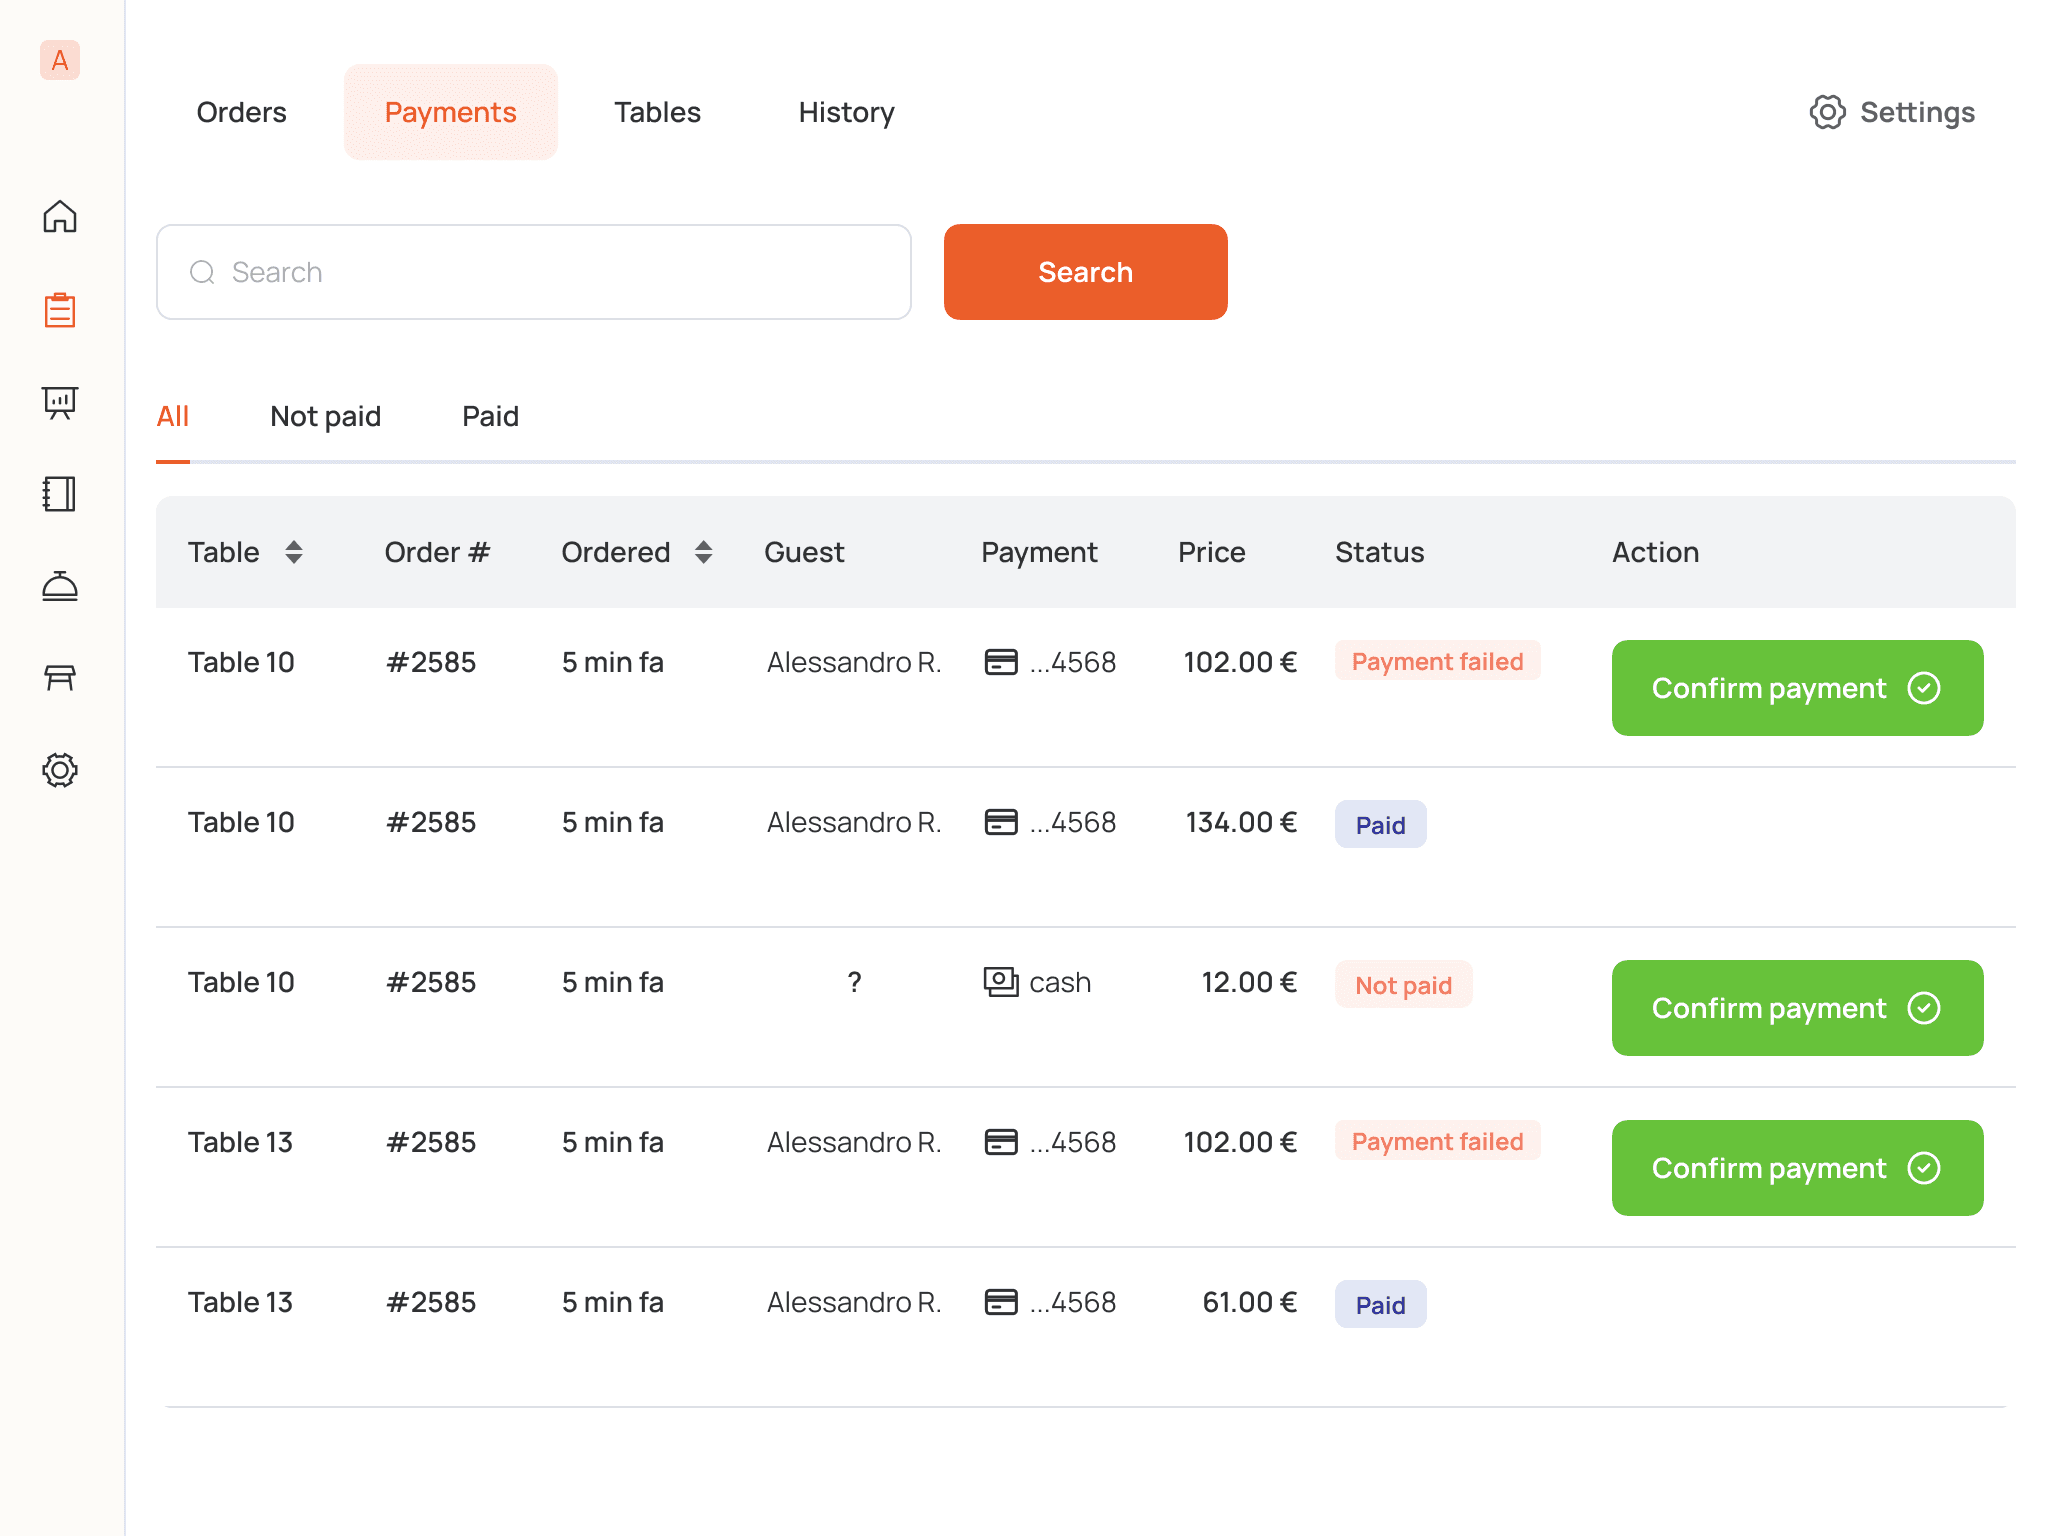
If the guest chose to pay by card in the app, and it did not go through — the waiter will see this in the payments tab and will not be able to send the order for preparation until the payment is completed. If the guest chose to pay in cash — this will also be visible in this section, and the waiter will need to approach the guest in person to accept the payment.
The "Tables" section is a different view of orders, where the waiter can see which tables are currently occupied, what status is assigned to each one, and if there are any issues, to address them. Or to close the table when the dishes have been served, the orders have been paid for, and the guests are leaving.
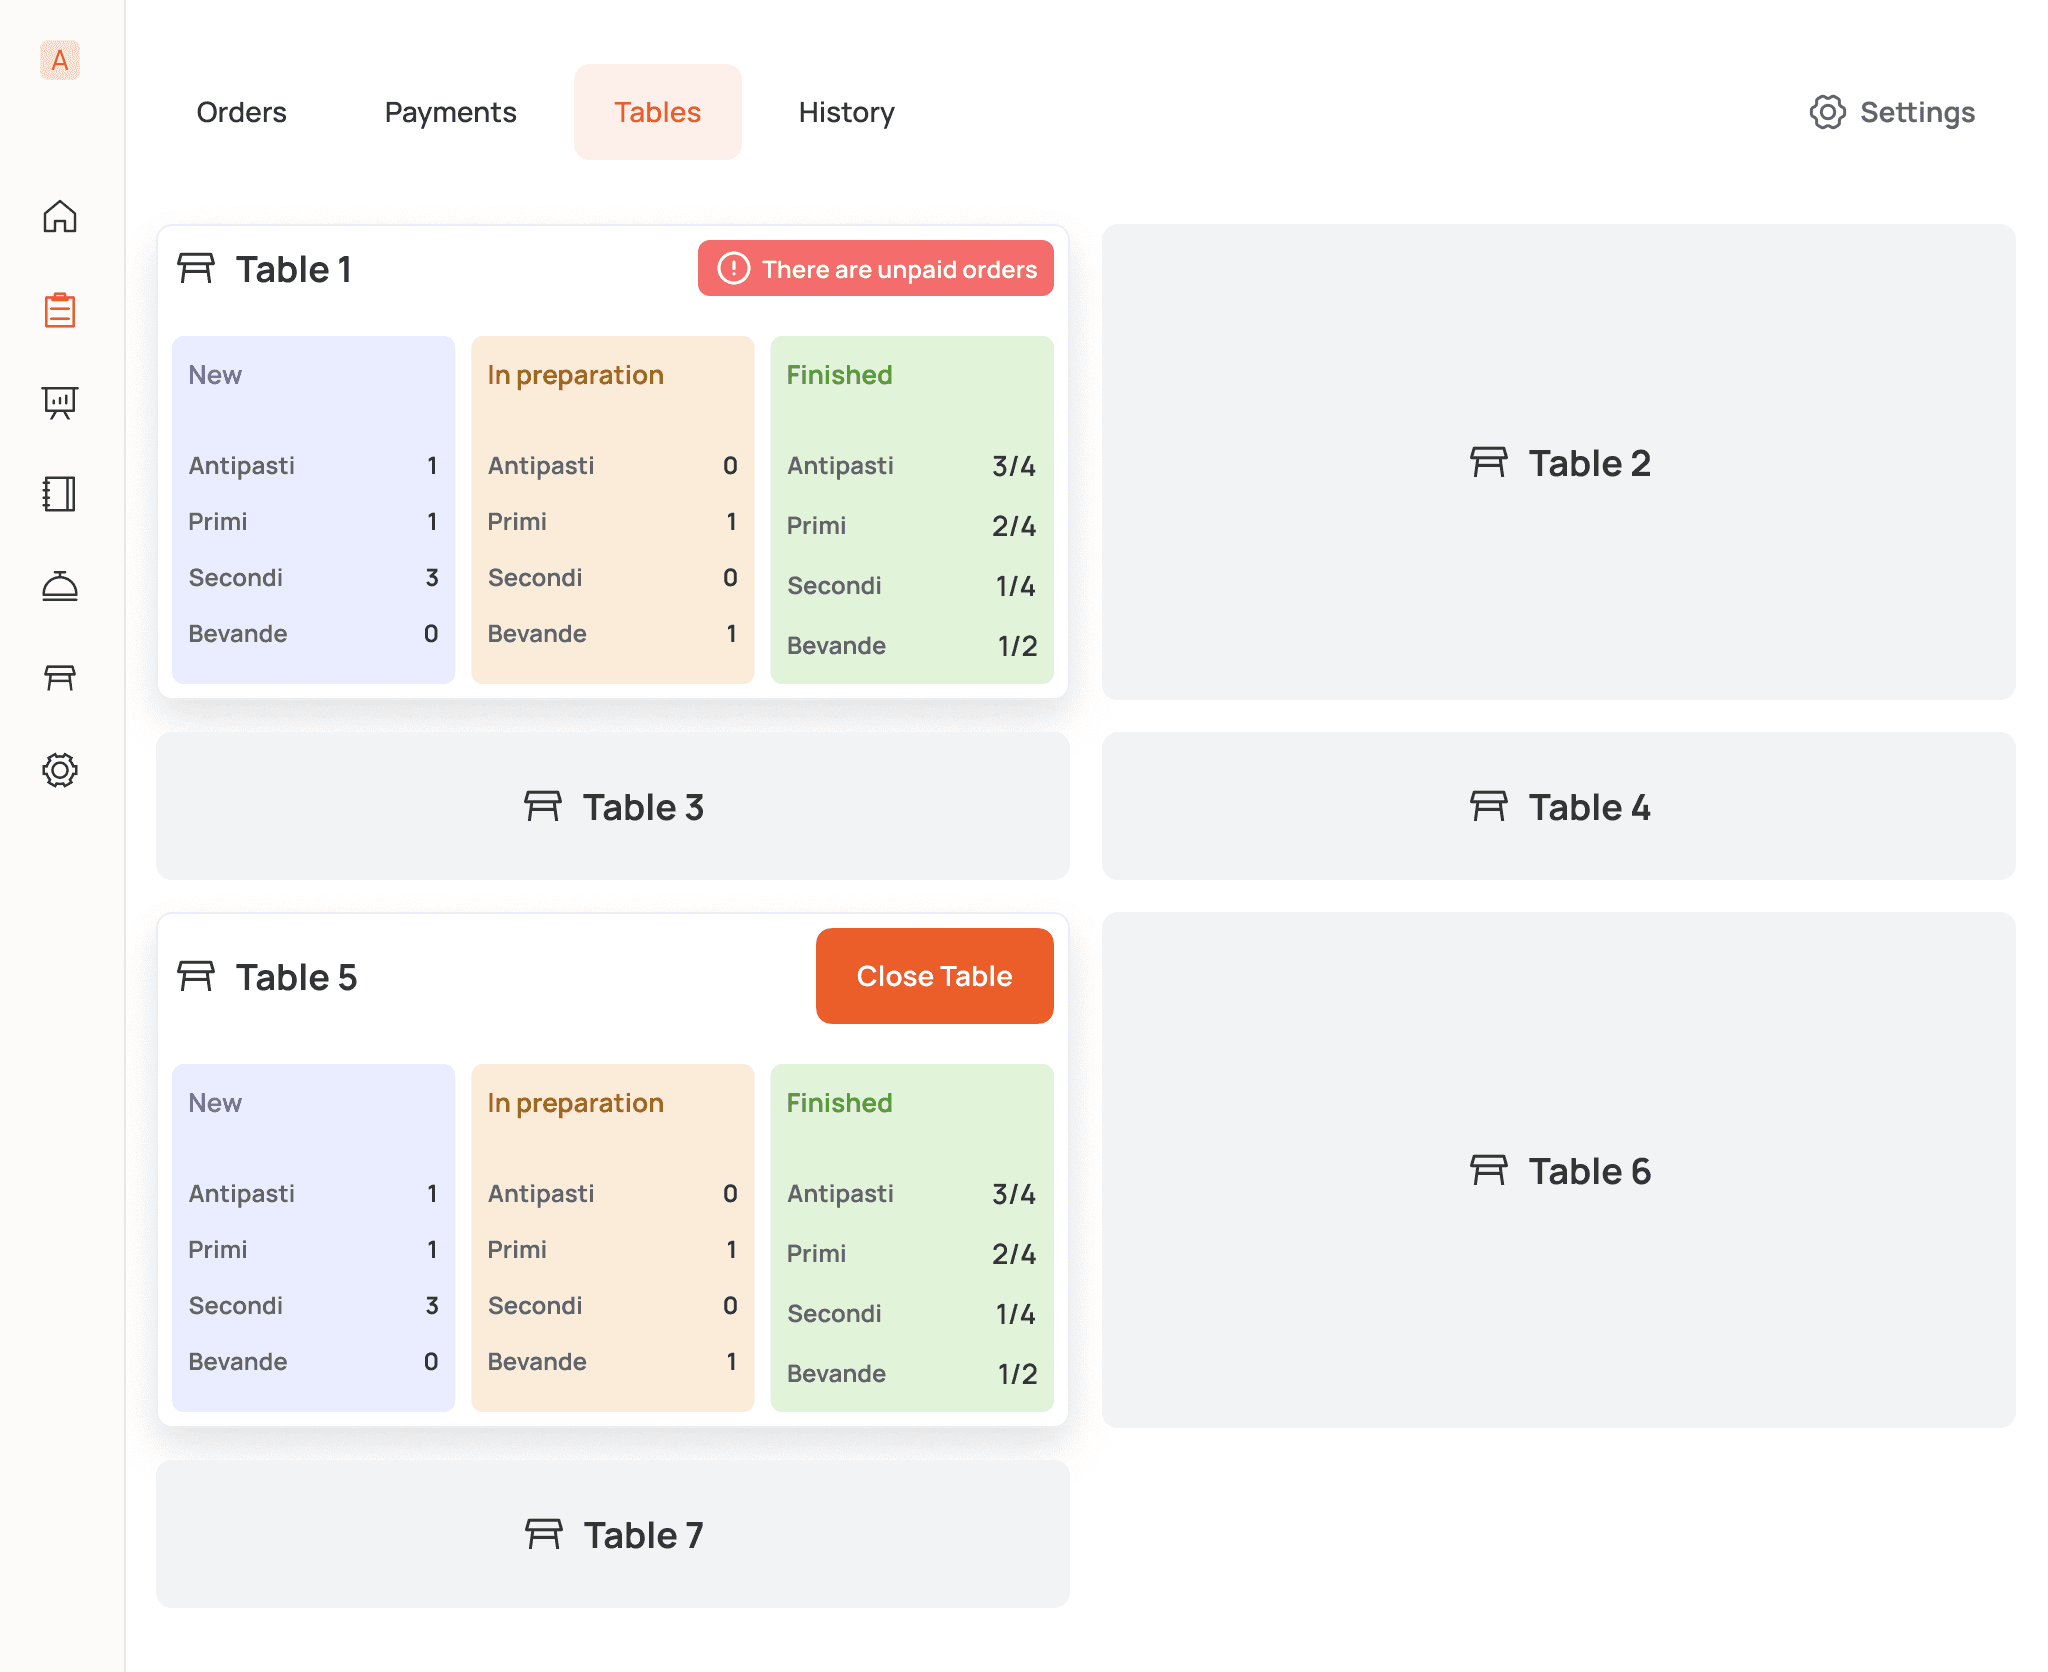
When you tap or click on a specific table, a panel opens showing all current orders for that table, their status, and the order of serving. There is also the option to compensate the visitor for the cost of a dish if there was something wrong with it, or to cancel it if the order has not yet been paid.

Restrictions, requirements, and feedback from restaurant owners
After the first iteration of the orders section, we received feedback from the restaurateurs, understood how they typically solve order issues at the moment, and what needs to be changed in the first version. Additionally, the client clarified the requirements and their wishes, based on which changes were also made.
v1
v2
v3
final
Home Screen
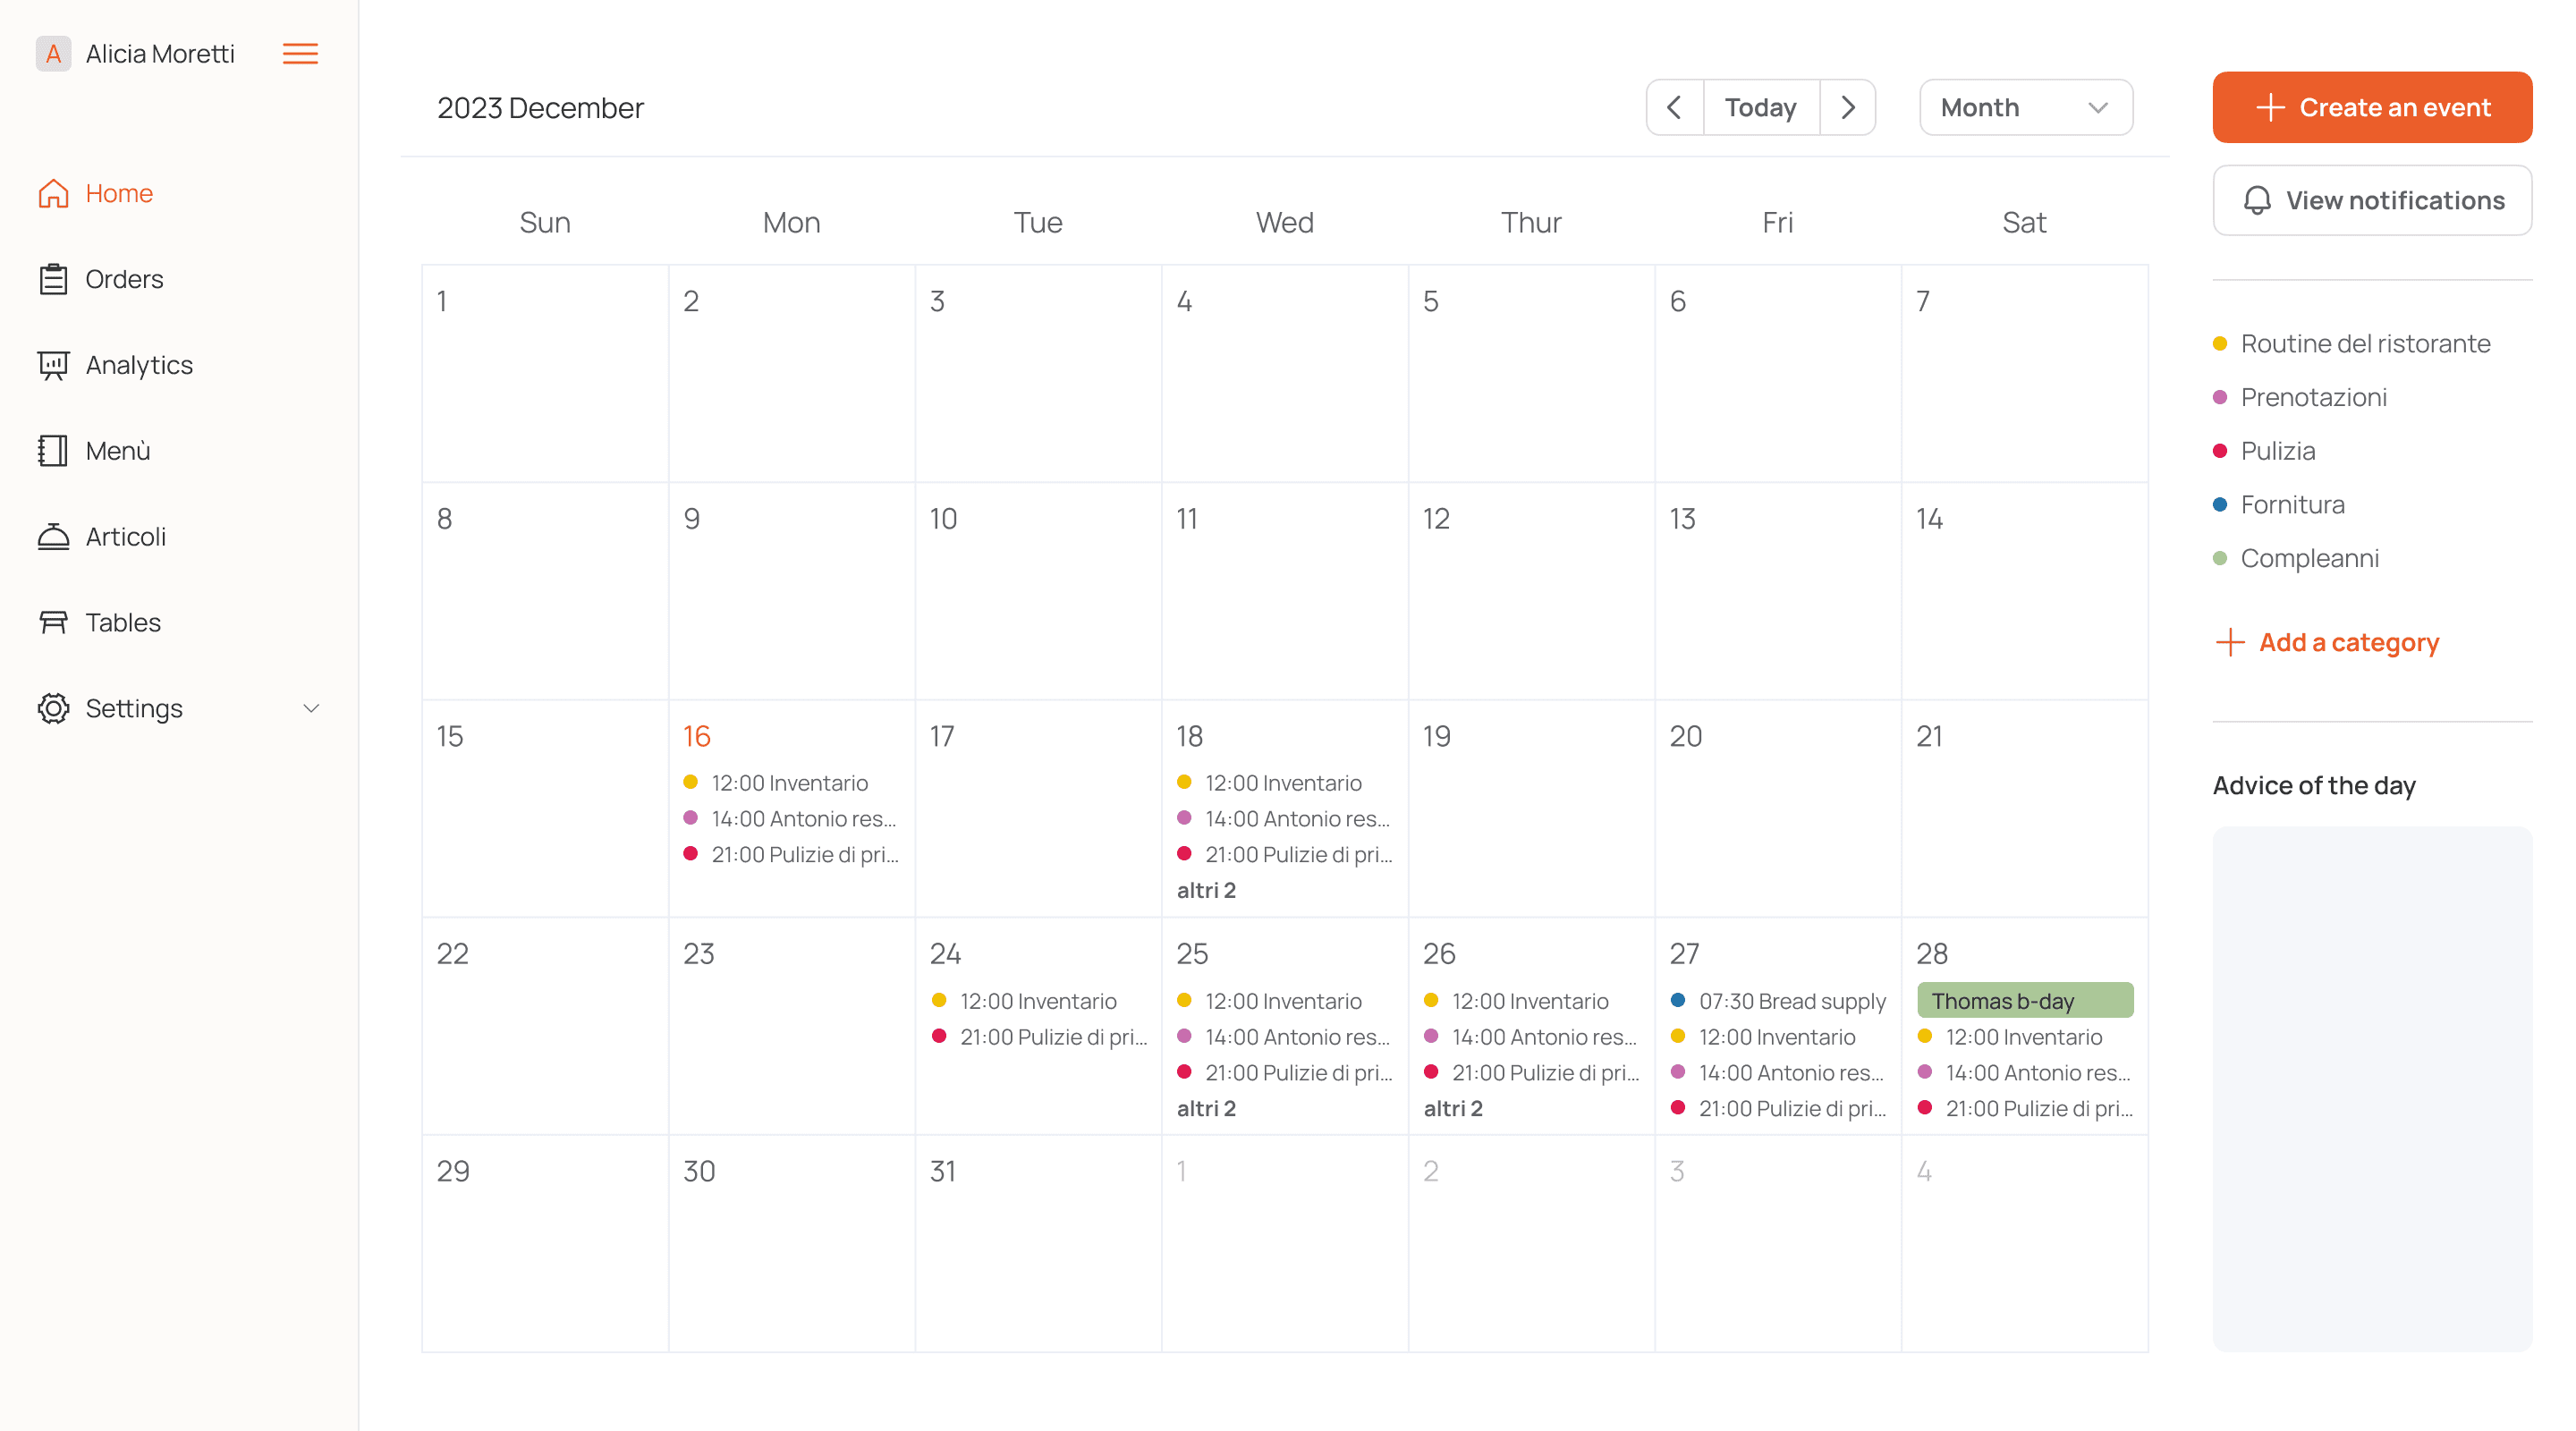
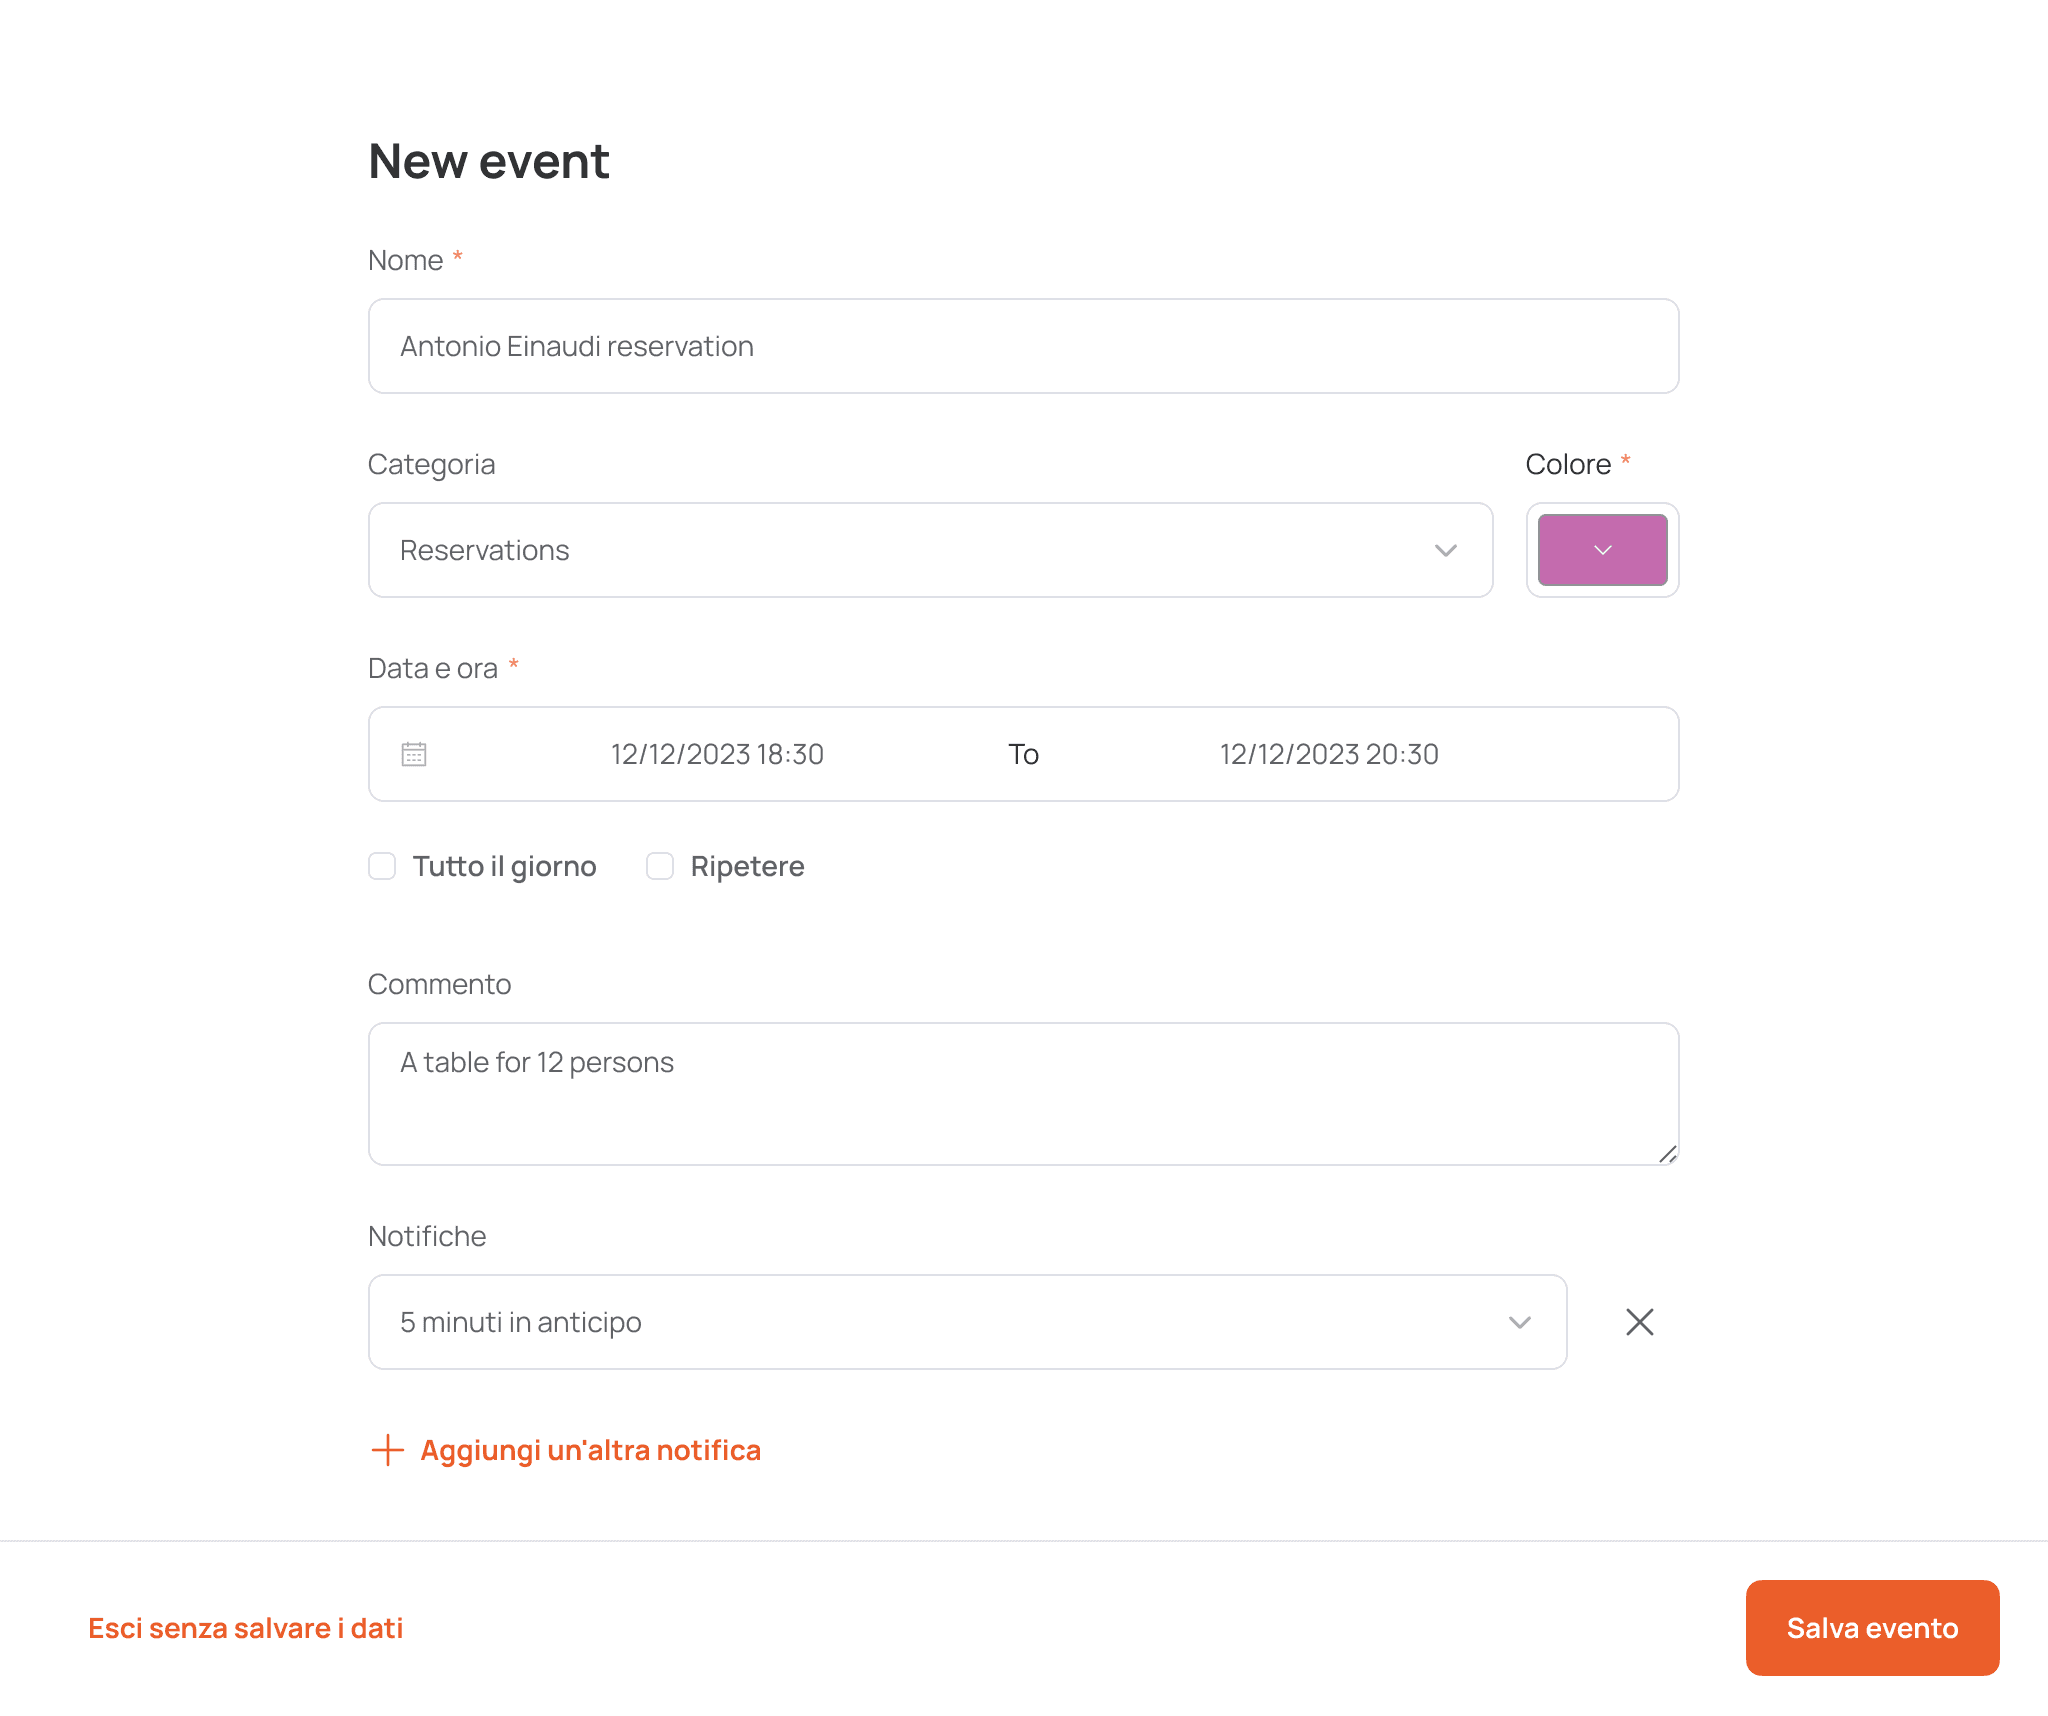
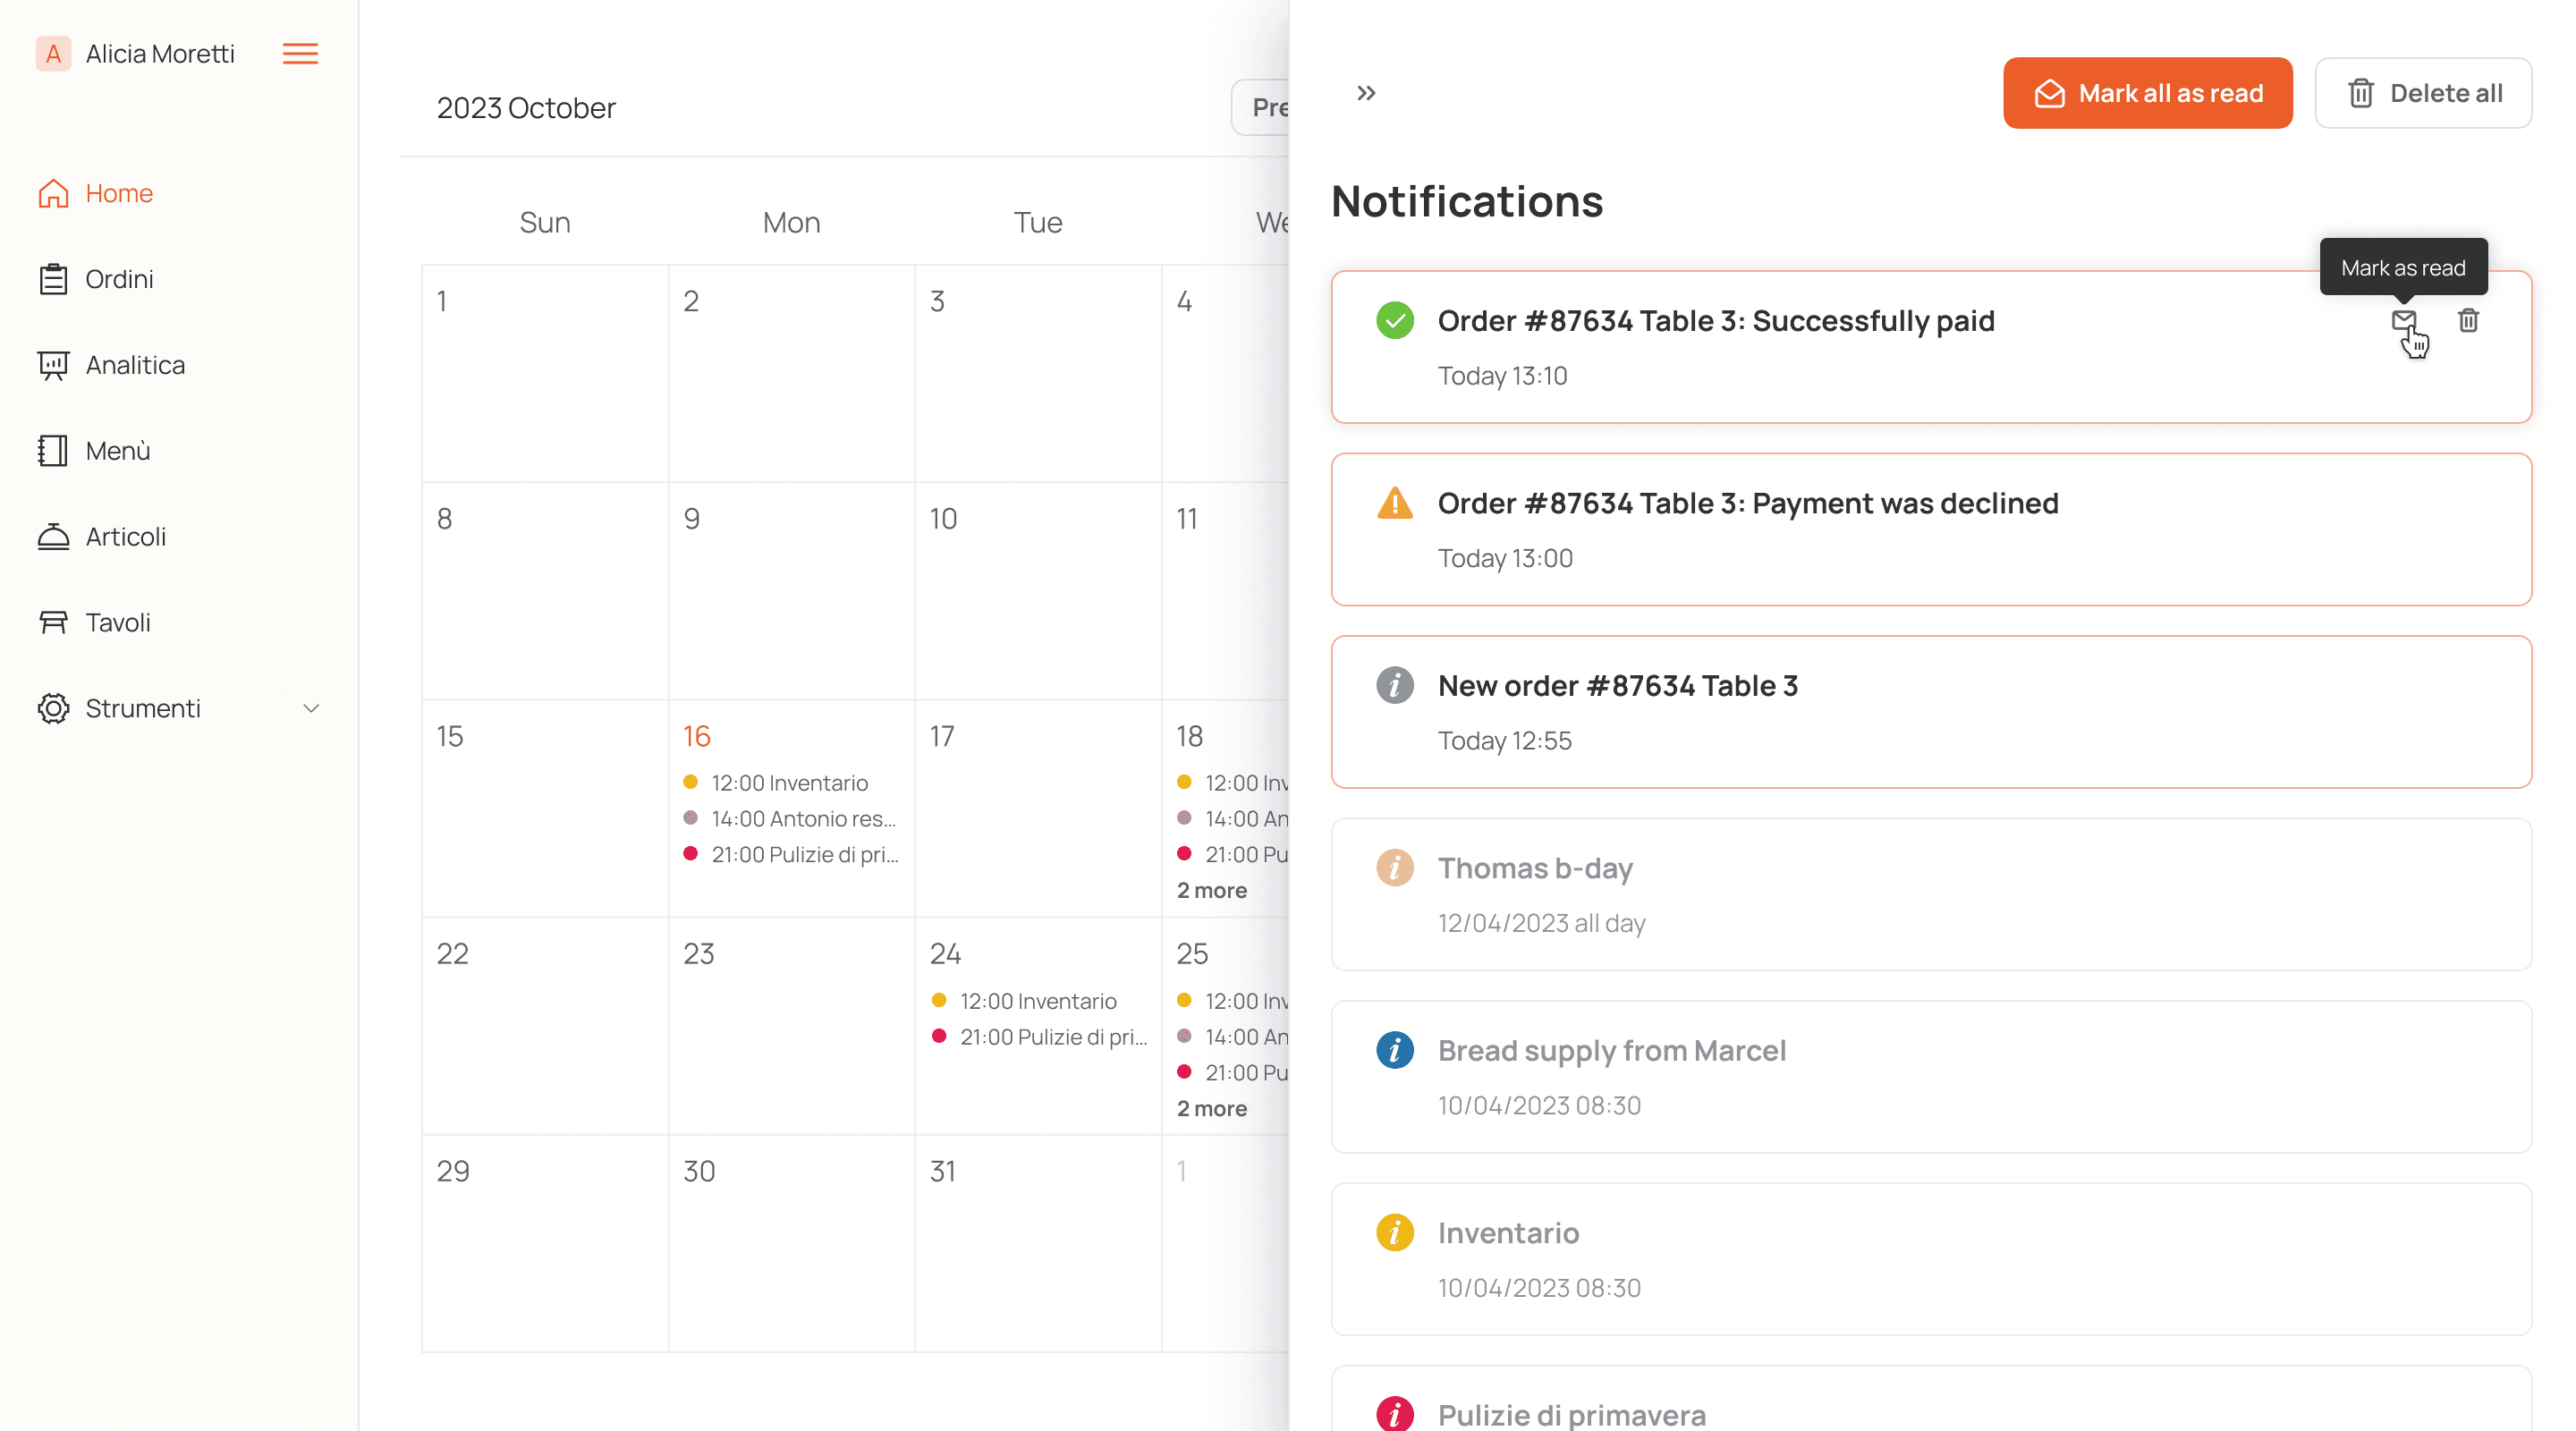
When the administrator has filled in all the necessary information for their restaurant, they see a calendar on the home screen, where they can plan meetings, make reservations, track inventories, and other events, sort them into groups, set reminders, and repeat them.
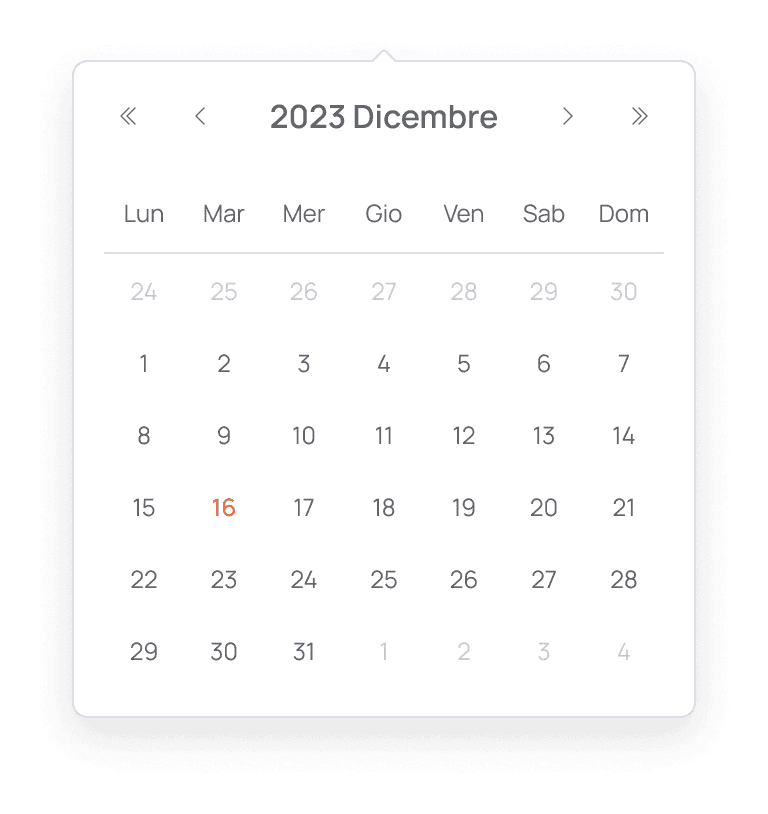
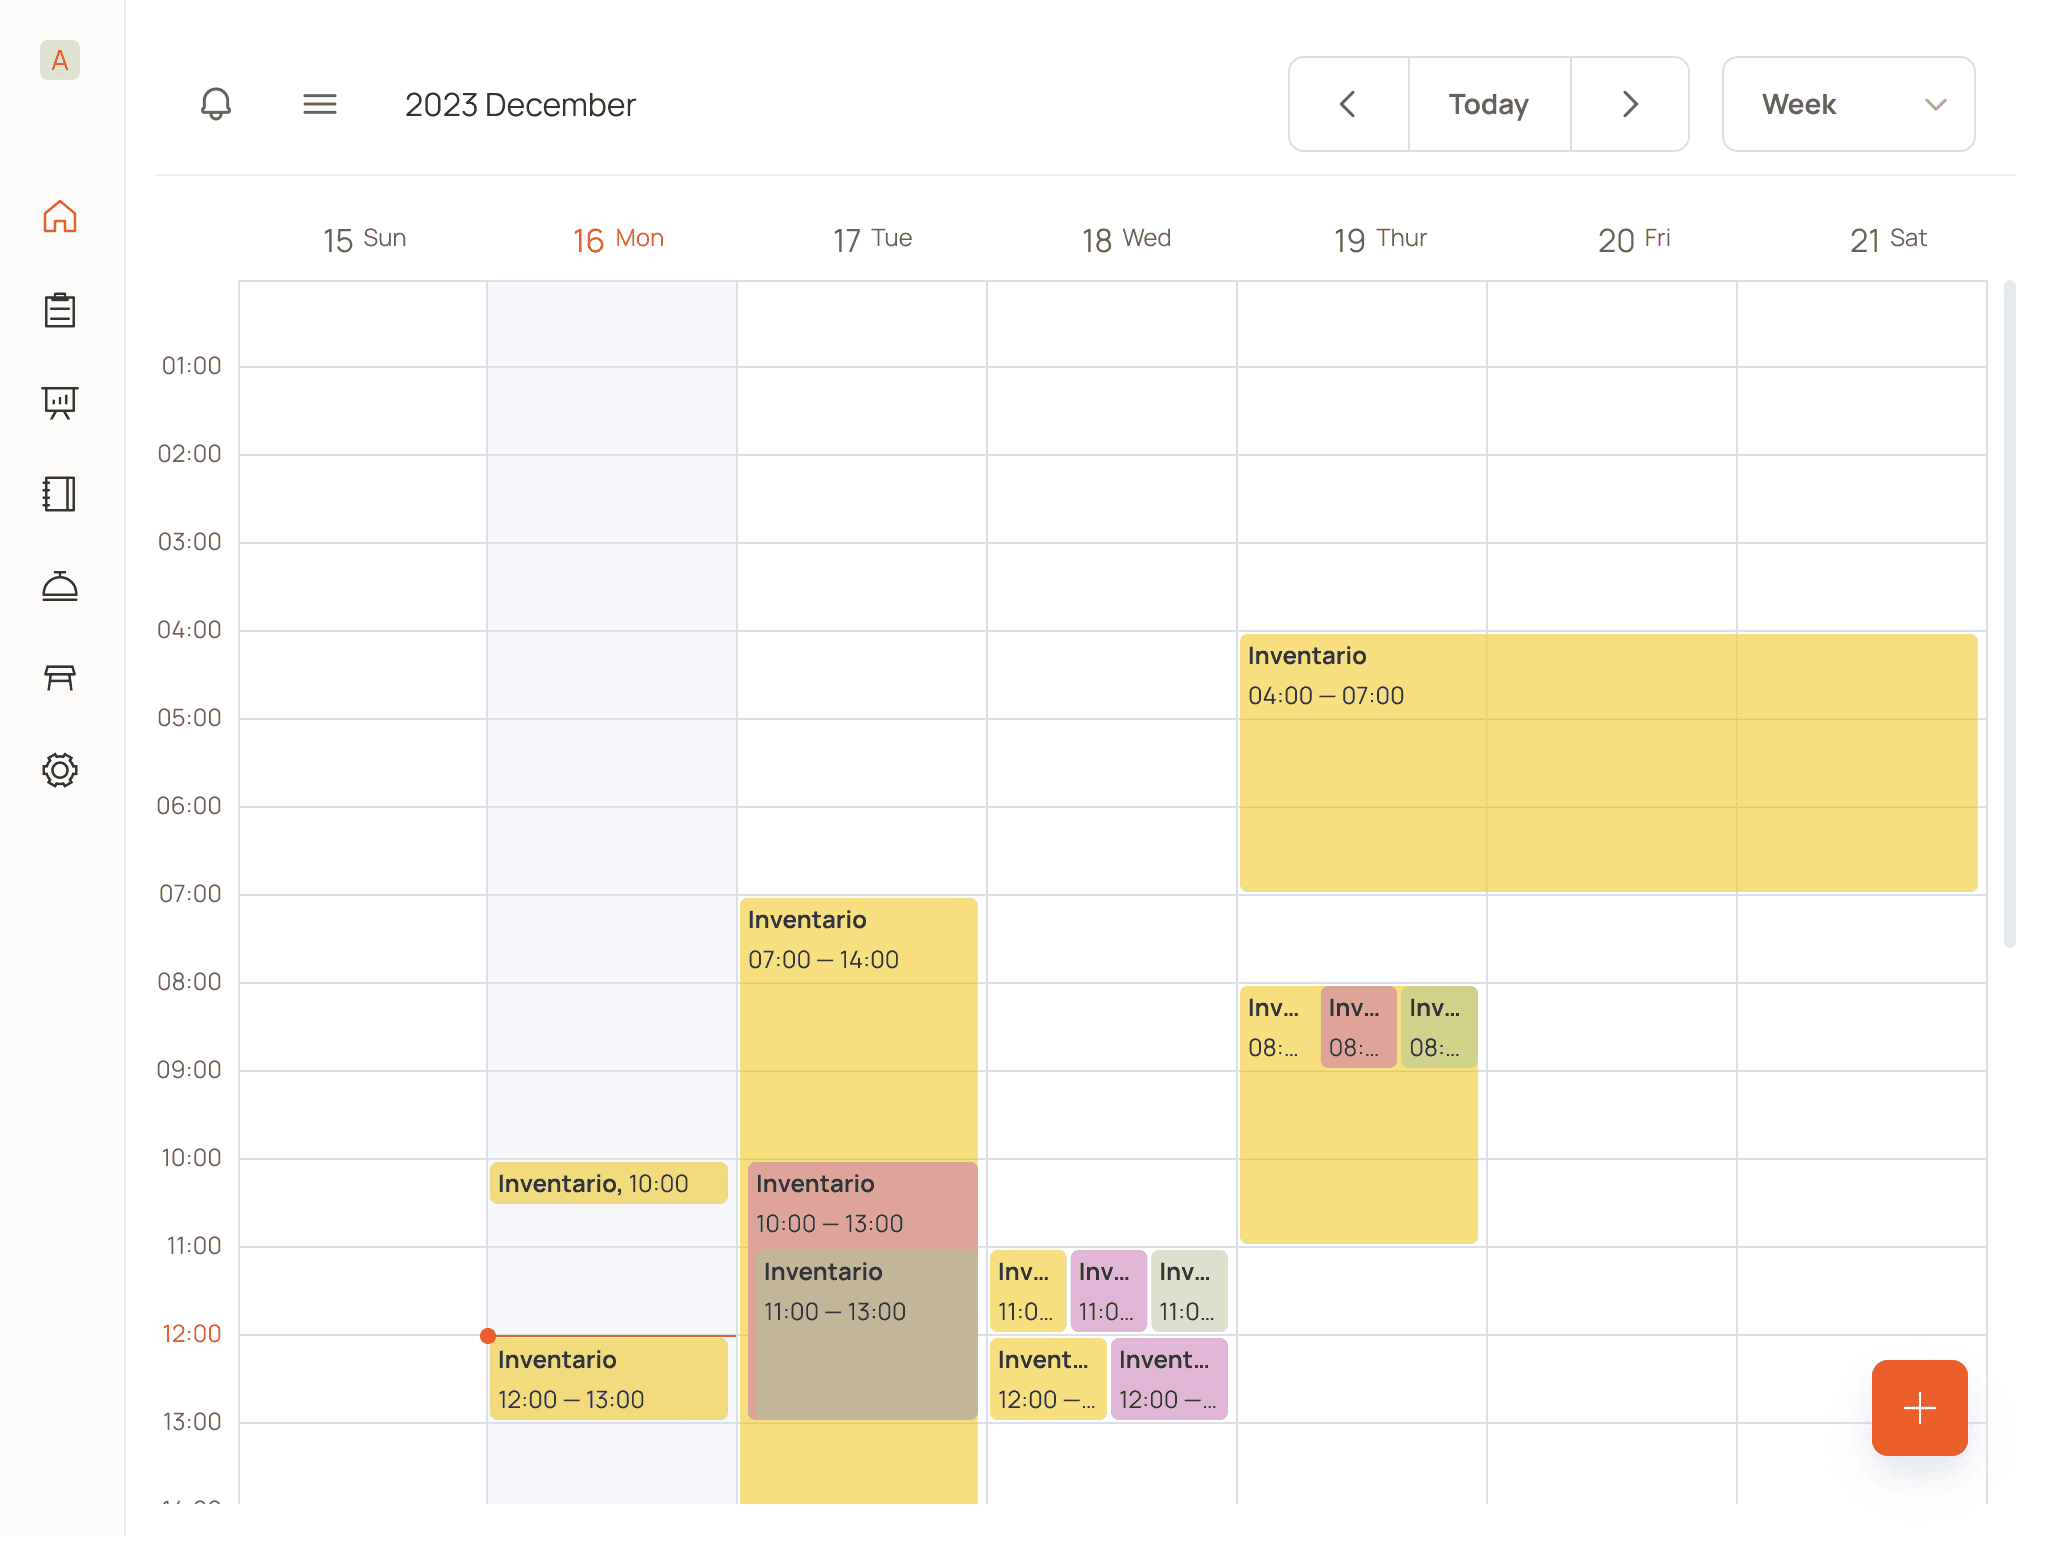
The user can view the calendar by month, week, and day, as well as quickly move between neighboring periods or select a period in the calendar.
Here, all notifications are gathered, which can be marked as read or deleted completely.

Analytics
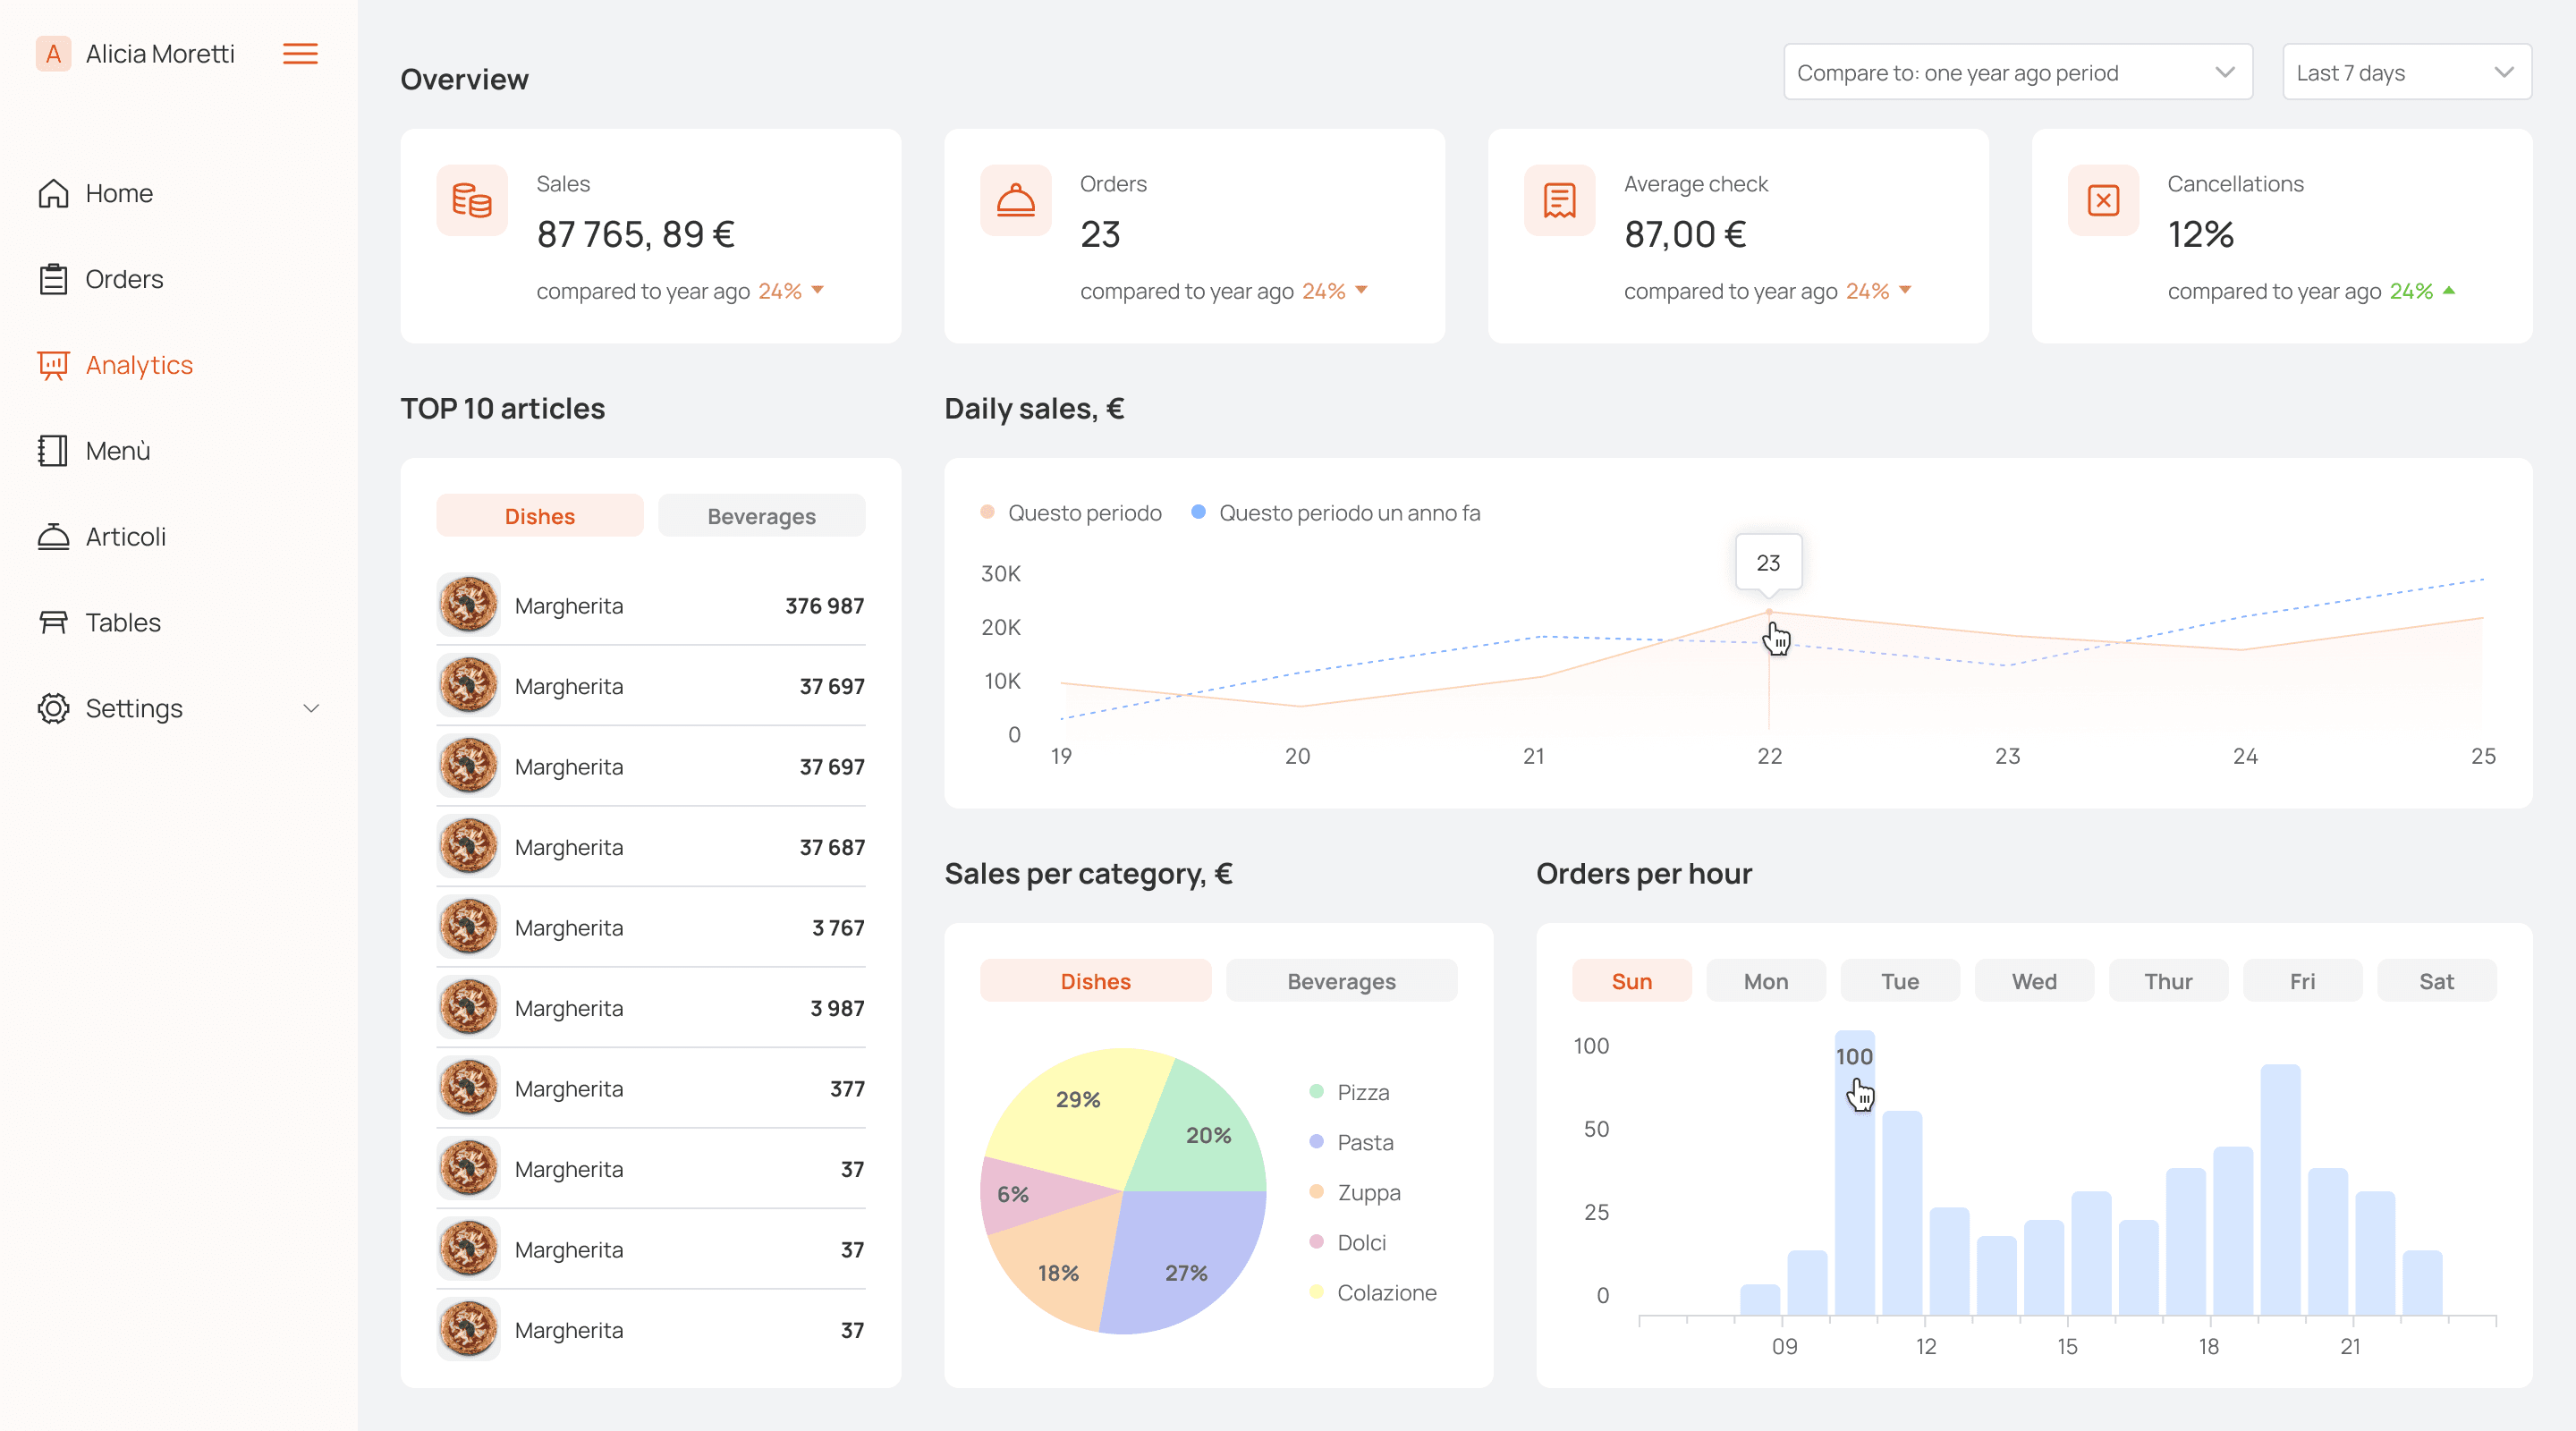
On this tab, which is available only to the admin, you can evaluate overall indicators such as sales, the number of orders, average check, and cancellation rate, as well as the rating of dishes and drinks, the dynamics of daily sales, and the number of orders per hour by day of the week.
The data can be compared with the previous period or with the same period last year, and you can view the values for the last 7, 14, 30, and 90 days.
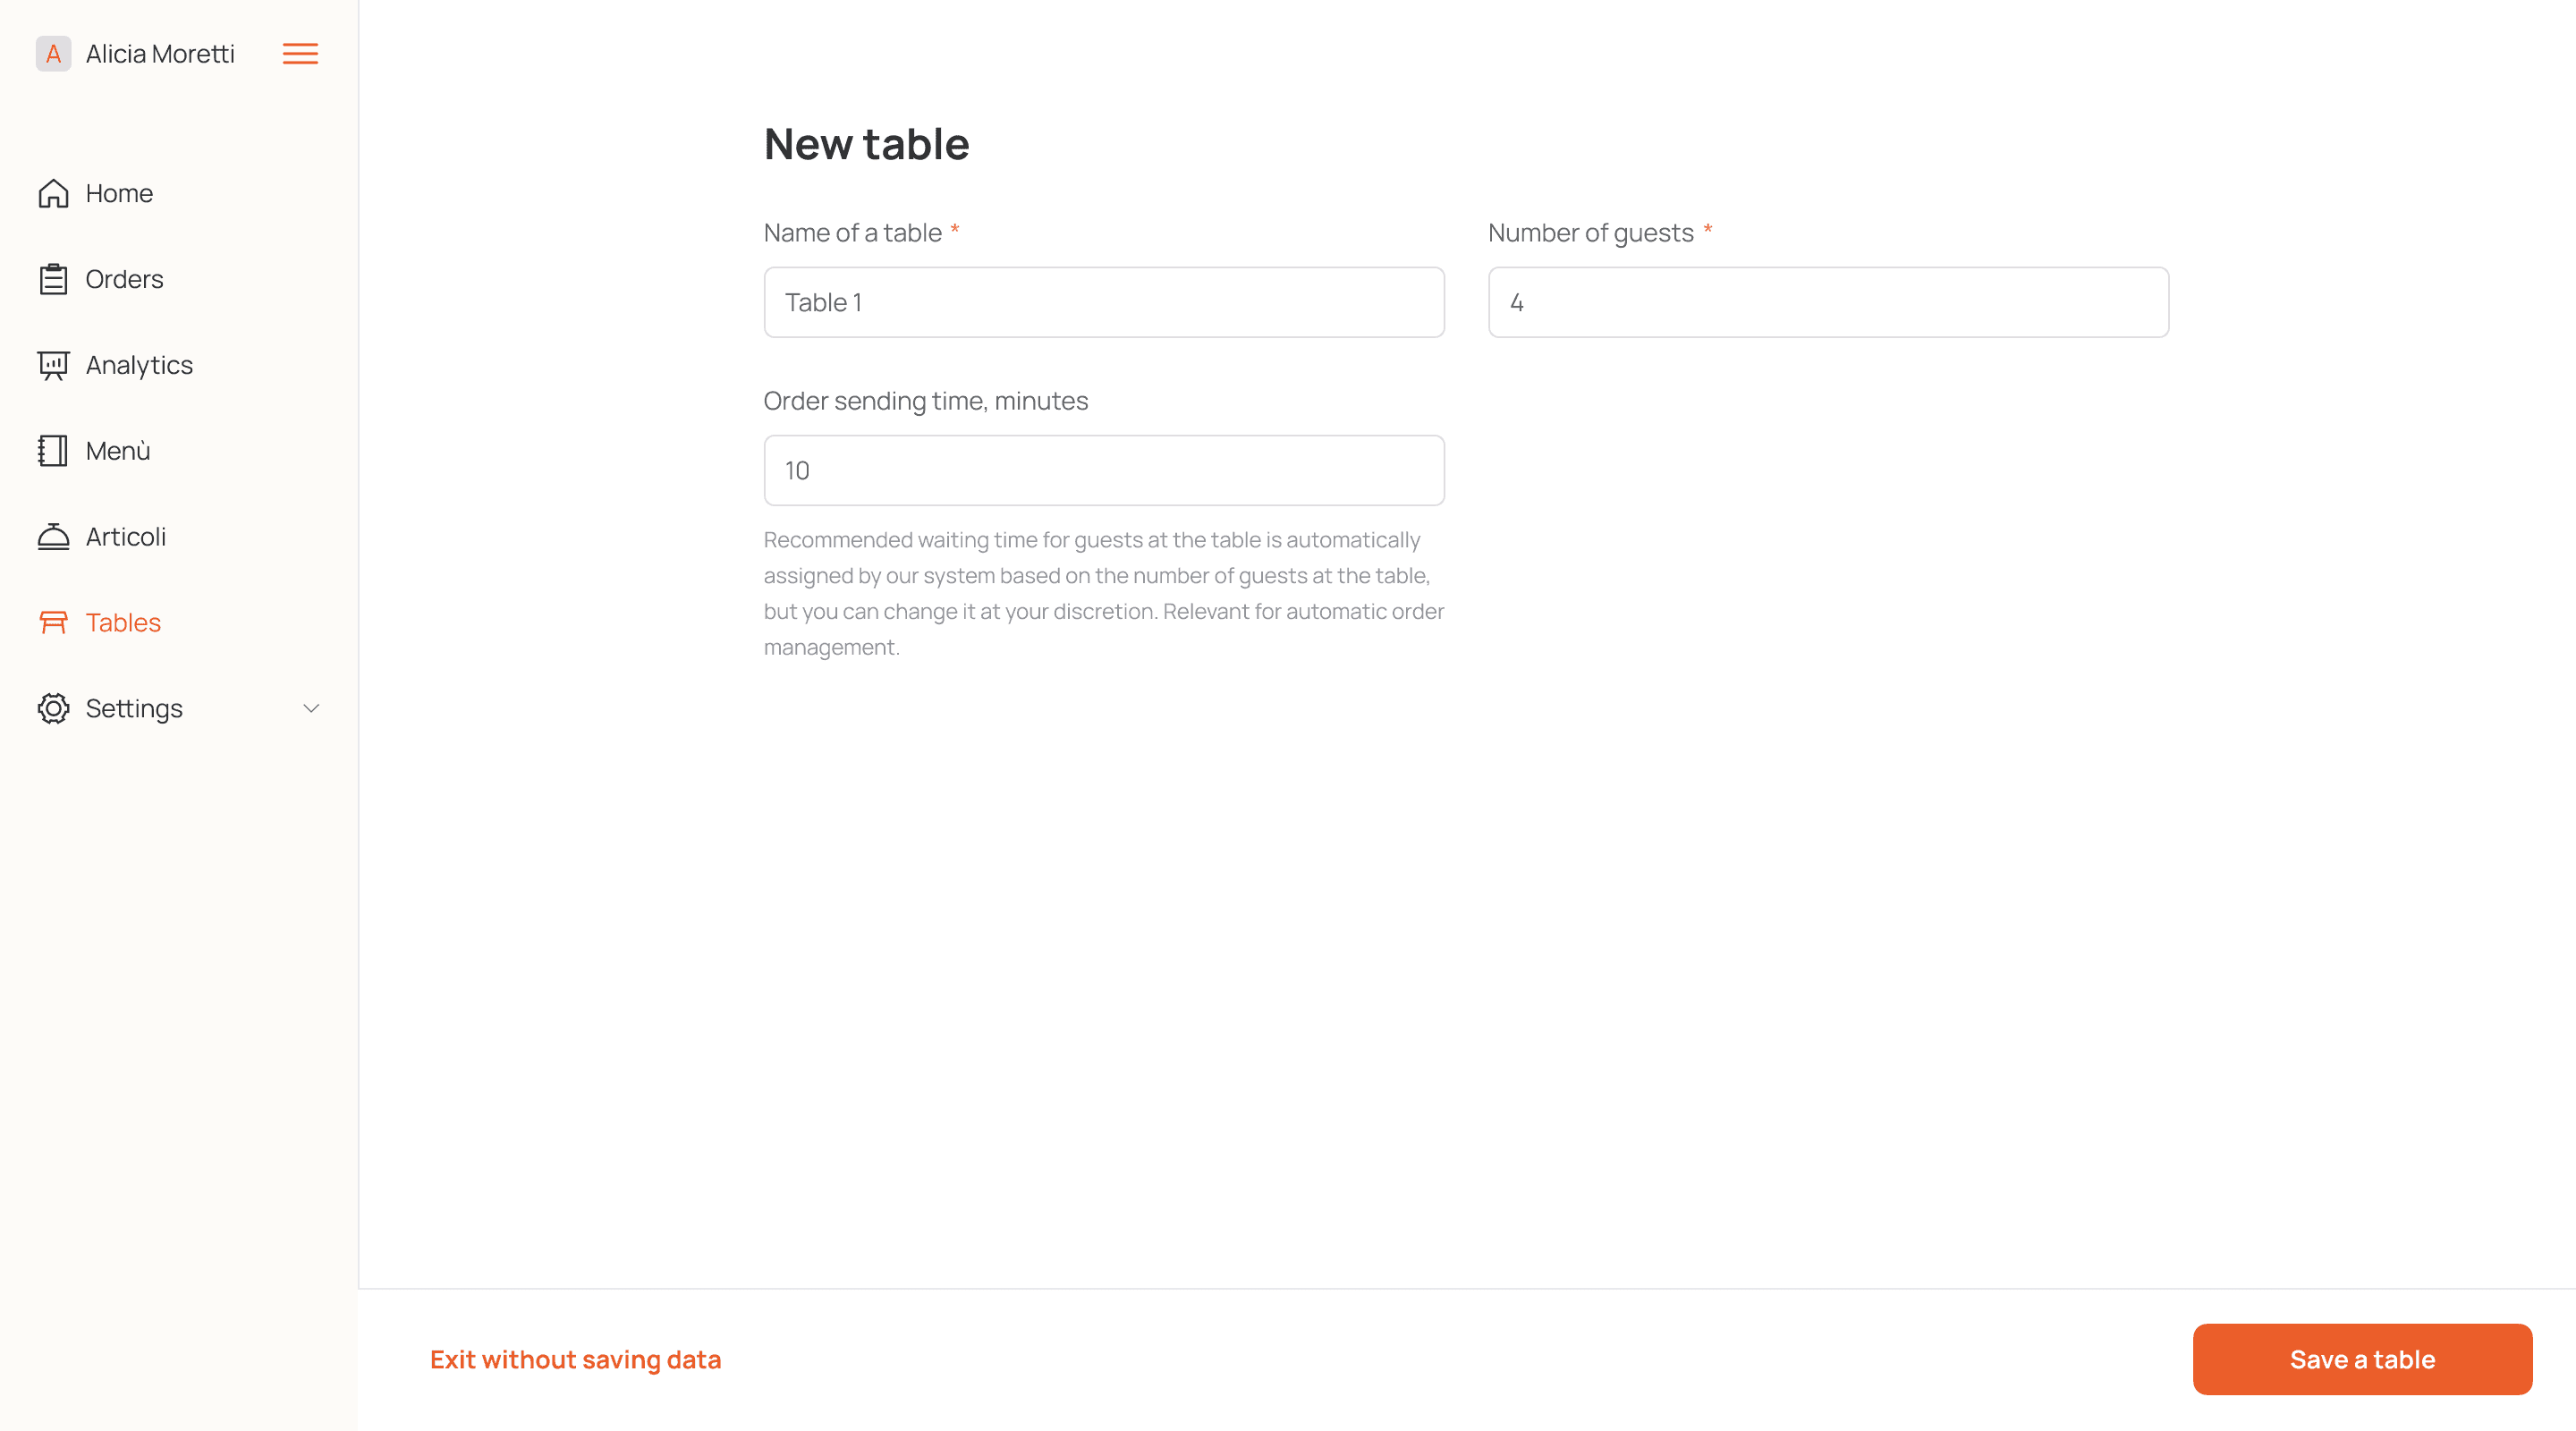
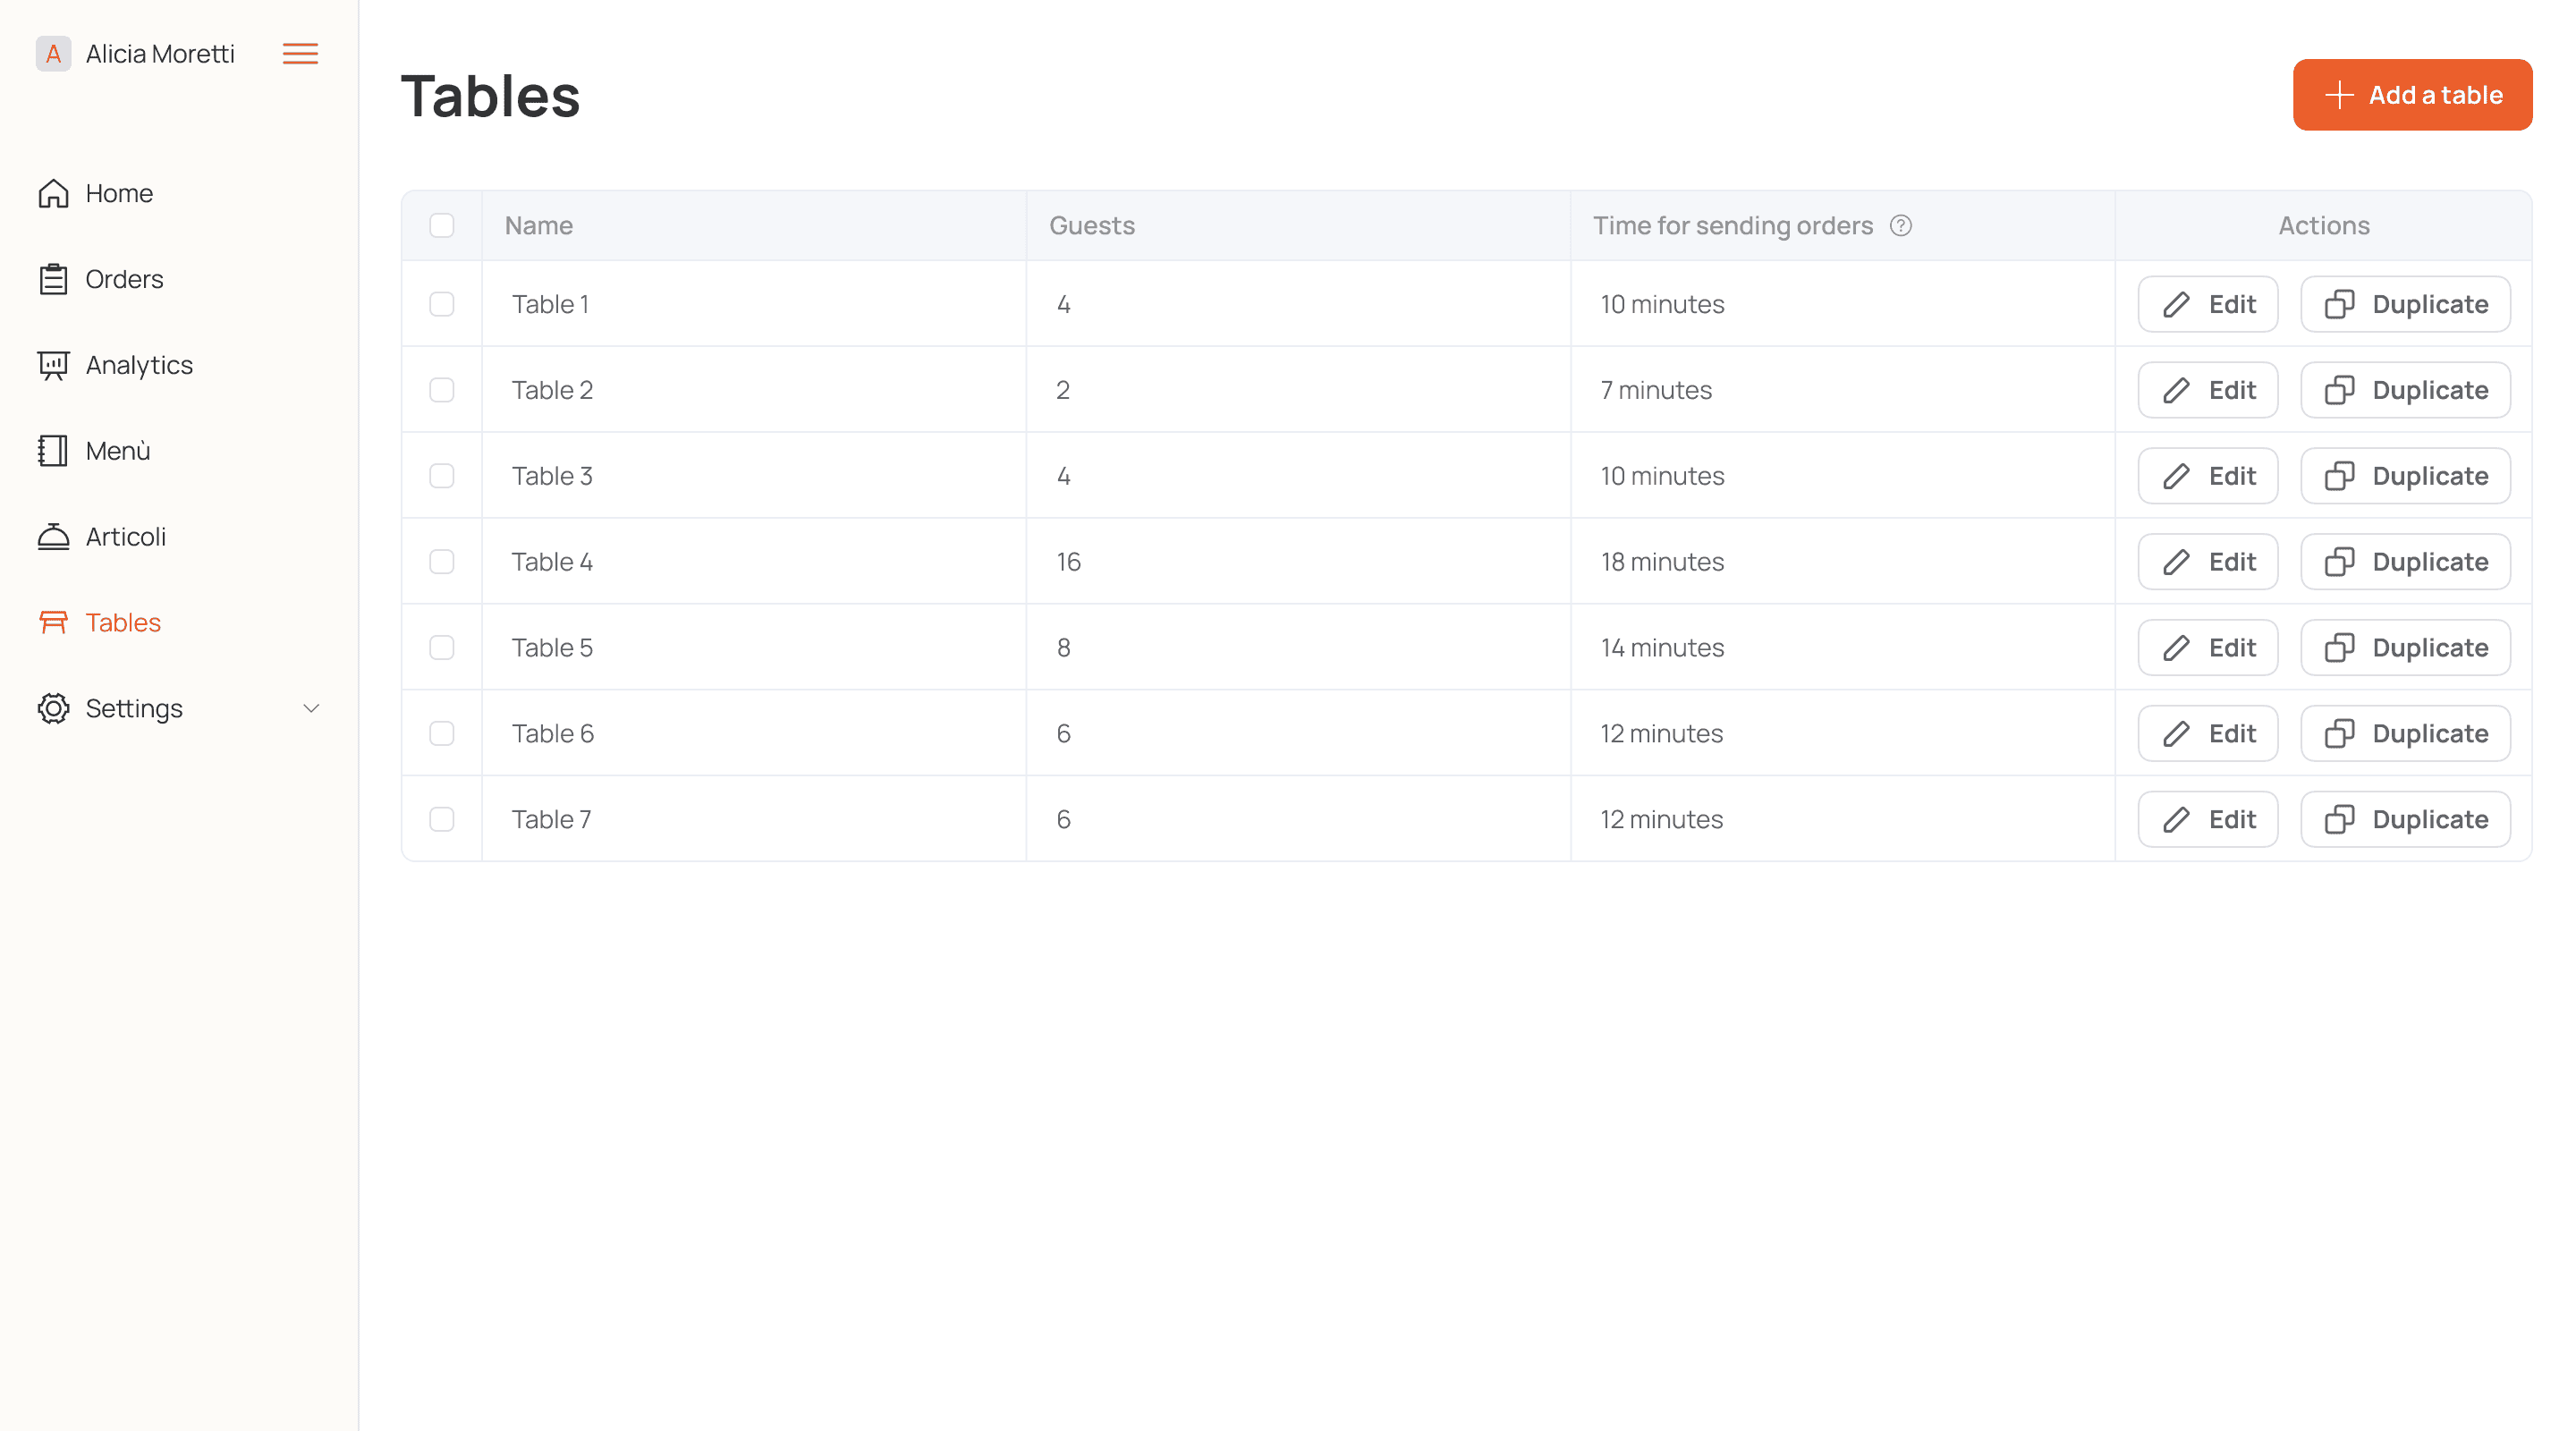
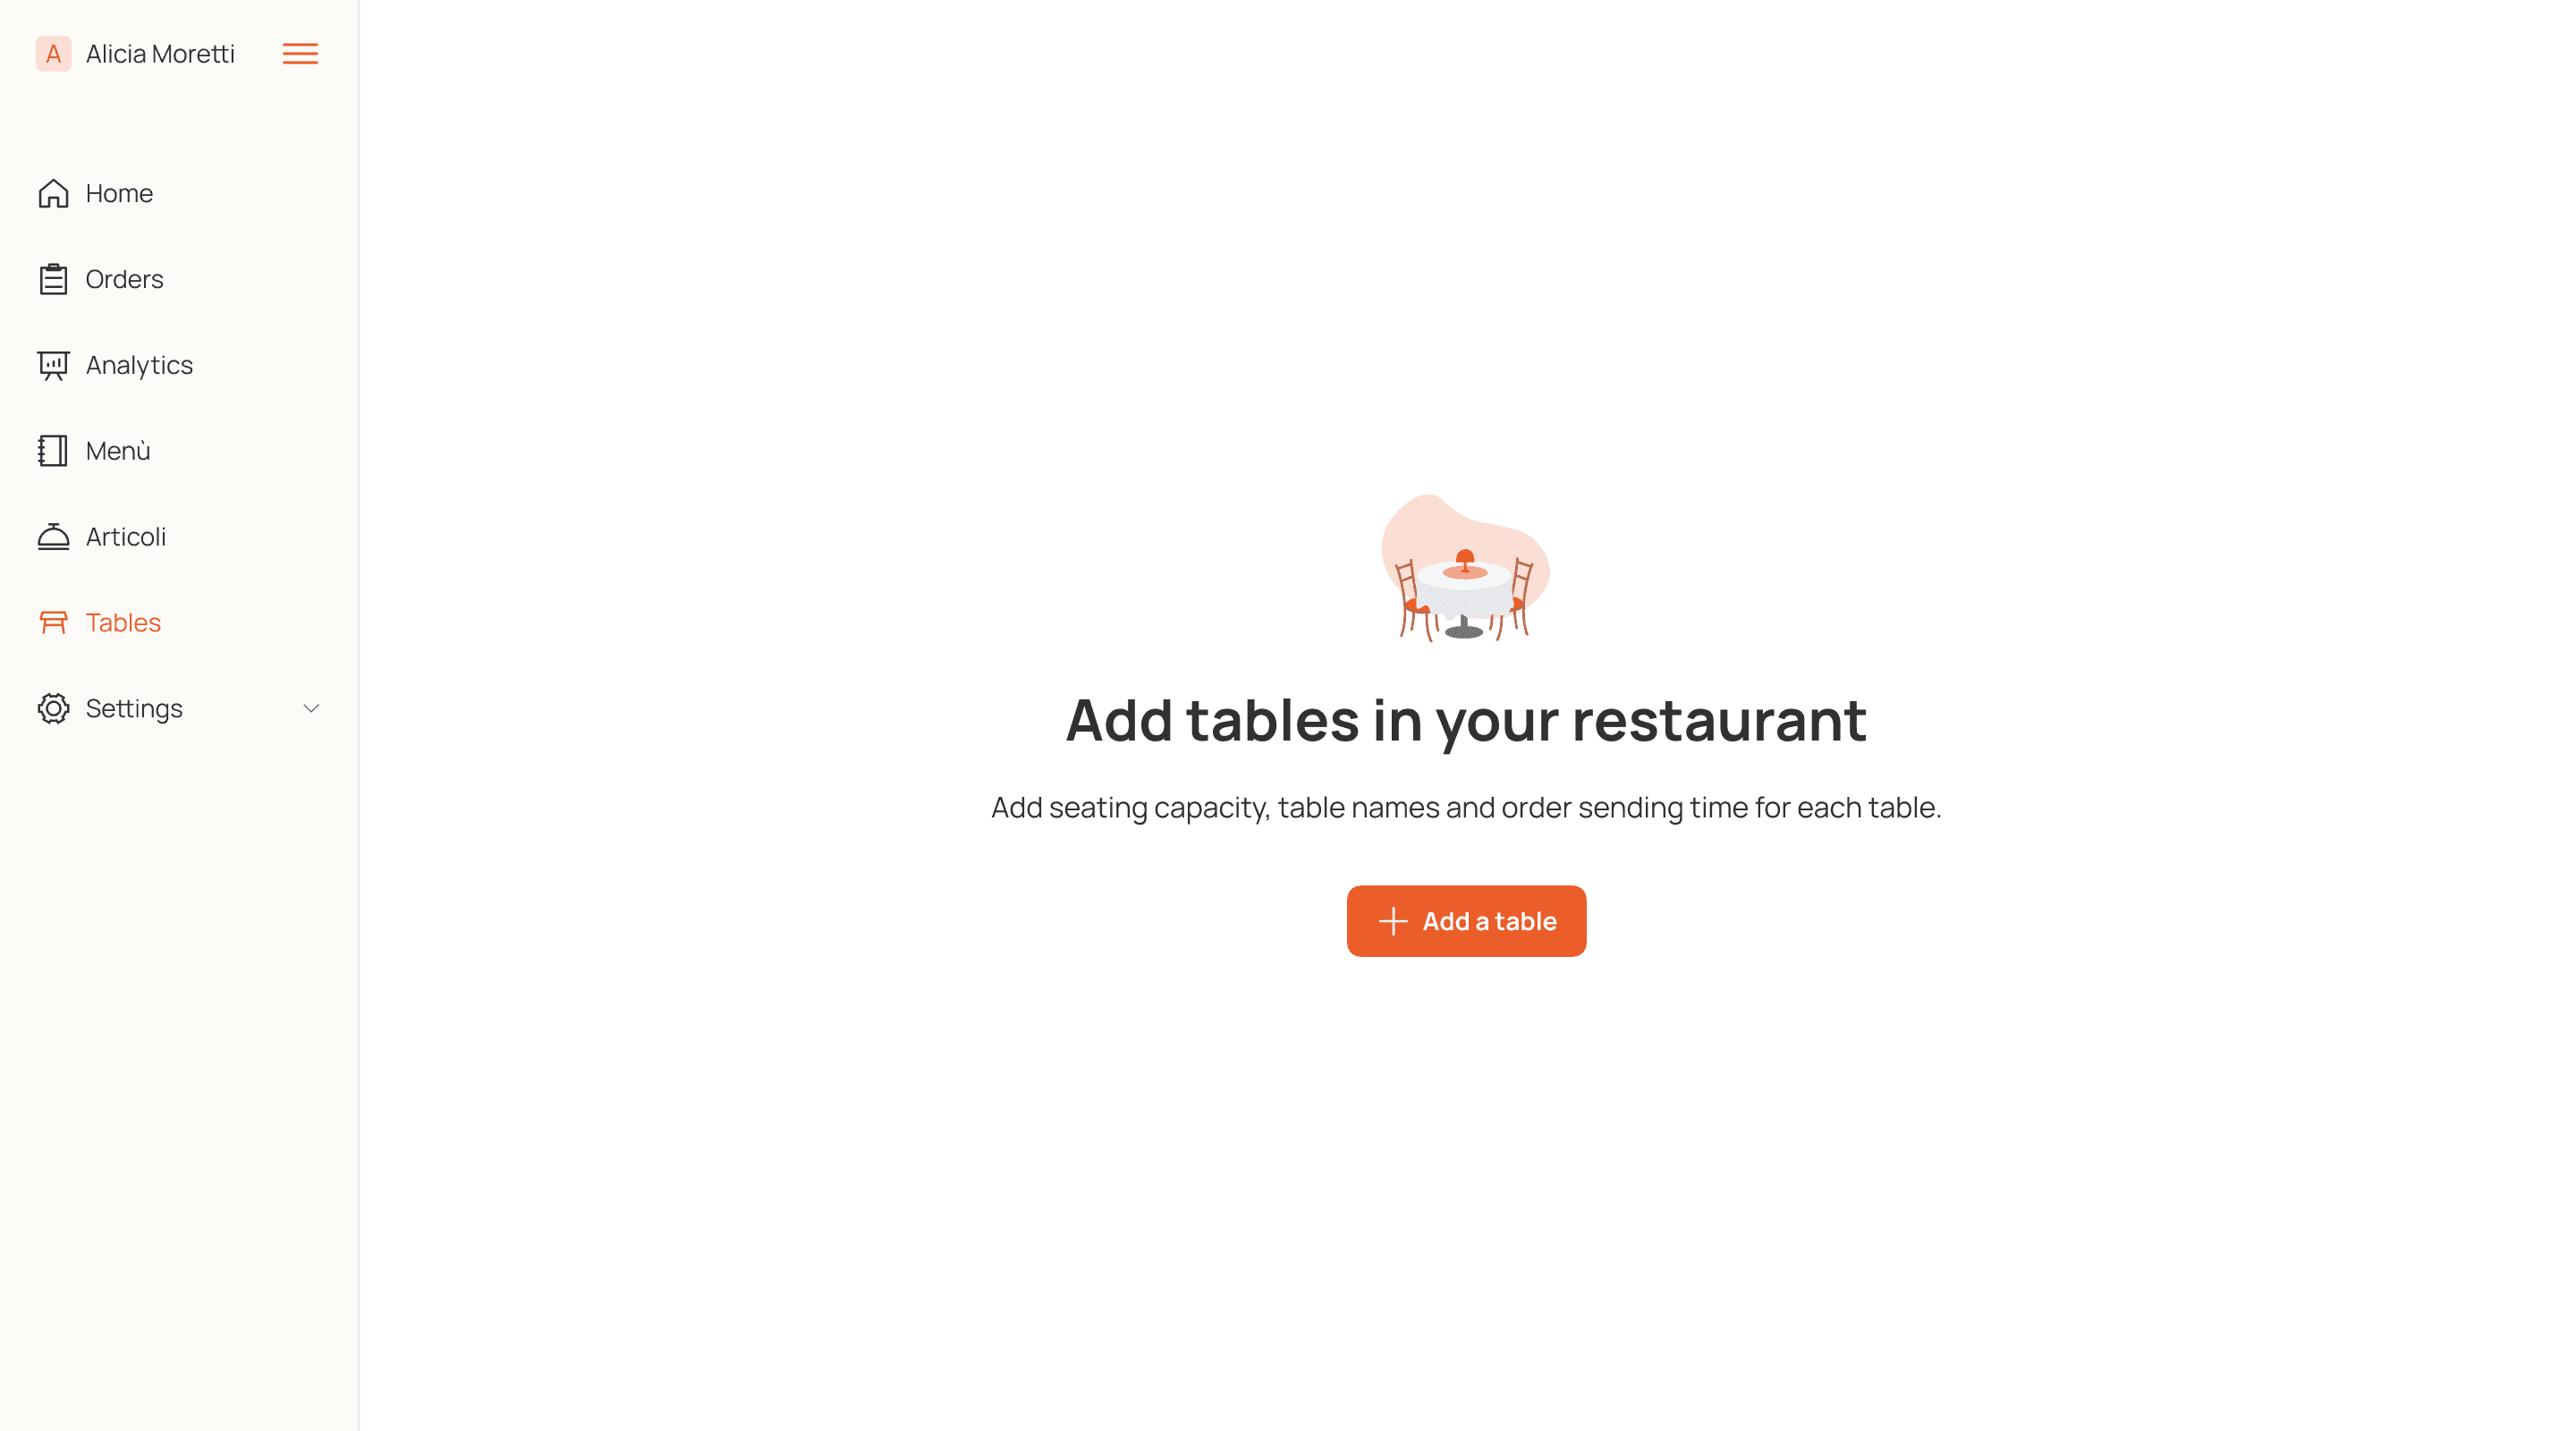
Tables
Here, the administrator adds tables of their restaurant with names, number of guest, and order waiting times. This is necessary for the correct display of time for visitors, tables in the 'Orders' tab, and when creating QR codes for each table.
Settings
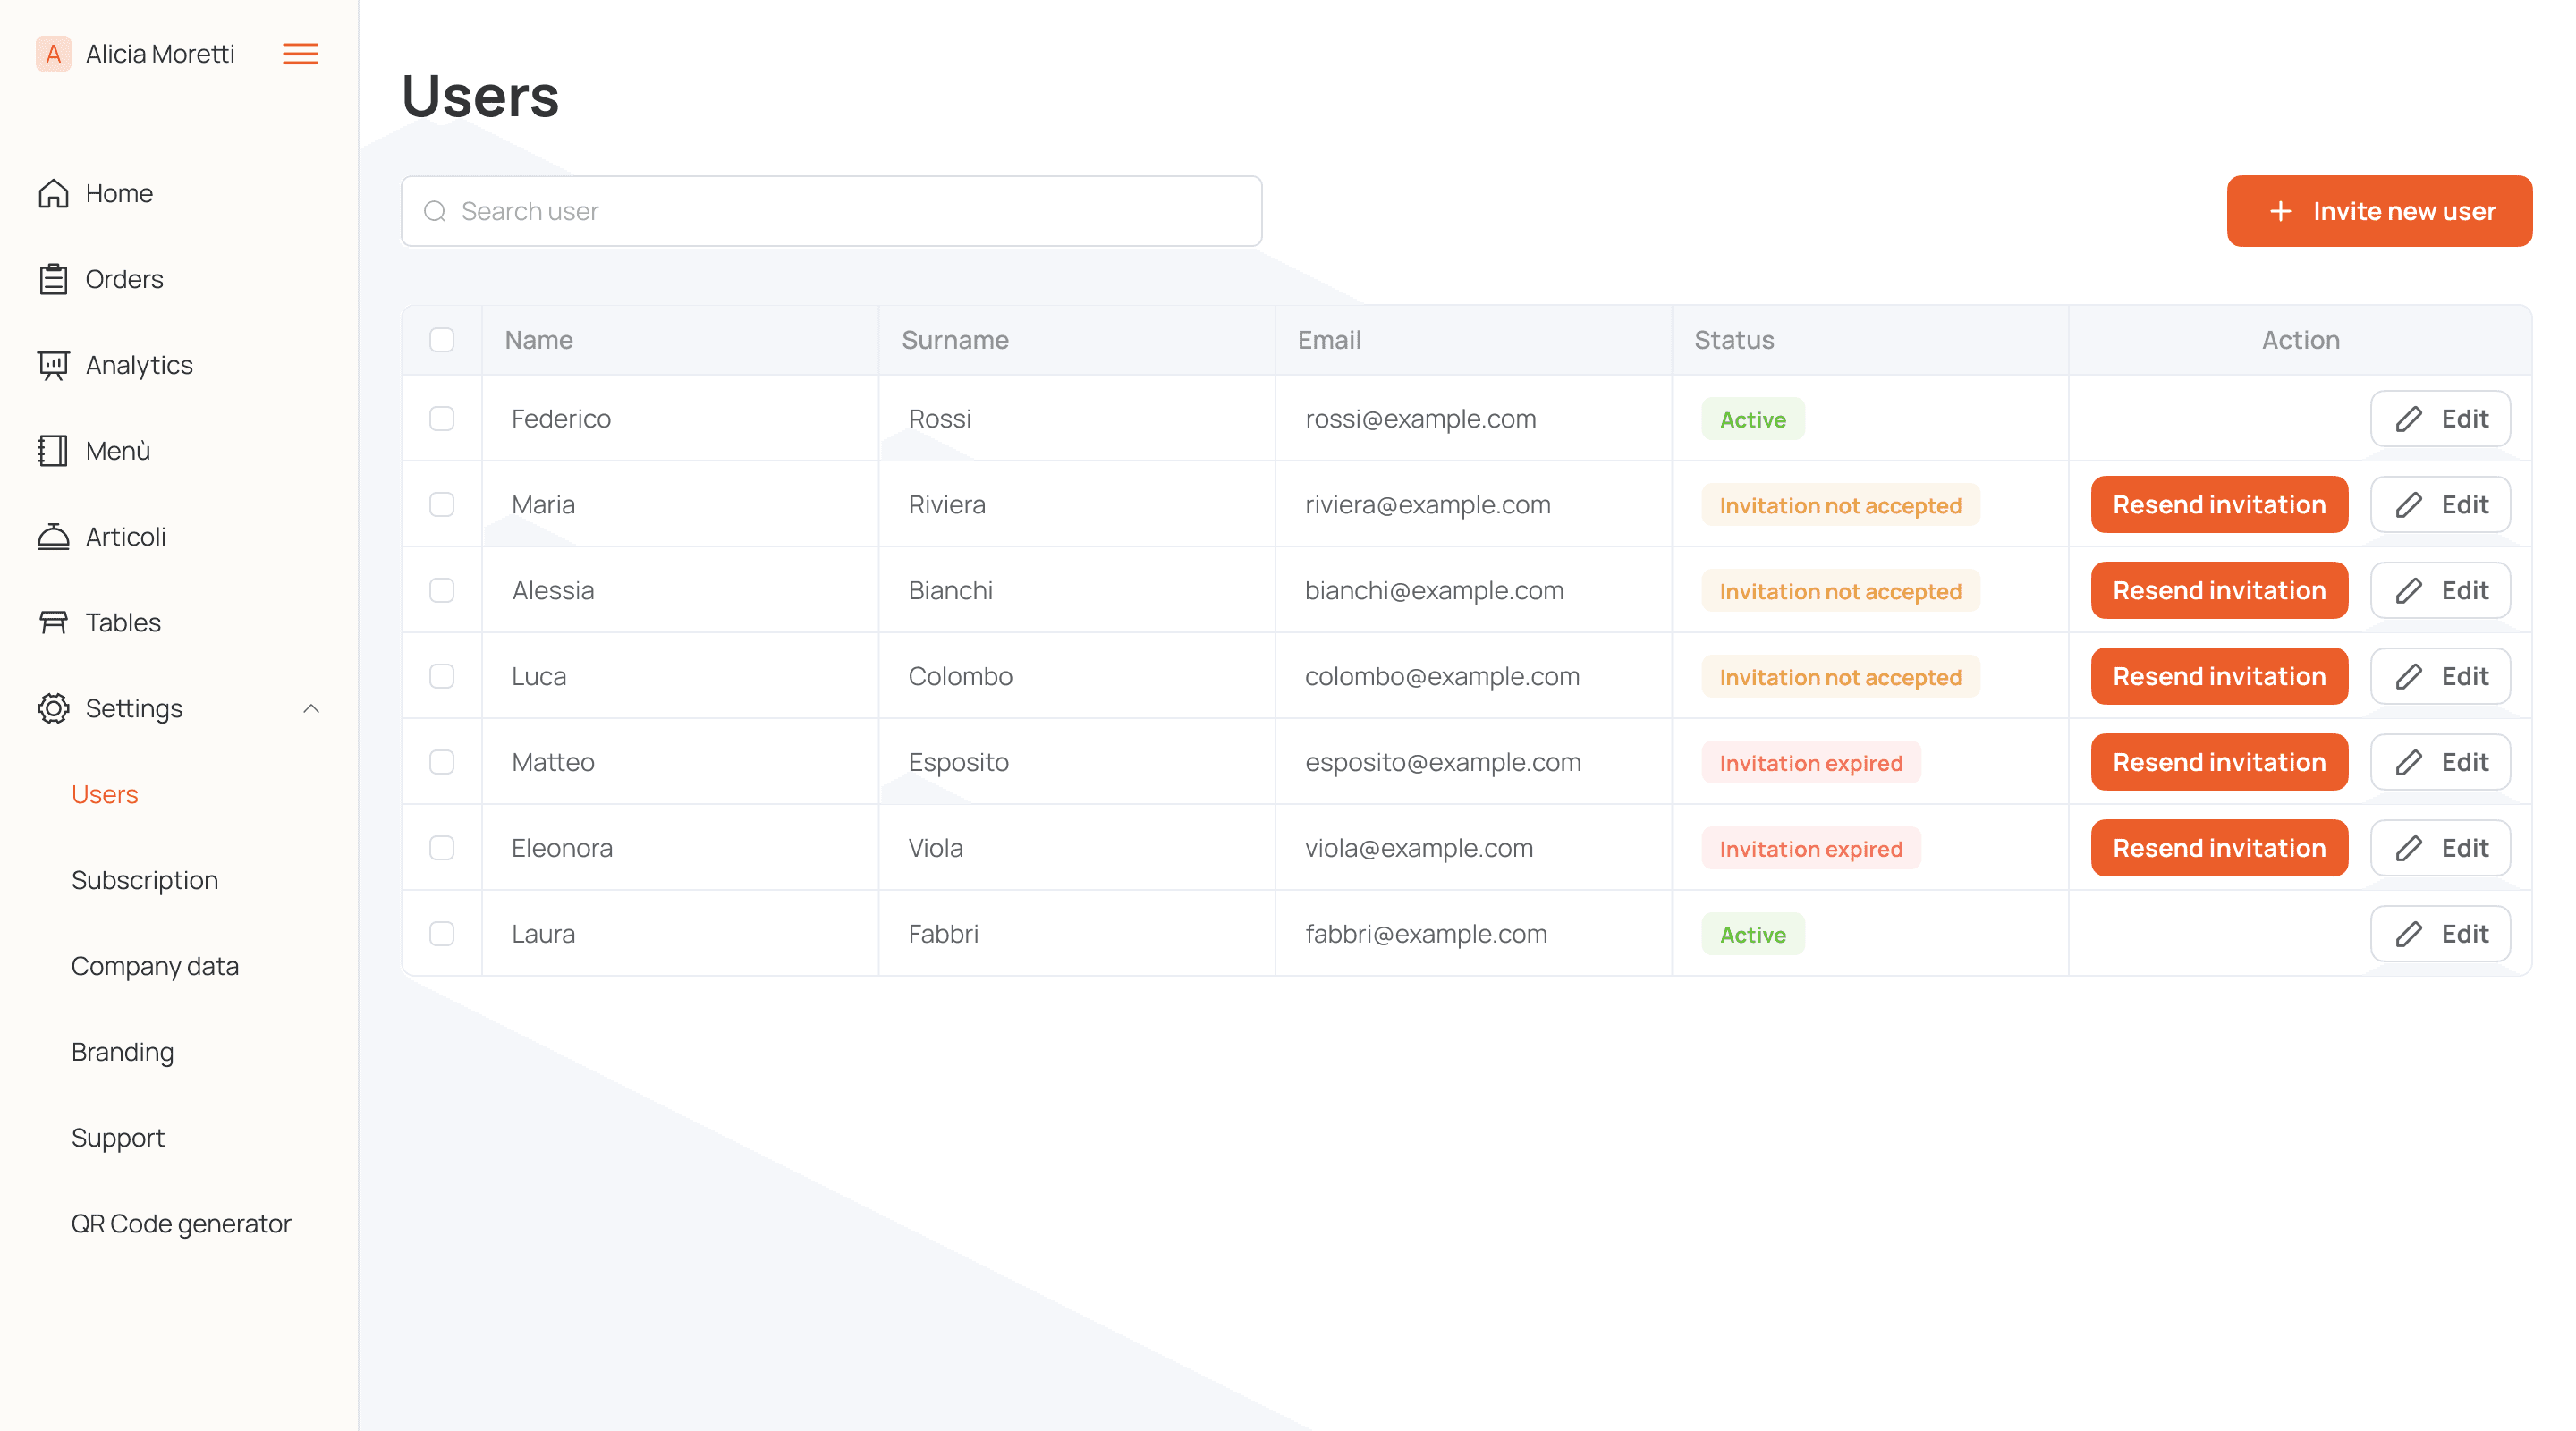
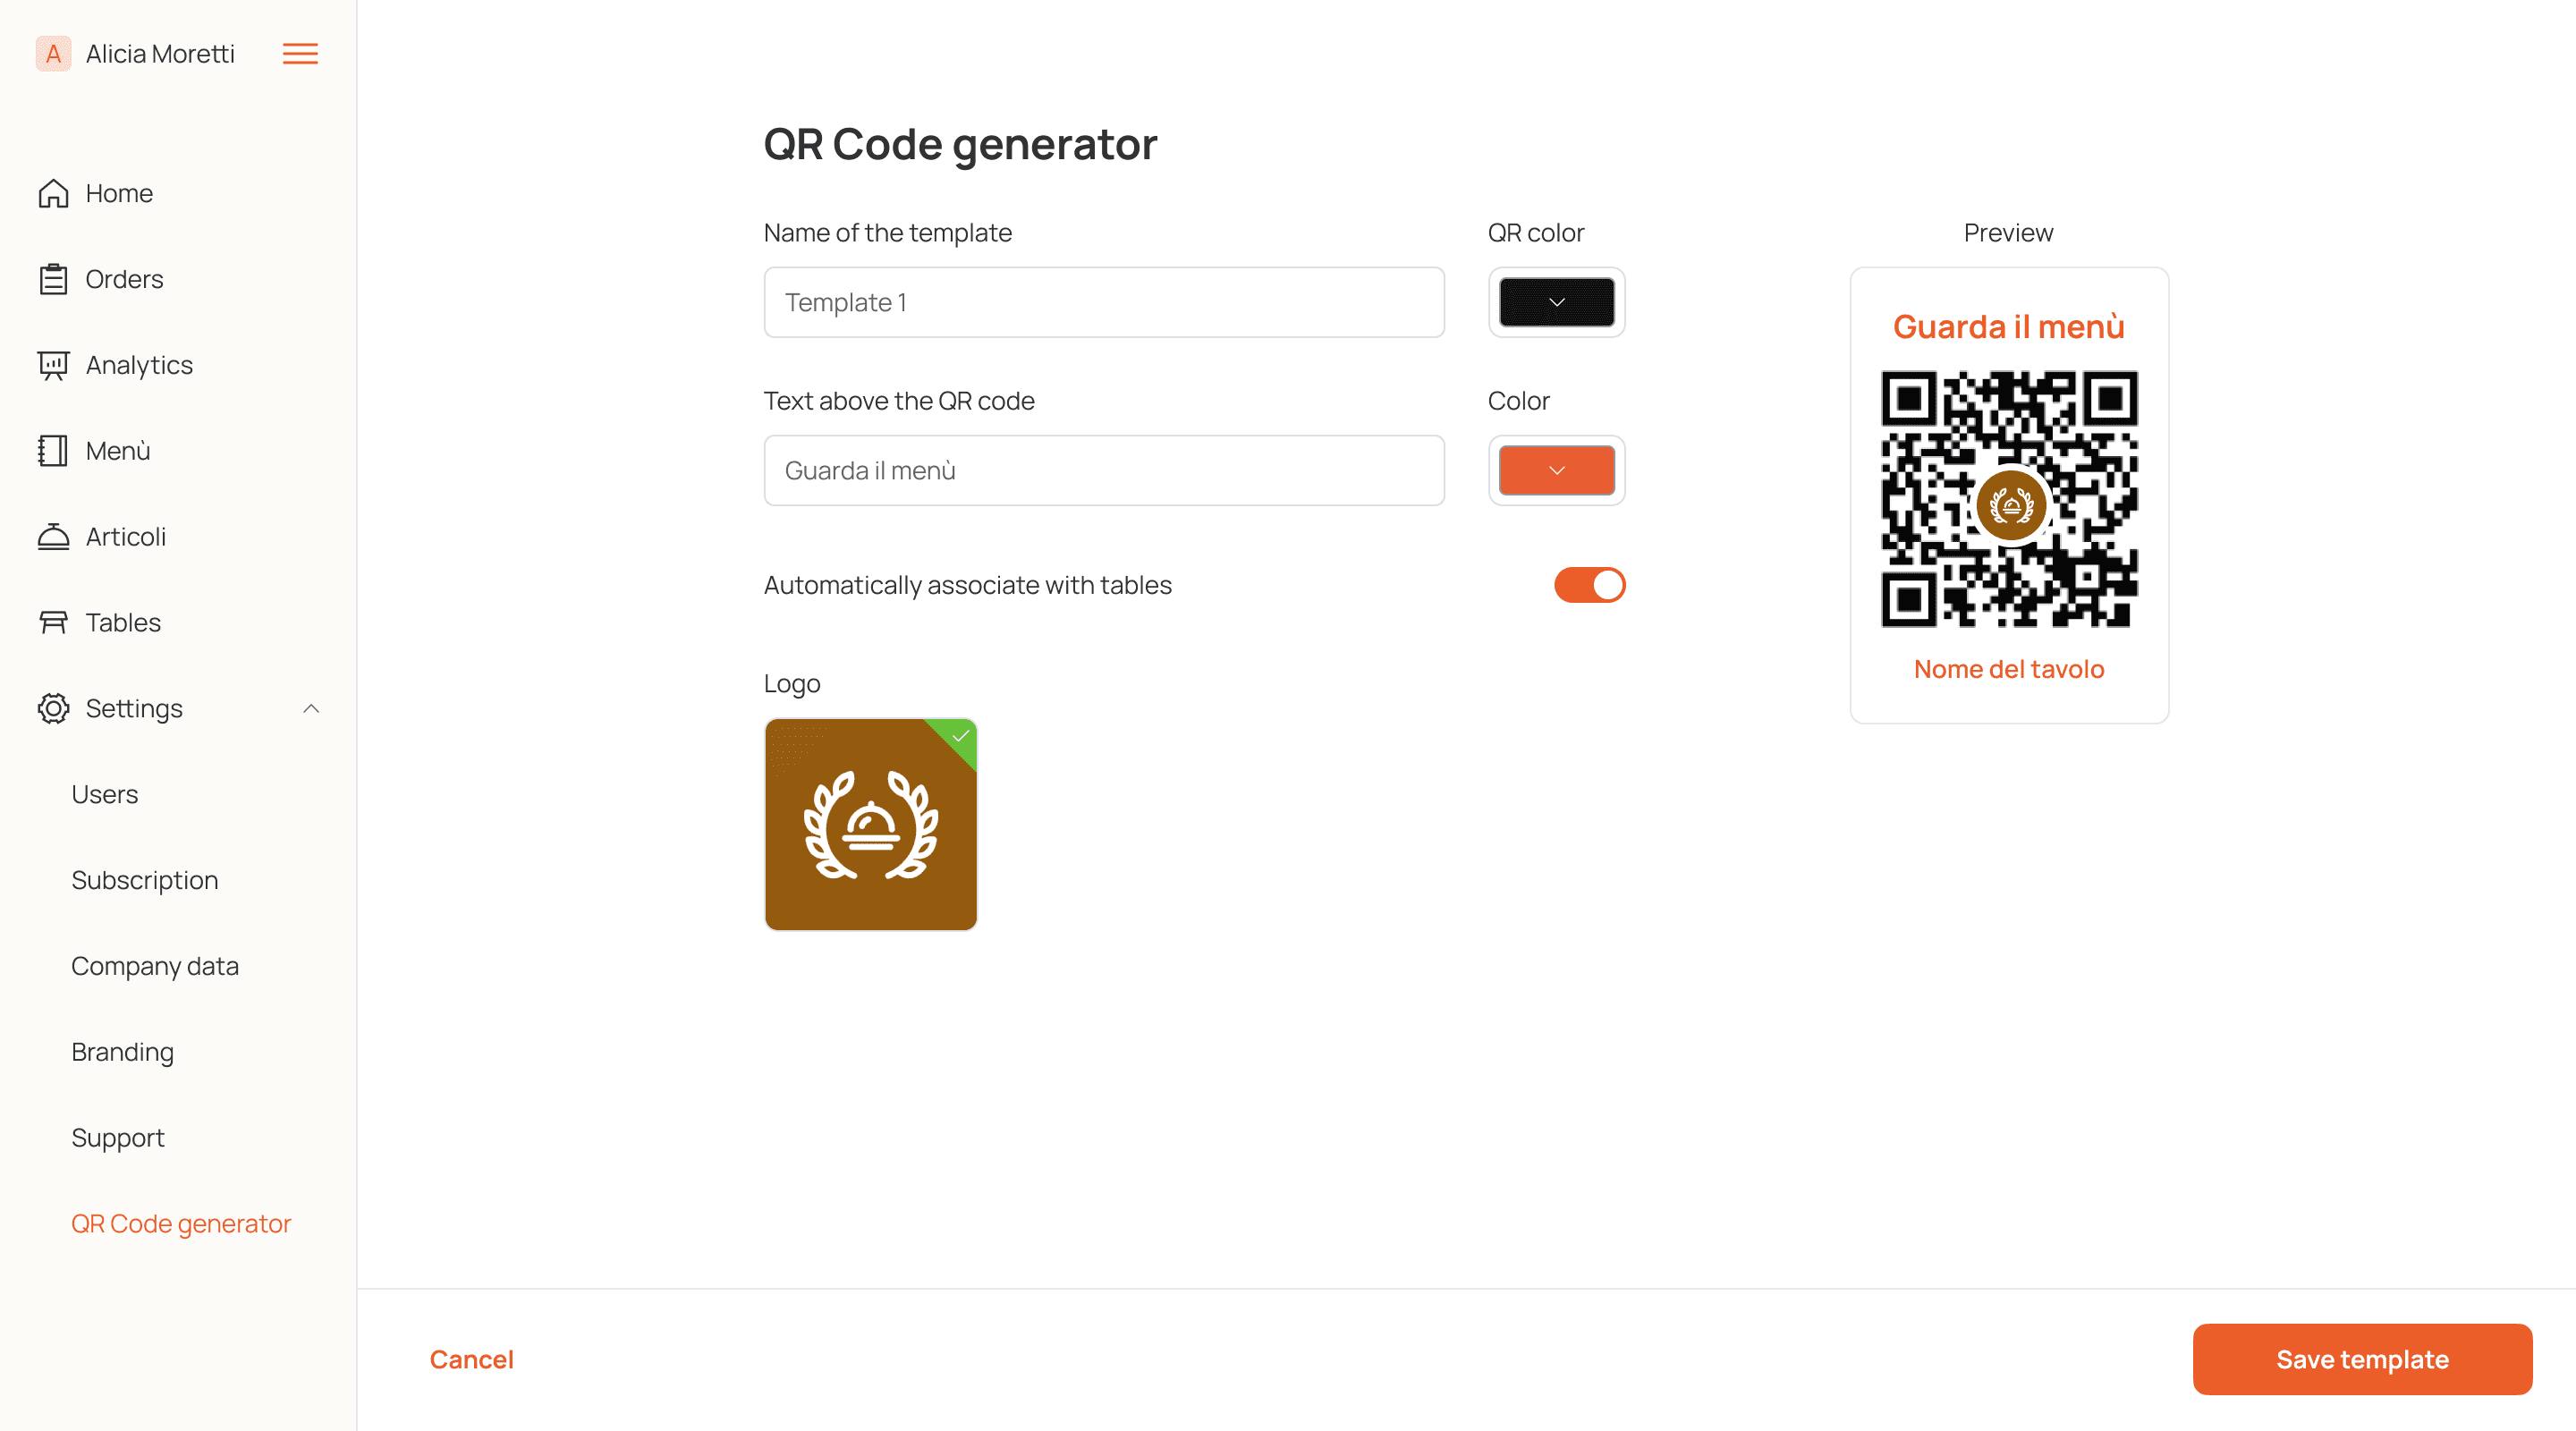
A set of various settings for the administrator, where they can add operators (waiters, bartenders, and other workers), manage subscriptions, enter company data, customize branding, generate QR codes for tables, and contact support.
To add a new employee, the administrator sends an invitation to their email, by which the employee registers in the system as an operator. The administrator can resend the invitation, delete the employee, change their first and last name, and also reset the password.
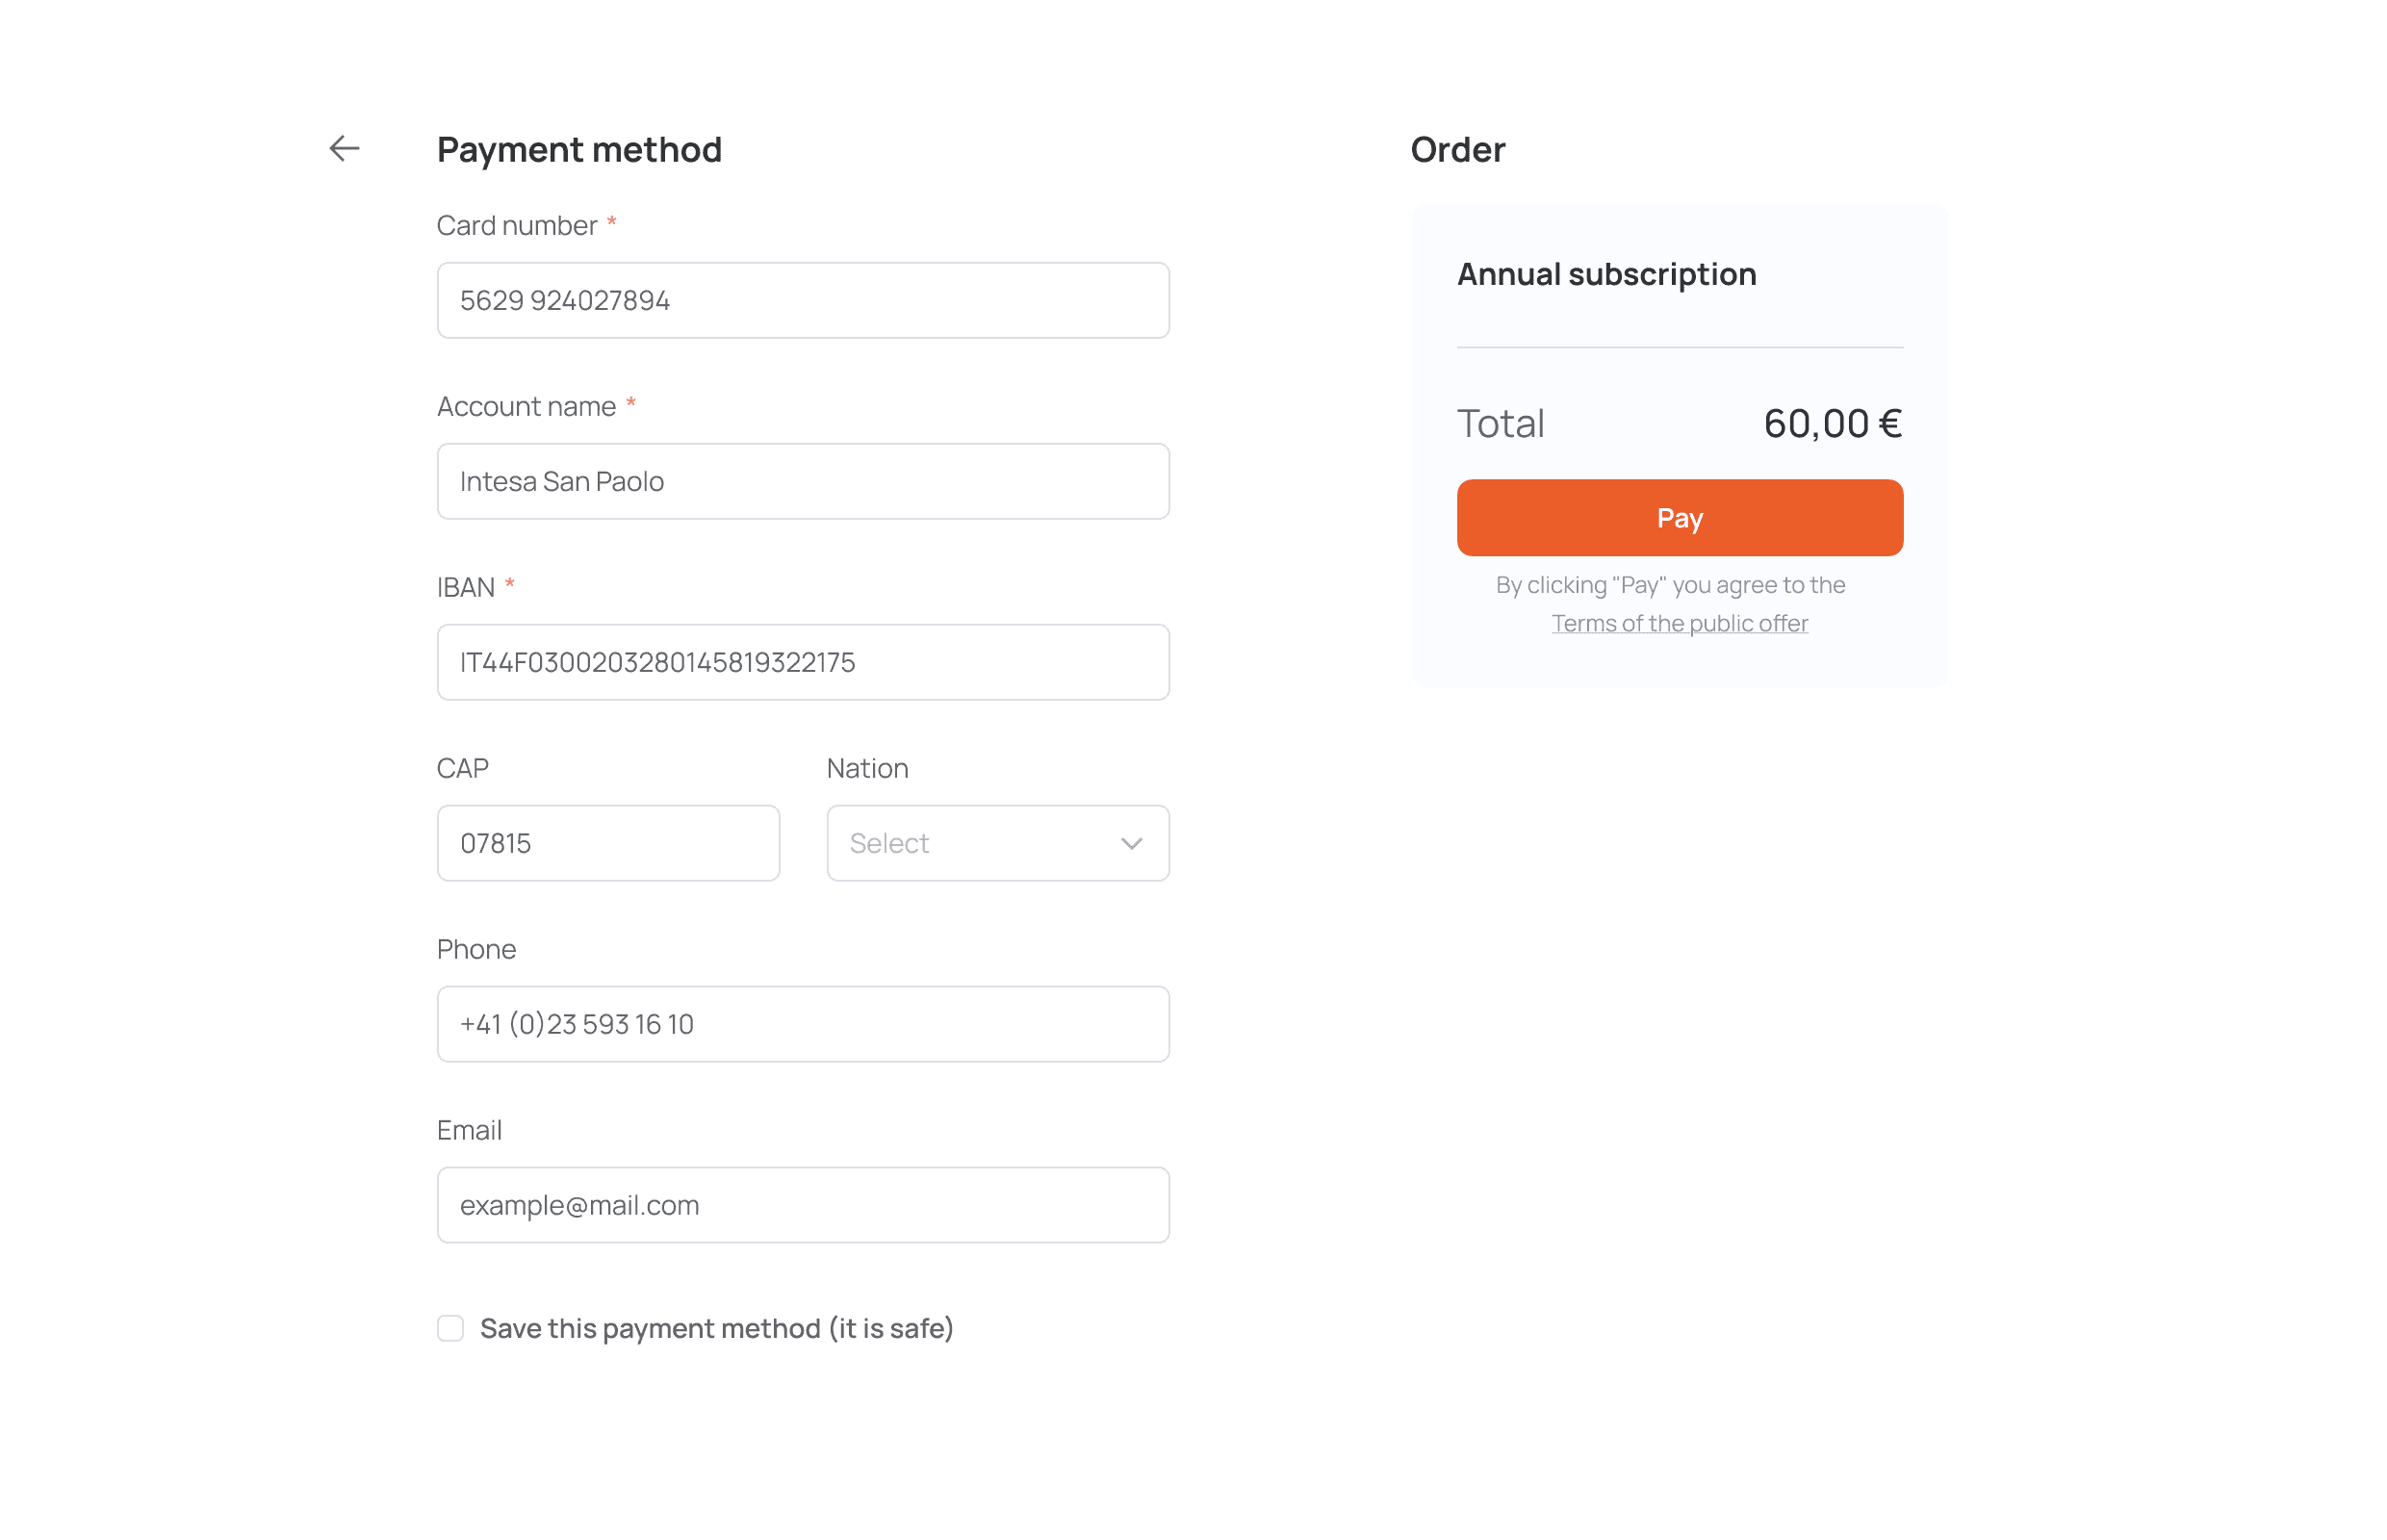
The subscription management page where the administrator can extend it or add additional features to the current package.


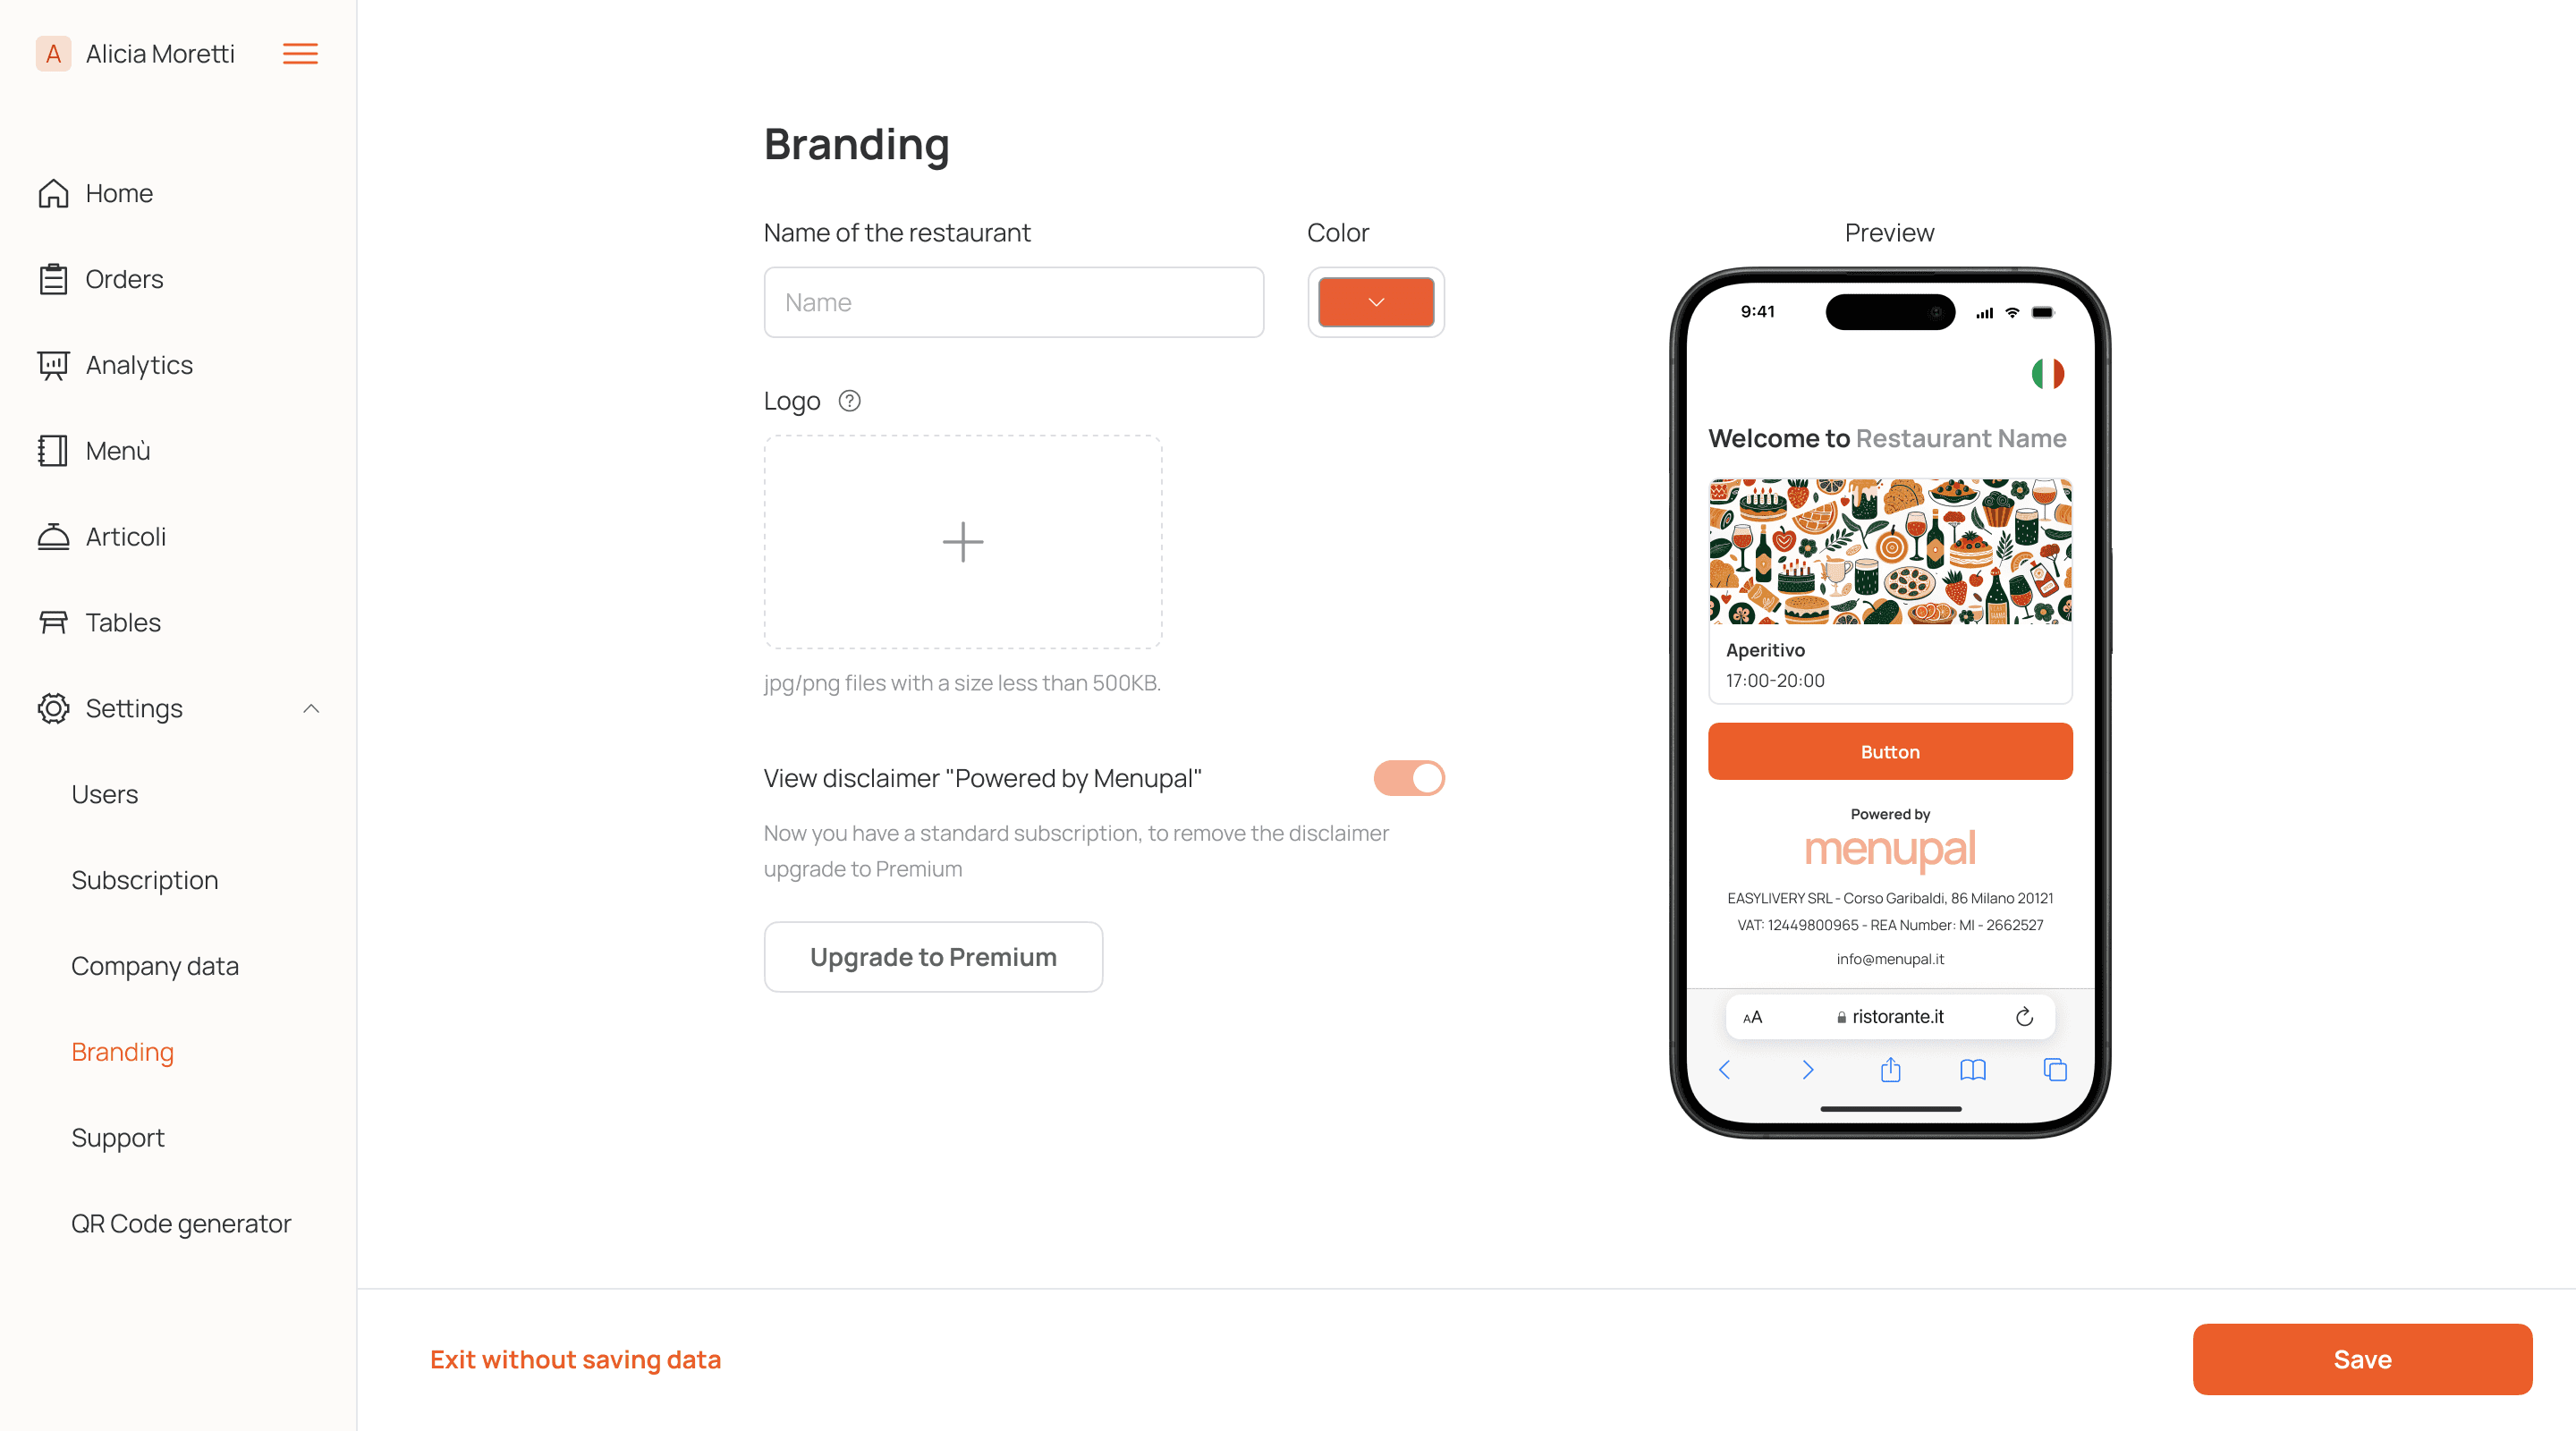
To configure the branding, you need to enter the restaurant's name, choose a primary color, and select a logo. All changes are dynamically reflected in the web application preview, allowing the administrator to see how the service will look from the visitors' perspective.
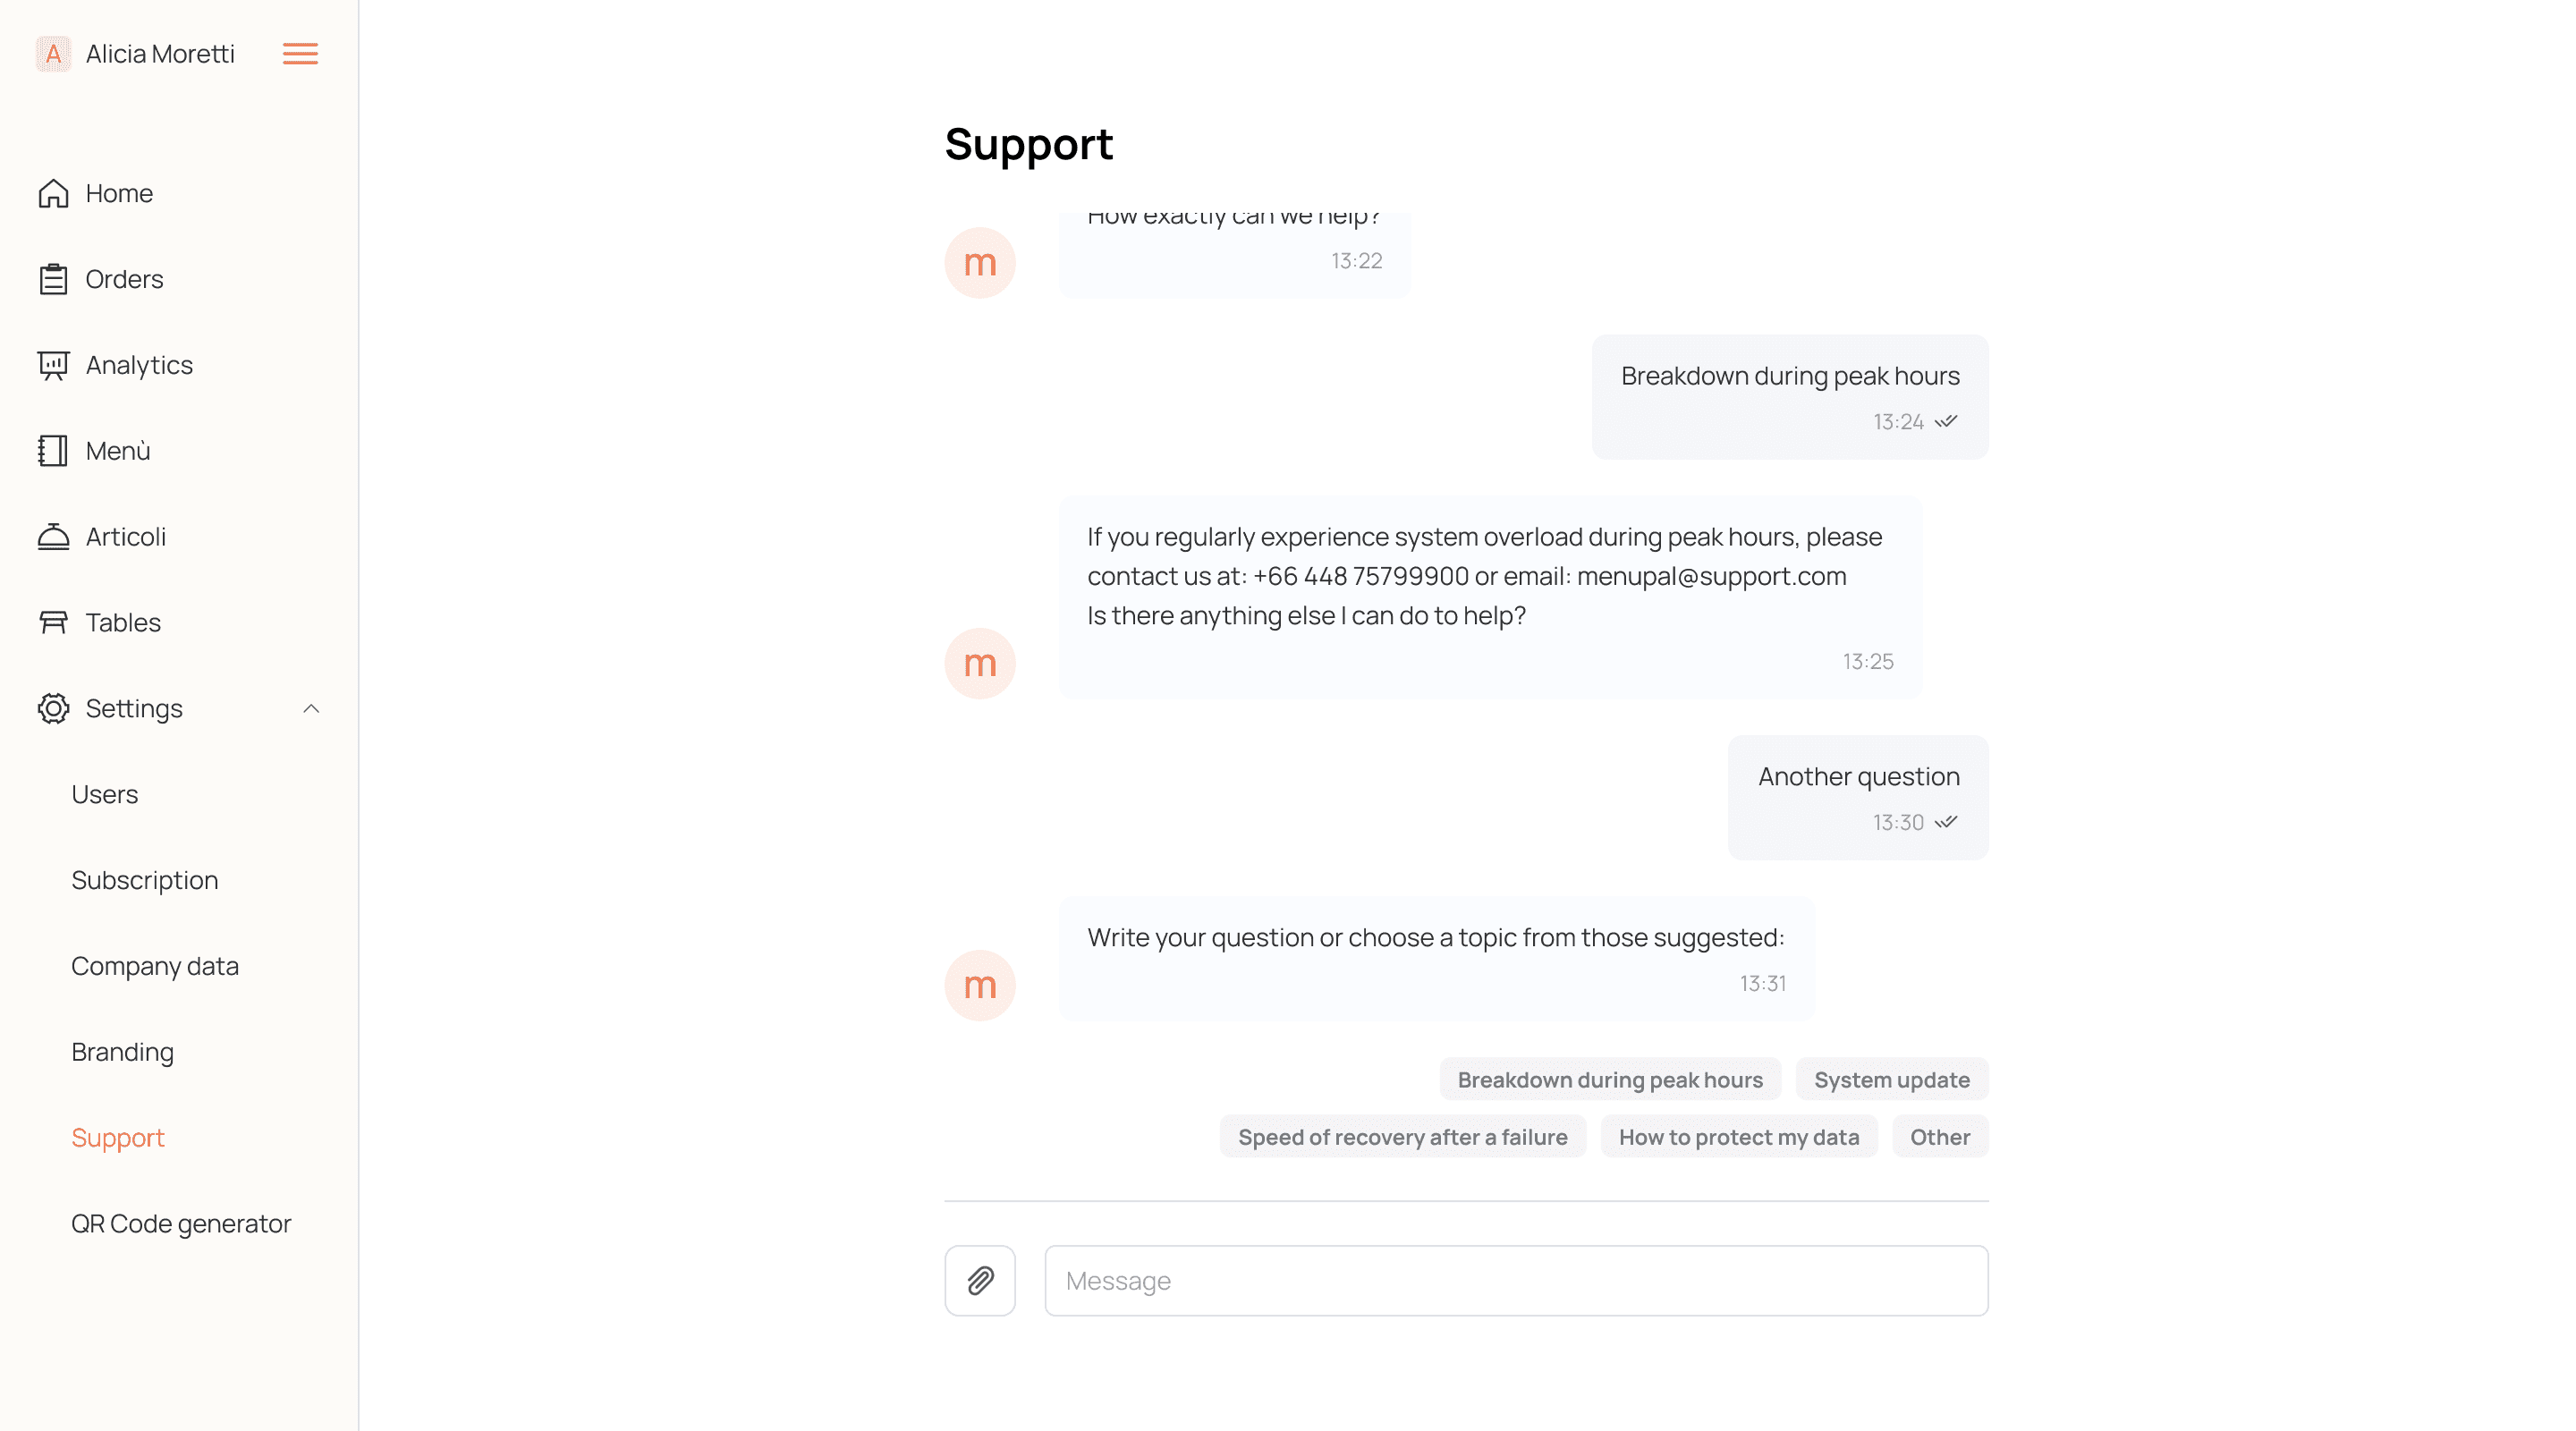
In support, the user can contact the bot with their question or choose from the most frequently encountered ones. During the dialogue, clarifying questions typically arise, which other users usually face. If none of the suggested options fit, one can always contact the operator directly.
On the QR code creation page, there is a mechanism similar to branding — the administrator selects the text, color, and logo, and immediately sees a preview of the future code. In the next steps, they can order and pay for the printing of the code for their tables with delivery.
YOU MIGHT BE INTERESTED
MORE WORKS
YOU MIGHT BE INTERESTED
MORE WORKS
YOU MIGHT BE INTERESTED
MORE WORKS
YOU MIGHT BE INTERESTED
MORE WORKS


nna Doronina
All illustrations are done with pencil and pen in Figma.
@
anna.doronina@ro.ru